Azure Image Proxy

The previous couple of articles configured an image resizing Azure Web Role, plopped those resized images on an Azure Service Bus, picked them up with a Worker Role and saved them into Blob Storage.

This one will click in the last missing piece; the proxy at the front to initially attempt to get the pregenerated image from blob storage and failover to requesting a dynamically resized image.

New Web Role

Add a new web role to your cloud project – I’ve called mine “ImagesProxy” – and make it an empty MVC4 Web API project. This is the easiest of the projects, so you can just crack right on and create a new controller – I called mine “Image” (not the best name, but it’ll do).

Retrieve

This whole project will consist of one controller with one action – Retrieve – which does three things;

  1. attempt to retrieve the resized image directly from blob storage
  2. if that fails, go and have it dynamically resized
  3. if that fails, send a 404 image and the correct http header

Your main method/action should look something like this:

[csharp][HttpGet]
public HttpResponseMessage Retrieve(int height, int width, string source)
{
try
{
var resizedFilename = BuildResizedFilenameFromParams(height, width, source);
var imageBytes = GetFromCdn("resized", resizedFilename);
return BuildImageResponse(imageBytes, "CDN", false);
}
catch (StorageException)
{
try
{
var imageBytes = RequestResizedImage(height, width, source);
return BuildImageResponse(imageBytes, "Resizer", false);
}
catch (WebException)
{
var imageBytes = GetFromCdn("origin", "404.jpg");
return BuildImageResponse(imageBytes, "CDN-Error", true);
}
}
}
[/csharp]

Feel free to alt-enter and clean up the red squiggles by creating stubs and referencing the necessary assemblies.

You should be able to see the three sections mentioned above within the nested try-catch blocks.

  1. attempt to retrieve the resized image directly from blob storage

    [csharp]var resizedFilename = BuildResizedFilenameFromParams(height, width, source);
    var imageBytes = GetFromCdn("resized", resizedFilename);
    return BuildImageResponse(imageBytes, "CDN", false);
    [/csharp]

  2. if that fails, go and have it dynamically resized

    [csharp]var imageBytes = RequestResizedImage(height, width, source);
    return BuildImageResponse(imageBytes, "Resizer", false)
    [/csharp]

  3. if that fails, send a 404 image and the correct http header

    [csharp]var imageBytes = GetFromCdn("origin", "404.jpg");
    return BuildImageResponse(imageBytes, "CDN-Error", true);
    [/csharp]

So let’s build up those stubs.

BuildResizedFilenameFromParams

Just a little duplication of code to get the common name of the resized image (yes, yes, this logic should have been abstracted out into a common library for all projects to reference, I know, I know..)

[csharp]private static string BuildResizedFilenameFromParams(int height, int width, string source)
{
return string.Format("{0}_{1}-{2}", height, width, source.Replace("/", string.Empty));
}
[/csharp]

GetFromCDN

We’ve seen this one before too; just connecting into blob storage (within these projects blob storage is synonymous with CDN) to pull out the pregenerated/pre-reseized image:

[csharp]private static byte[] GetFromCdn(string path, string filename)
{
var connectionString = CloudConfigurationManager.GetSetting("Microsoft.Storage.ConnectionString");
var account = CloudStorageAccount.Parse(connectionString);
var cloudBlobClient = account.CreateCloudBlobClient();
var cloudBlobContainer = cloudBlobClient.GetContainerReference(path);
var blob = cloudBlobContainer.GetBlockBlobReference(filename);

var m = new MemoryStream();
blob.DownloadToStream(m);

return m.ToArray();
}
[/csharp]

BuildImageResponse

Yes, yes, I know – more duplication.. almost. The method to create an HTTP response message from before, but this time with extras params to set a header saying where the image came from, and allow to set the HTTP status code correctly. We’re just taking the image bytes and putting them in the message content, whilst setting the headers and status code appropriately.

[csharp]private static HttpResponseMessage BuildImageResponse(byte[] imageBytes, string whereFrom, bool error)
{
var httpResponseMessage = new HttpResponseMessage { Content = new ByteArrayContent(imageBytes) };
httpResponseMessage.Content.Headers.ContentType = new MediaTypeHeaderValue("image/jpeg");
httpResponseMessage.Content.Headers.Add("WhereFrom", whereFrom);
httpResponseMessage.StatusCode = error ? HttpStatusCode.NotFound : HttpStatusCode.OK;

return httpResponseMessage;
}
[/csharp]

RequestResizedImage

Build up a request to our pre-existing image resizing service via a cloud config setting and the necessary dimensions and filename, and return the response:

[csharp]private static byte[] RequestResizedImage(int height, int width, string source)
{
byte[] imageBytes;
using (var wc = new WebClient())
{
imageBytes = wc.DownloadData(
string.Format("{0}?height={1}&width={2}&source={3}",
CloudConfigurationManager.GetSetting("Resizer_Endpoint"),
height, width, source));
}
return imageBytes;
}
[/csharp]

And that’s all there is to it! A couple of other changes to make within your project in order to allow pretty URLs:

  1. Create the necessary route:

    [csharp]config.Routes.MapHttpRoute(
    name: "Retrieve",
    routeTemplate: "{height}/{width}/{source}",
    defaults: new { controller = "Image", action = "Retrieve" }
    );
    [/csharp]

  2. Be a moron:

    [xml] <system.webServer>
    <modules runAllManagedModulesForAllRequests="true" />
    </system.webServer>
    [/xml]

That last one is dangerous; I’m using it here as a quick hack to ensure that URLs ending with known file extensions (e.g., /600/200/image1.jpg) are still processed by the MVC app instead of assuming they’re static files on the filesystem. However, this setting is not advised since it means that every request will be picked up by your .Net app; don’t use it in regular web apps which also host images, js, css, etc!

If you don’t use this setting then you’ll go crazy trying to debug your routes, wondering why nothing is being hit even after you install Glimpse..

In action

First request

Hit your proxy with a request for an image that exists within your blob storage “origin” folder; this will raise a storage exception when attempting to retrieve from blob storage and drop into the resizer code chunk e.g.:
image proxy, calling the resizer
Notice the new HTTP header that tells us the request was fulfilled via the Resizer service, and we got an HTTP 200 status code. The resizer web role will have also added a message to the service bus awaiting pick up.

Second request

By the time you refresh that page (if you’re not too trigger happy) the uploader worker role should have picked up the message from the service bus and saved the image data into blob storage, such that subsequent requests should end up with a response similar to:
image proxy, getting it from cdn
Notice the HTTP header tells us the request was fulfilled straight from blob storage (CDN), and the request was successful (HTTP 200 response code).

Failed request

If we request an image that doesn’t exist within the “origin” folder, then execution drops into the final code chunk where we return a default image and set an error status code:
image proxy, failed request

So..

This is the last bit of the original plan:
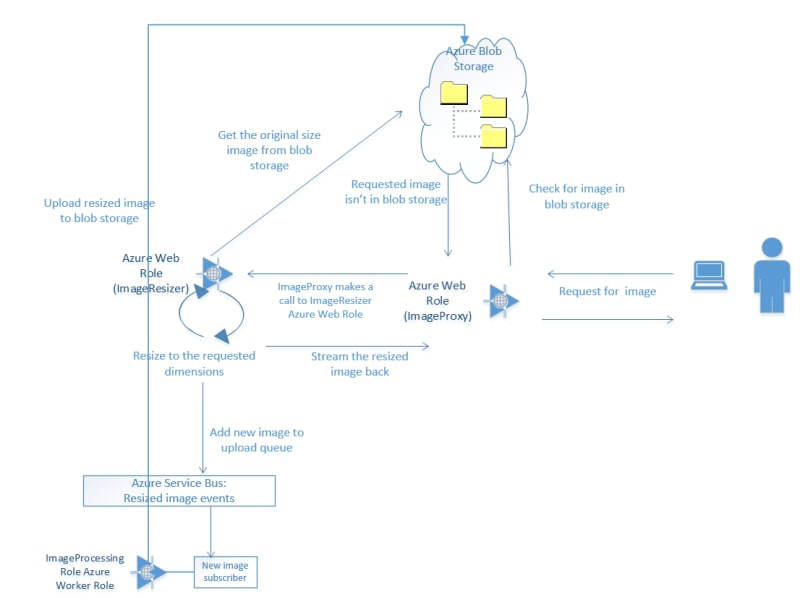
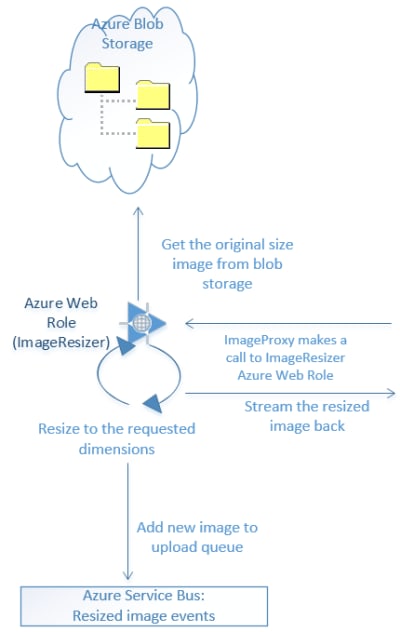
Azure Image Resizing - Conceptual Architecture

Please grab the source from github, add in your own settings to the cloud config files, and have a go. It’s pretty cool being able to just upload one image and have other dimension images autogenerated upon demand!
Automated Image Resizing and Hosting in Azure #2

Saving the resized images

Last article concluded with us creating a web role that will retrieve an image from blob storage, resize it, raise an event, and stream the result back.

This article is about the worker role to handle those raised events.

Simply enough, all we’ll be doing is creating a worker role, hooking into the same azure service bus queue, picking up each message, pulling out the relevant data within, and uploading that to blob storage.

Overall Process

A reminder of the overall process:
Azure Image Resizing Conceptual Architecture

The Worker Role

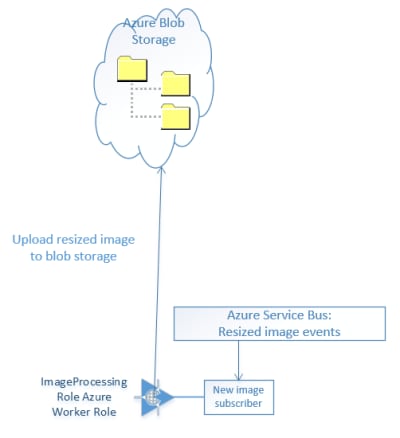
The section of that which the worker role is responsible for is as below:

Azure-Image-Resizing-Uploader-Achitecture

Add a new worker role to the Cloud project within the solution from last time (or a new one if you like). This one consists of four little methods; Run, OnStart, and OnEnd, where Run will call an UploadBlob method.

Run

This method will pick up any messages appearing on the queue, deserialize the contents of the message to a known structure, and pass them to an uploading method.

Kick off by pasting over the Run method with this one, including the definitions at the top – set the QueueName to the same queue you configured for the resize notification from the last post:

[csharp] const string QueueName = "azureimages";
QueueClient _client;
readonly ManualResetEvent _completedEvent = new ManualResetEvent(false);

public override void Run()
{
_client.OnMessage(receivedMessage =>
{
try
{
// Process the message
var receivedImage = receivedMessage.GetBody<ImageData>();
UploadBlob("resized", receivedImage);
}
catch (Exception e)
{
Trace.WriteLine("Exception:" + e.Message);
}
}, new OnMessageOptions
{
AutoComplete = true,
MaxConcurrentCalls = 1
});

_completedEvent.WaitOne();
}
[/csharp]

Yes, I’m not doing anything with exceptions; that’s an exercise for the reader.. ahem… (Me? Lazy? Never..happypathhappypathhappypath)

Naturally you’ll get a few squiggles and highlights to fix; Install-Package Microsoft.ServiceBus.NamespaceManager will help with some, as will creating the stub UploadBlob.

Now, to tidy up the reference to ImageData you could do a few things:

  1. Copy the ImageData.cs over from the previous project into this one
  2. Create a reference to the previous project and add in a using to this file
  3. Extract ImageData from the previous project into a common referenced project for them both to share.

I can live with my own conscience, so am just whacking in a reference to the previous project. Don’t hate me.

OnStart and OnStop

[csharp] public override bool OnStart()
{
// Set the maximum number of concurrent connections
ServicePointManager.DefaultConnectionLimit = 2;

// Create the queue if it does not exist already
var connectionString = CloudConfigurationManager.GetSetting("Microsoft.ServiceBus.ConnectionString");
var namespaceManager = NamespaceManager.CreateFromConnectionString(connectionString);
if (!namespaceManager.QueueExists(QueueName))
{
namespaceManager.CreateQueue(QueueName);
}

// Initialize the connection to Service Bus Queue
_client = QueueClient.CreateFromConnectionString(connectionString, QueueName);
return base.OnStart();
}

public override void OnStop()
{
// Close the connection to Service Bus Queue
_client.Close();
_completedEvent.Set();
base.OnStop();
}
[/csharp]

OnStart gets a connection to the service bus, creates the named queue if necessary, and creates a queue client referencing that queue within that service bus.

OnStop kills everything off.

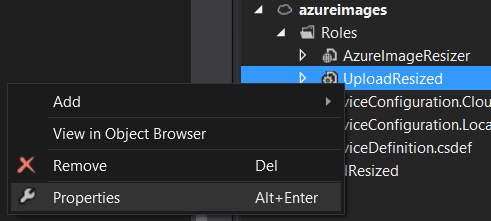
So, off you pop and add the requisite service connection string details; right click the role within the cloud project, properties:

Cloud-Service-Role-Properties

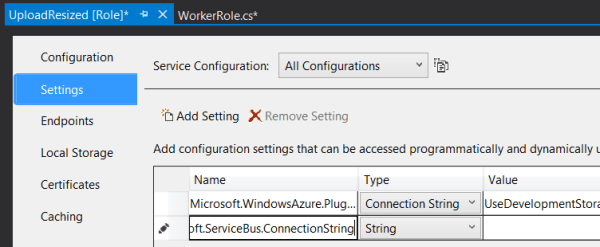
Click settings, add setting “Microsoft.ServiceBus.ConnectionString” with the value you used previously.

Role-Settings

Lastly:

UploadBlob

[csharp] public void UploadBlob(string path, ImageData image)
{
var connectionString = CloudConfigurationManager.GetSetting("Microsoft.Storage.ConnectionString");
var account = CloudStorageAccount.Parse(connectionString);
var cloudBlobClient = account.CreateCloudBlobClient();
var cloudBlobContainer = cloudBlobClient.GetContainerReference(path);

cloudBlobContainer.CreateIfNotExists();

var blockref = image.FormattedName ?? Guid.NewGuid().ToString();
var blob = cloudBlobContainer.GetBlockBlobReference(blockref);

if (!blob.Exists())
blob.UploadFromStream(new MemoryStream(image.Data));
}
[/csharp]

Pretty self explanatory, isn’t it? Get a reference to an area of blob storage within a container associated with an account, and stream some data to it if it doesn’t already exist (you might actually want to overwrite it so could remove that check). Bosch. Done. Handsome.

Notice we’re using the FormattedName property on ImageData to get a blob name which includes the requested dimensions; this will be used in the next article where we create the image proxy.

This means that for a request like:

[csharp]http://127.0.0.1/api/Image/Resize?height=600&width=400&source=image1.jpg
[/csharp]

The formatted name will be set to:

[csharp]600_400-image1.jpg
[/csharp]

You shouldn’t get any compile errors here but you’ll need to add in the setting for your storage account (“Microsoft.Storage.ConnectionString”).

Kick it off

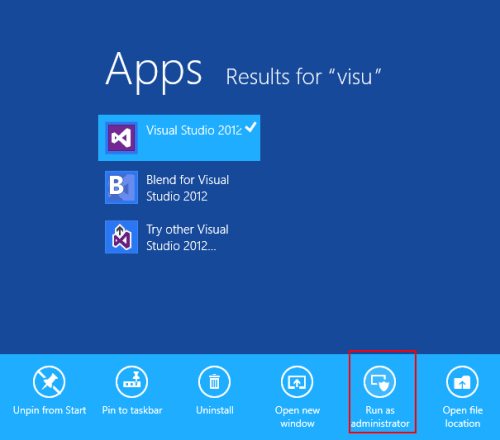
To run that you’ll need VS to be running as admin (right click VS, run as admin):

run-as-admin

After you’ve got it running, fire off a request within the resizing web api (if it’s not the same solution/cloud service) for something like:

[csharp]http://127.0.0.1/api/Image/Resize?height=600&width=400&source=image1.jpg
[/csharp]

Resulting in:
Resized-Image

Then open up your Azure storage explorer to see something similar to the below within the “resized” blob container:

Resized-Blob

What happened?

  1. The ImageController on your Resizer Web API web role did the hard work and popped a message on an Azure Service Bus queue containing the image data
  2. The new Uploader worker role is subscribed to the same Azure Service Bus queue
    1. it picks up the message
    2. pulls out the image data
    3. generates an image name based on the image dimensions and origin
    4. streams the image data into a blob block with the generated name

Cool, huh?

The code for this series is up on GitHub

Next up

One more web role to act as a proxy for checking blob storage first before firing off the resize request. Another easy one. Azure is easy. Everyone should be doing this. You should wait and see what else I’ll write about Azure.. it’s awesome.. and easy..!

Managing Automated Image Resizing and Hosting from Within Azure

I’m going to try to explain a proof of concept I’ve recently completed which is intended to automate the process of resizing, hosting, and serving images, taking the responsibility away from your own systems and data centre/ web host.

We’ll be using Windows Azure for all of the things;

  1. Web API Azure Web role to proxy the incoming requests, checking blob storage and proxying if not there
  2. Web API Azure Web role to resize and return the image, and to add it to a Azure Service Bus
  3. Azure Service Bus to hold the event and data for the resized image
  4. Worker role to subscribe to the service bus and upload any images on there into blob storage for the next request

Overall Process

The overall process looks a bit like this:

Azure Image Resizing Conceptual Architecture

  1. The user makes a request for an image including the required dimensions, e.g. images.my-site.blah/400/200/image26.jpg, to the image proxy web role
  2. The image proxy web role tries to retrieve the image at the requested size from blob storage; if it finds it, it returns it; if not, it makes a request through to the image resizing web role
  3. The image resizing web role retrieves the original size image from blob storage (e.g. image26.jpg), and resizes it to the requested dimensions (e.g., 400×200)
  4. The resized image is returned to the user via the proxy and also added to an Azure Service Bus
  5. The image processing worker role subscribes to the Azure Service Bus, picks up the new image and uploads it to blob storage

First Things First: Prerequisites

To start with you’ll need to:

  1. Set up a Windows Azure account
  2. Have VS2010 or VS2012 and the appropriate Azure Cloud SDK

Fun Things Second: Image Resizing Azure Web Role

We’re going to focus on the resizing web role next.

Resizer Architecture

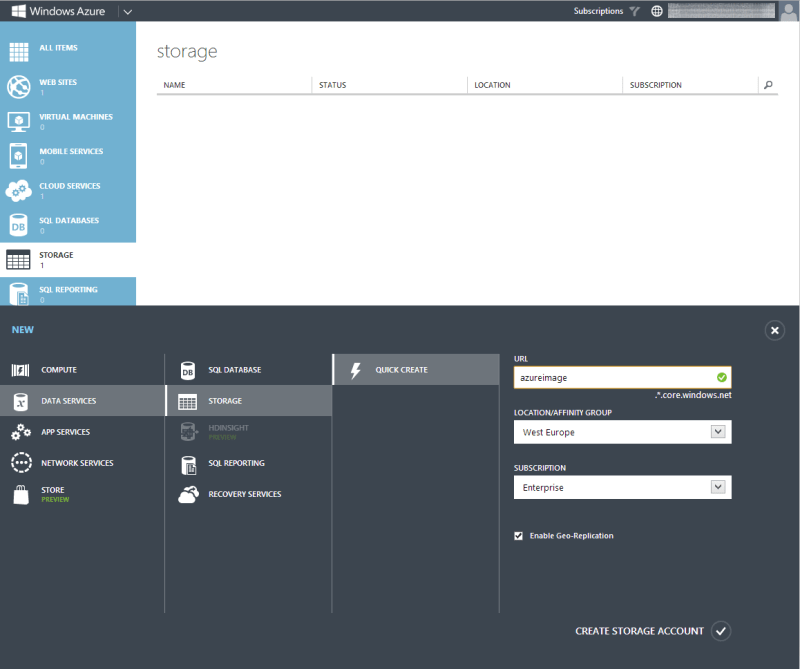
For this you need to set up blob storage by logging into your Azure portal and following these simple steps:

Click “Storage”

Storage

Click “New”

Add

Fill in the form

Form

Click “Create”

Create

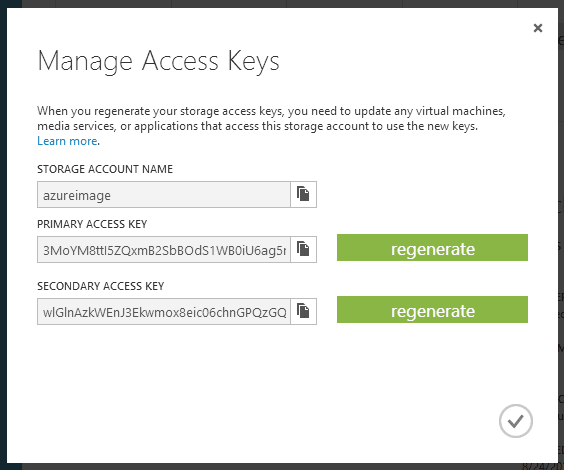
Note your keys

Click
Manage Access Keys
and note your storage account name and one of the values in the popup:

Retrieve Access Keys

It doesn’t matter which one you use, but it means you can regenerate one key without killing a process that uses the other one. And yes, I’ve regenerated mine since I took the screenshot..

Upload some initial images

We can easily achieve this using the worker role we’re going to write and the service bus to which it subscribes to automate the process, but I’m just going to show off the nice little Azure Storage Explorer available over on CodePlex.

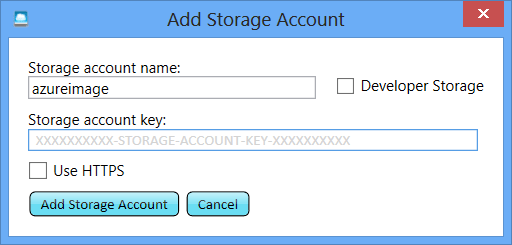
Go download and install it, then add a new account using the details you’ve just retrieved from your storage account

Add account to Storage Explorer

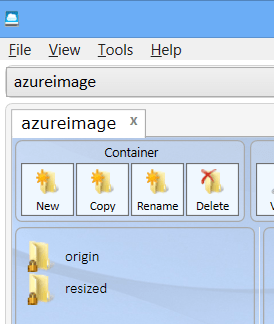
And initialise it with a couple of directories; origin and resized

Directory Init

Then upload one or two base images of a reasonable size (dimension wise).

CODE TIME

Setting up

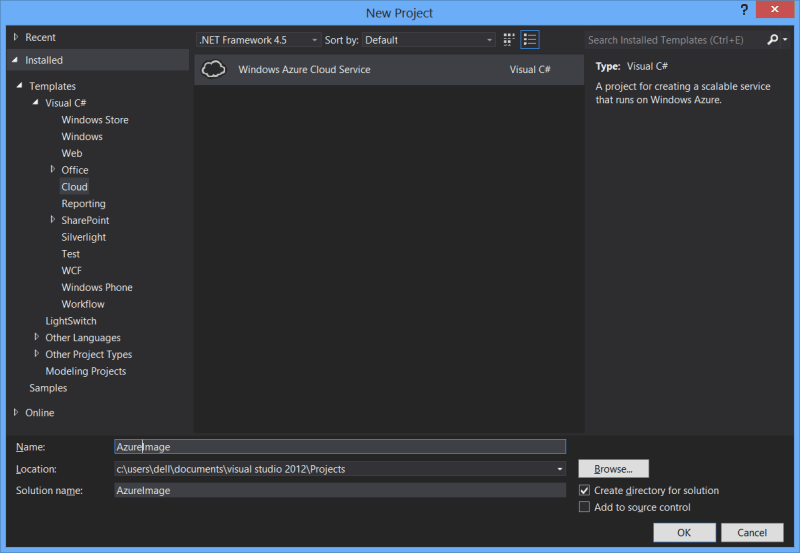
Bust open VS and start a new Cloud Services project

VS2012 new cloud project

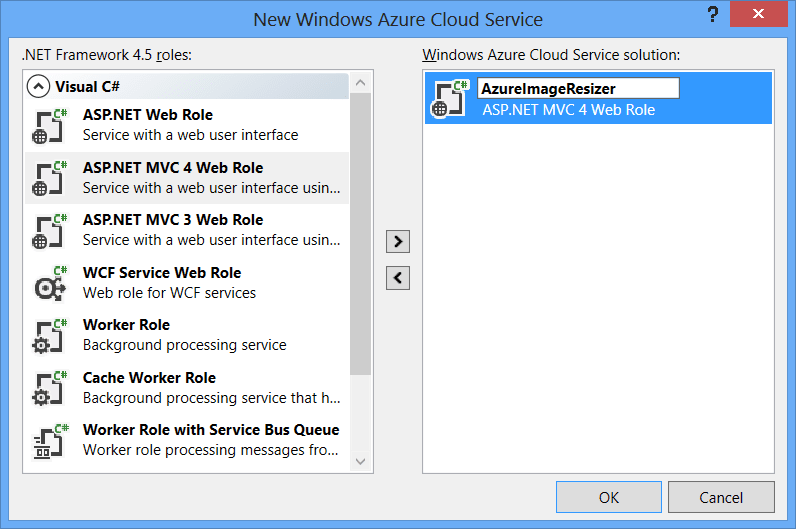
Select an MVC4 role

MVC role

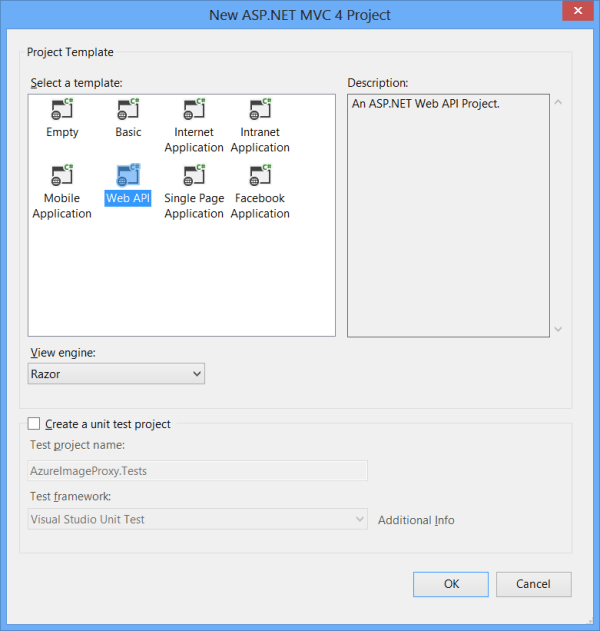
And Web API as the project type

WebAPI project

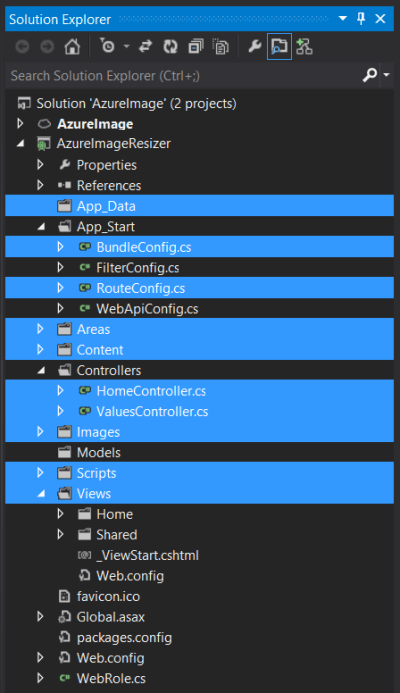
At this point you could carry on but I prefer to take out the files and directories I don’t think I need (I may be wrong, but this is mild OCD talking..); I delete everything highlighted below:

DELETE

If you do this too, don’t forget to remove the references to the configs from global.asax.cs.

Building the Resizer

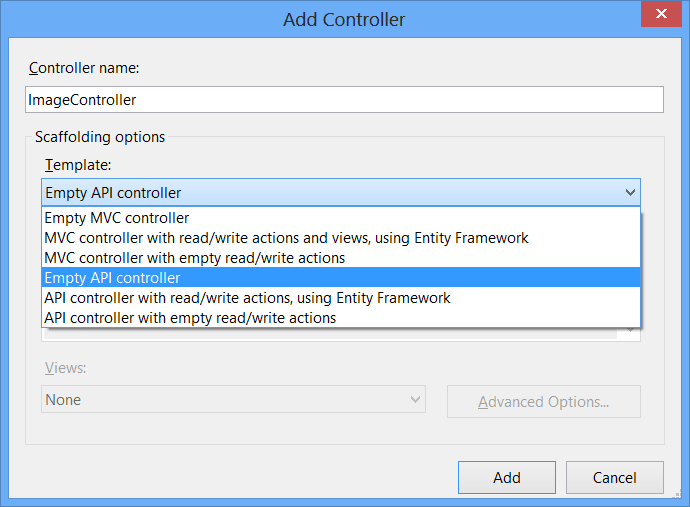
Create a new file called ImageController in your Controllers directory and use the Empty API controller template:

Empty API controller template

This is the main action that we’re going to be building up:

[csharp][HttpGet]
public HttpResponseMessage Resize(int width, int height, string source)
{
var imageBytes = GetFromCdn("origin", source);
var newImageStream = ResizeImage(imageBytes, width, height);
QueueNewImage(newImageStream, height, width, source);
return BuildImageResponse(newImageStream);
}
[/csharp]

Paste that in and then we’ll crack on with the methods it calls in the order they appear. To get rid of the red highlighting you can let VS create some stubs.

First up:

GetFromCdn

This method makes a connection to your blob storage, connects to a container (in this case “origin”), and pulls down the referenced blob (image), before returning it as a byte array. There is no error handling here, as it’s just a proof of concept!

Feel free to grab the code from github and add in these everso slightly important bits!

[csharp]private static byte[] GetFromCdn(string path, string filename)
{
var connectionString = CloudConfigurationManager.GetSetting("Microsoft.Storage.ConnectionString");
var account = CloudStorageAccount.Parse(connectionString);
var cloudBlobClient = account.CreateCloudBlobClient();
var cloudBlobContainer = cloudBlobClient.GetContainerReference(path);
var blob = cloudBlobContainer.GetBlockBlobReference(filename);

var m = new MemoryStream();
blob.DownloadToStream(m);

return m.ToArray();
}
[/csharp]

This will give you even more red highlighting and you’ll need to bring in a few new assemblies;

  • System.IO.MemoryStream
  • Microsoft.WindowsAzure.Storage.CloudStorageAccount
  • Microsoft.WindowsAzure.CloudConfigurationManager

You’ll need to add in the setting value mentioned:

[csharp]CloudConfigurationManager.GetSetting("Microsoft.Storage.ConnectionString")
[/csharp]

These config settings aren’t held in a web.config or app.config; you need to right click the web role within your cloud project and click properties, then settings, and Add Setting. Enter the values below, referring back to the details you previously got for your Storage Account

  • Name: Microsoft.Storage.ConnectionString
  • Value: DefaultEndpointsProtocol=http; AccountName=<your account name here>; AccountKey=<account key here>

ResizeImage

This method does the hard work; takes a byte array and image dimensions, then does the resizing using the awesome ImageResizer and spews the result back as a memorystream:

[csharp]private static MemoryStream ResizeImage(byte[] downloaded, int width, int height)
{
var inputStream = new MemoryStream(downloaded);
var memoryStream = new MemoryStream();

var settings = string.Format("width={0}&height={1}", width, height);
var i = new ImageJob(inputStream, memoryStream, new ResizeSettings(settings));
i.Build();

return memoryStream;
}
[/csharp]

In order to get rid of the red highlighting here you’ll need to nuget ImageResizer; open the VS Package Manager window and whack in:

[csharp]Install-Package ImageResizer
[/csharp]

And then bring in the missing assembly reference;

  • ImageResizer.ImageJob

QueueNewImage

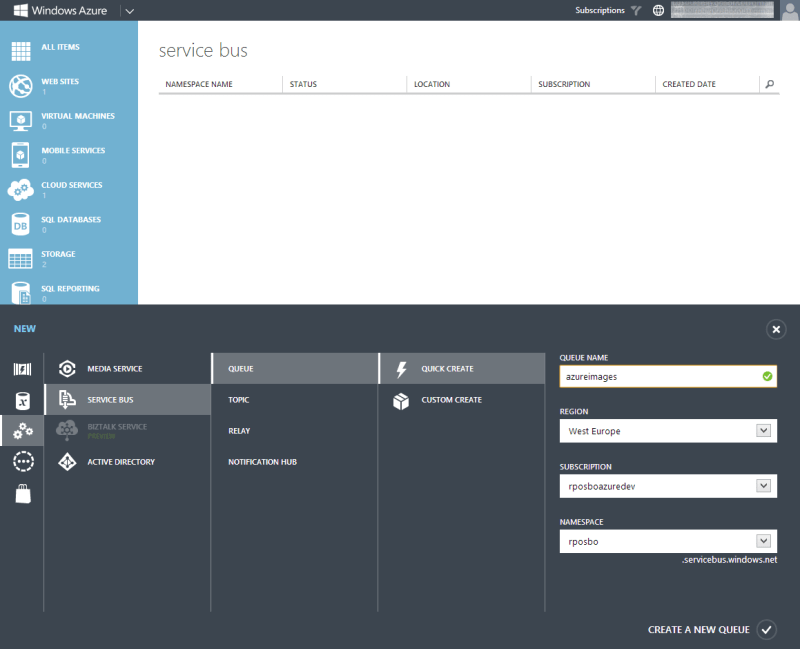
This method takes the generated image byte array and puts it on an Azure Service Bus instance. As such, we need to go and create a new Azure Service Bus within the Azure portal.

Click “Service Bus”

Service BUs

Click “New”

Add

Fill in the form

Form

Click “Create”

Create

What you’ve done here is set up a namespace to which you have assigned a new queue. When using this service bus you’ll connect to the namespace within the connection string and then create a queue client connecting to a named queue in code.

Note your connection details

At the service bus namespaces page click
Connection Info
and note your ACS connection string in the popup:

Connection String

Set it up

You’ll need to nuget the azure service bus package, so in your VS package manager run

[csharp]Install-Package WindowsAzure.ServiceBus
[/csharp]

And bring in the missing reference

  • Microsoft.ServiceBus.Messaging

Paste in the following methods:

[csharp]private static void QueueNewImage(MemoryStream memoryStream, int height, int width, string source)
{
var img = new ImageData
{
Name = source,
Data = memoryStream.ToArray(),
Height = height,
Width = width,
Timestamp = DateTime.UtcNow
};
var message = new BrokeredMessage(img);
QueueConnector.ImageQueueClient.BeginSend(message, SendComplete, img.Name);
}

private static void SendComplete(IAsyncResult ar)
{
// Log the send thing
}
[/csharp]

Now we need to define the ImageData and QueueConnector classes. Create these as new class files:

ImageData.cs

[csharp]public class ImageData
{
public string Name;
public byte[] Data;
public int Height;
public int Width;
public DateTime Timestamp;

public string FormattedName
{
get { return string.Format("{0}_{1}-{2}", Height, Width, Name.Replace("/", string.Empty)); }
}
}
[/csharp]

QueueConnector.cs

This class creates a connection to your service bus namespace using a connection string, creates a messaging client for the specified queue, and creates the queue if it doesn’t exist.

[csharp]public static class QueueConnector
{
public static QueueClient ImageQueueClient;
public const string QueueName = "azureimages";

public static void Initialize()
{
ServiceBusEnvironment.SystemConnectivity.Mode = ConnectivityMode.Http;
var connectionString = CloudConfigurationManager.GetSetting("Microsoft.ServiceBus.ConnectionString");
var namespaceManager = NamespaceManager.CreateFromConnectionString(connectionString);

if (!namespaceManager.QueueExists(QueueName))
{
namespaceManager.CreateQueue(QueueName);
}

var messagingFactory = MessagingFactory.Create(namespaceManager.Address, namespaceManager.Settings.TokenProvider);
ImageQueueClient = messagingFactory.CreateQueueClient(QueueName);
}
}
[/csharp]

To get rid of the red you’ll need to reference

  • Microsoft.ServiceBus.Messaging.MessagingFactory
  • Microsoft.ServiceBus.NamespaceManager
  • Microsoft.WindowsAzure.CloudConfigurationManager

As before, there now needs to be a cloud project setting for the following:

[csharp]CloudConfigurationManager.GetSetting("Microsoft.ServiceBus.ConnectionString");
[/csharp]

Right click your web role within the cloud project, and click properties, then settings, and Add Setting. Enter the values below, referring back to the details you previously got for your Service bus

  • Name: Microsoft.ServiceBus.ConnectionString
  • Value: Endpoint=sb://<your namespace>.servicebus.windows.net/; SharedSecretIssuer=owner; SharedSecretValue=<your default key>

In order for this initialisation to occur, you need to add a call to it in the global.asax.cs Application_Start method. Add the following line after the various route and filter registrations:

[csharp]QueueConnector.Initialize();
[/csharp]

Lastly BuildImageResponse

This method takes the image stream result, creates an Http response containing the data and the basic headers, and returns it:

[csharp]private static HttpResponseMessage BuildImageResponse(MemoryStream memoryStream)
{
var httpResponseMessage = new HttpResponseMessage {Content = new ByteArrayContent(memoryStream.ToArray())};
httpResponseMessage.Content.Headers.ContentType = new MediaTypeHeaderValue("image/jpeg");
httpResponseMessage.StatusCode = HttpStatusCode.OK;

return httpResponseMessage;
}
[/csharp]

This one requires a reference to

  • System.Net.Http.Headers.MediaTypeHeaderValue

Running it all

Hopefully you should have something you can now hit F5 in and spin up a locally hosted web role which accesses remotely (Azure) hosted storage and an Azure Service Bus.

To get the action to fire, send off a request to – for example:
http://127.0.0.1/api/Image/Resize?height=200&width=200&source=image1.jpg

You should see something like:
resized image response

Change those height and width parameters and you’ll get a shiny new image back each time:
resized image response

Passing in the value of 0 for either dimension parameter means it’s ignored and the aspect ratio is preserved/no padding added.

You’ll also notice that your queue is building up with messages of these lovely new images:
Queue increasing

Next Up

In the next post on this theme we’ll create a worker role to subscribe to the queue and upload the new images into blob storage.

I hope you’ve enjoyed this post; I certainly am loving working with Azure at the moment. It’s matured so much since I first tackled it several years ago.

The code for this post is available on GitHub; you’ll need to add in your own cloud settings though!

Troubleshooting

If you get the following error when hitting F5 –

[csharp]Not running in a hosted service or the Development Fabric
[/csharp]

Be sure to set the Cloud Project as the startup project in VS.

Node.js 101: Wrap up

Year of 101s, Part 1 – Node January

Summary – What was it all about?

I set out to spend January learning some node development fundementals.

Part #1 – Intro

I started with a basic intro to using node – a Hello World – which covered what node.js is, how to create the most basic of all programs, and mentioned some of the development environments.

Part #2 – Serving web content

Second was creating a very simple node web server, which covered using nodemon to develop your node app, the concept of exports, basic request routing, and serving various content types.

Part #3 – A basic API

Next was a simple API implementation, where I proxy calls to the Asos API, return a remapped subset of the data returned, reworked the routing creating basic search functionality and a detail page, and touched on being able to pass in command line arguements.

Part #4 – Basic deployment and hosting with Appharbor, Azure, and Heroku

Possibly the most interesting and fun post for me to work on involved deploying the node code on to three cloud hosting solutions where I discovered the oddities each provider has, various solutions to the problems this raises, as well as some debugging cleverness (nice work, Heroku!). The simplicity of a git-remote-push-deploy process is incredible, and really makes quick application development and hosting even more enjoyable!

Part #5 – Packages

Another interesting one was getting to play with node packages, the node package manager (npm), the express web framework, jade templating engine, and stylus css pre-processor, and deploying node apps with packages to cloud hosting.

Part #6 – Web-based development

The final part covered the fantastic Cloud9IDE, including a (very) basic intro to github, and how Cloud9 can still be used in developing and deploying directly to Azure, Appharbor, or Heroku.

What did I get out of it?

I really got into githubbing and OSSing, and really had to try hard to not over stretch myself as I had starting forking repos to try and make a few tweaks to things whilst working on the node month.

It has been extremely inspiring and has opened up so many other random tangents for me to explore in other projects at some other time. Very motivating stuff.

I’ve now got a month of half decent blog posts – I had only intended to do a total of 4 posts but including this one I’ve done 7, since I kept adding more information as it turned up and needed to split a few posts into two.

Also I’ve learned a bit about blogging; trying to do posts well in advance allowed me to build up the details once I’d discovered more whilst working on subsequent posts. For example, how Appharbor and Azure initially track master – but can be configured to track different branches. Also, debugging with Heroku only came up whilst working with packages in Heroku.

Link list

Node tutorials and references

Setting up a node development environment on Windows
Node Beginner – a great article, and I’ve also bought the associated eBooks.
nodejs.org – the official node site, the only place to go for reference

Understanding Javascript better

Execution in The Kingdom of Nouns
Object Orientation and Inheritance in Javascript

Appharbor

Appharbor and git

Heroku

Heroku toolbelt download and reference
node on Heroku

Azure

Checkout what Azure can do!

February – coming up, Samsung Smart TV App Development!

Yeah, seriously. How random is that?.. 🙂

Node.js 101: Part #6 – Web-Based Development

Web-Based Development

Following on from my recent post about doing something this year, I’m committing to doing 12 months of “101”s; posts and projects themed at begining something new (or reasonably new) to me

January is all about node, and I started with a basic intro, then cracked open a basic web server with content-type manipulation and basic routing, created a basic API, before getting stuck into some great deployment and hosting solutions and then an intro to using node packages including cloud deployment

In my previous posts I’ve been developing code locally, committing to a local git repo and pushing to a remote git repo. This is fine for the particular situation, but what about when I’m not at my own pc and feel the need to make some changes? Maybe I’m at my dad’s place using his netbook with no dev tools installed?

Cloud9IDE

Cloud9 is an incredible web-based development environment that is so feature-rich you’d usually expect to fork out wads of cash for the opportunity to use it: LIVE interactive collaborative development in the same shared IDE (see multiple people editing a file at once), code completion, syntax highlighting, an integrated console for those useful commands like ssh, git, npm.

It’s frikkin open source too, so you could install it on your own servers and have your own private IDE for your own code, based in a web browser. How amazing is that?

It’s built on Node.js in the back-end and javascript and HTML5 at the front. I’ve been playing around on there for the past year, and it’s been improving all the time – it’s just the best thing around. Go and start using it now. There are still some bugs, but if you find something you can always try to fix it and send a pull request!

c9-demo-1

So. That’s great for my web-based development, so how about if I need to collaborate on this project with people who I’m not sharing my C9 environment with?

GitHub

If you’re not already using github but are already using git (what the hell are you playing at?!), go and sign up for this exceptionally “powerful collaboration, review, and code management for open source and private development projects.”

You configure github as your git remote, push your code to it, and other users can pull, fork, edit, and send pull requests, so that you’re still effectively in charge of your own code repository whilst others can contribute to it or co-develop with you.

github-demo-1

Great. So how do I deploy my code if I’m using this sort of remote, web-based development environment?

Azure/AppHarbor/Heroku

Deploying to an existing Azure/Appharbor/Azure site from Cloud9IDE is the same as from your local dev pc; set up a remote and push to it! C9 has a built in terminal should the bare command line at the bottom of the screen not do it for you.

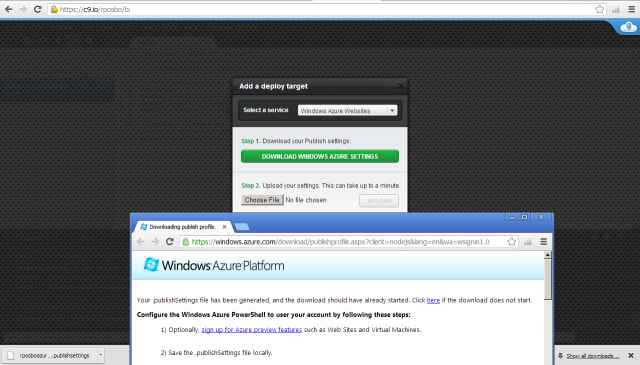
As for creating a new hosting environment, C9 also includes the ability to create them from within itself for both Azure and Heroku! I’ve actually never managed to get this working, but am quite happy to create the empty project on Heroku/Azure/Appharbor and use git from within C9 to deploy.

c9-azure-setup-1

Coming up

Next post will be the last for this first month of my Year of 101s: January Wrap-Up – Node.js 101; a summary of what I’ve learned in January whilst working with Node, as well as a roundup of the useful links I’ve used to get all of the information.

What’s in February’s 101?.. wait and see..!

Node.js 101: Part #5 – Packages

Following on from my recent post about doing something this year, I’m committing to doing 12 months of “101”s; posts and projects themed at begining something new (or reasonably new) to me

January is all about node, and I started with a basic intro, then cracked open a basic web server with content-type manipulation and basic routing, created a basic API, before getting stuck into some great deployment and hosting solutions

Node Packages

Up until now I’ve been working with node using the basic code I’ve written myself. What about if you want to create an application that utilises websockets? Or how about a Sinatra-inspired web framework to shortcut the routing and request handling I’ve been writing? Maybe you want to have a really easy to build website without having to write HTML with a nice look without writing any CSS? Like coffeescript? mocha? You gaddit.

Thanks to the node package manager you can easily import pre-built packages into your project to do alllll of these things and loads more. This command line tool (which used to be separate but is now a part of the node install itself) can install the packages in a ruby gem-esque/.Net nuget fashion, pulling down all the dependencies automatically.

Example usage:
[code]npm install express -g[/code]

The packages (compiled C++ binaries, just like node itself) are pulled either into your working directory (local node_modules folder) or as a global package (with the “-g” parameter). You then reference the packages in your code using “requires”.

Or you can install everything your project needs at once by creating a package.json e.g.:
[code]{
"name": "basic-node-package",
"version": "0.0.1",
"dependencies": {
"express": "*",
"jade": "*",
"stylus": "*",
"nib": "*"
}
}[/code]

And then call [code]npm install[/code]

A great intro to using these four packages can be found on the clock website

I’ve decided to write a wrapper for my basic node API using express, jade, stylus, and nib. All I’m doing is call the api and displaying the results on a basic page. The HTML is being written in jade and the css in stylus & nib. Routing is being handled by express.

app.js
[js]var express = require(‘express’)
, stylus = require(‘stylus’)
, nib = require(‘nib’)
, proxy = require(‘./proxy’)

var app = express()
function compile(str, path) {
return stylus(str)
.set(‘filename’, path)
.use(nib())
}
app.set(‘views’, __dirname + ‘/views’)
app.set(‘view engine’, ‘jade’)
app.use(express.logger(‘dev’))
app.use(stylus.middleware(
{ src: __dirname + ‘/public’
, compile: compile
}
))
app.use(express.static(__dirname + ‘/public’))

var host = ‘rposbo-basic-node-api.azurewebsites.net’;

app.get(‘/products/:search/:key’, function (req,response) {
console.log("Request handler ‘products’ was called");

var requestPath = ‘/products/’ + req.params.search + ‘?key=’ + req.params.key;

proxy.getRemoteData(host, requestPath, function(json){
var data = JSON.parse(json);

response.render(‘products’,
{
title: ‘Products for’ + data.category,
products: data.products,
key: req.params.key
}
);
})
});

app.get(‘/product/:id/:key’, function (req,response) {
console.log("Request handler ‘product’ was called");

var requestPath = ‘/product/’ + req.params.id + ‘?key=’ + req.params.key;

proxy.getRemoteData(host, requestPath, function(json){
var data = JSON.parse(json);

response.render(‘product’,
{
title: data.title,
product: data
}
);
})
});

app.get(‘/’, function (req,response) {
console.log("Request handler ‘index’ was called");
response.end("Go");
});

app.listen(process.env.PORT);
[/js]

So that file sets up the express, jade, and stylus references and wires up the routes for /products/ and /product/ which then make a call using my old proxy.js to the API; I can probably do all of this with a basic inline http get, but I’m just reusing it for the time being.

Notice how the route “/products/:search/:key” which would actually be something like “/products/jeans/myAp1k3Y” is referenced using req.params.search and req.params.key.

Then all I’m doing is making the API call, parsing the returned JSON and passing that parsed object to the view.

The views are written in jade and have a main shared one:
layout.jade
[code]!!!5
html
head
title #{title}
link(rel=’stylesheet’, href=’/stylesheets/style.css’)
body
header
h1 basic-node-packages
.container
.main-content
block content
.sidebar
block sidebar
footer
p Running on node with Express, Jade and Stylus[/code]

Then the route-specific ones:

products.jade:
[code]extend layout
block content
p
each product in products
li
a(href=’/product/’ + product.id + ‘/’ + key)
img(src=product.image)
p
=product.title[/code]

and

product.jade:
[code]extend layout
block content
p
img(src=product.image)
li= product.title
li= product.price[/code]

The stylesheet is written in stylus & nib:

style.styl
[css]/*
* Import nib
*/
@import ‘nib’

/*
* Grab a custom font from Google
*/
@import url(‘http://fonts.googleapis.com/css?family=Quicksand’)

/*
* Nib provides a CSS reset
*/
global-reset()

/*
* Store the main color and
* background color as variables
*/
main-color = #fa5b4d
background-color = #faf9f0

body
font-family ‘Georgia’
background-color background-color
color #444

header
font-family ‘Quicksand’
padding 50px 10px
color #fff
font-size 25px
text-align center

/*
* Note the use of the `main-color`
* variable and the `darken` function
*/
background-color main-color
border-bottom 1px solid darken(main-color, 30%)
text-shadow 0px -1px 0px darken(main-color, 30%)

.container
margin 50px auto
overflow hidden

.main-content
float left

p
margin-bottom 20px

li
width:290
float:left

p
line-height 1.8

footer
margin 50px auto
border-top 1px dotted #ccc
padding-top 5px
font-size 13px[/css]

And this is compiled into browser-agnostic css upon compilation of the app.

The other files used:

proxy.js:
[js]var http = require(‘http’);

function getRemoteData(host, requestPath, callback){

var options = {
host: host,
port: 80,
path: requestPath
};

var buffer = ”;
var request = http.get(options, function(result){
result.setEncoding(‘utf8’);

result.on(‘data’, function(chunk){
buffer += chunk;
});

result.on(‘end’, function(){
callback(buffer);
});
});

request.on(‘error’, function(e){console.log(‘error from proxy call: ‘ + e.message)});
request.end();
};
exports.getRemoteData = getRemoteData;[/js]

package.json
[js]{
"name": "basic-node-package",
"version": "0.0.1",
"dependencies": {
"express": "*",
"jade": "*",
"stylus": "*",
"nib": "*"
}
}[/js]

web.config
[xml]<configuration>
<system.web>
<compilation batch="false" />
</system.web>
<system.webServer>
<handlers>
<add name="iisnode" path="app.js" verb="*" modules="iisnode" />
</handlers>
<iisnode loggingEnabled="false" />

<rewrite>
<rules>
<rule name="myapp">
<match url="/*" />
<action type="Rewrite" url="app.js" />
</rule>
</rules>
</rewrite>
</system.webServer>
</configuration>[/xml]

All of these files are, as usual, on Github

Deployment with Packages

Something worth bearing in mind is that deploying something which includes packages and the result of packages (e.g. minified js or css from styl) requires all of these artifacts to be added into your git repo before deployment to certain hosts such as Appharbor and Azure; Heroku will actually run an npm install as part of the deployment step, I believe, and also compile the .styl into .css, unlike Azure/Appharbor.

The files above give a very basic web interface to the /products/ and /product/ routes:
asos-jade-products-1

asos-jade-product-1

Coming up

Web-based node development and deployment!

Node.js 101 : Part #4 – Basic Deployment and Hosting with Azure, Heroku, and AppHarbor

Following on from my recent post about doing something this year, I’m committing to doing 12 months of “101”s; posts and projects themed at beginning something new (or reasonably new) to me.

January is all about node, and I started with a basic intro, then cracked open a basic web server with content-type manipulation and basic routing, and the last one was a basic API implementation

Appharbor, Azure, and Heroku

Being a bit of a cocky git I said on twitter at the weekend:

It’s not quite that easy, but it’s actually not far off!

Deployment & Hosting Options

These are not the only options, but just three that I’m aware of and have previously had a play with. A prerequisite for each of these – for the purposes of this post – is using git for version control since AppHarbor, Azure, and Heroku support git hooks and remotes; this means essentially you can submit your changes directly to your host, which will automatically deploy them (if pre-checks pass).

I’ll be using the set of files from my previous API post for this one, except I need to change the facility to pass in command line args for the api key to instead take it from a querystring parameter.

The initial files are the same as the last post and can be grabbed from github

Those changes are:

app.js (removed lines about getting value from command line):

[js]var server = require("./server"),
router = require("./router"),
requestHandlers = require("./requestHandlers");

// only handling GETs at the moment
var handle = {}
handle["favicon.ico"] = requestHandlers.favicon;
handle["product"] = requestHandlers.product;
handle["products"] = requestHandlers.products;

var port = process.env.PORT || 3000;
server.start(router.route, handle, port);[/js]

server.js (added in querystring param usage):

[js highlight=”7″]var http = require("http"),
url = require("url");

function start(route, handle, port) {
function onRequest(request, response) {
var pathname = url.parse(request.url).pathname;
var apiKey = url.parse(request.url, true).query.key;
route(handle, pathname, response, apiKey);
}

http.createServer(onRequest).listen(port);
console.log("Server has started listening on port " + port);
}

exports.start = start;[/js]

The “.query” returns a querystring object, which means I can get the parameter “key” by using “.key” instead of something like [“key”].

Ideal scenario

In the perfect world all I’d need to do is something like:
[code]git add .
git commit -m "initial node stuff"
git push {azure/appharbor/heroku/whatever} master
…..
done
…..
new site deployed to blahblah.websitey.net
…..
have a lovely day
[/code]
and I could pop off for a cup of earl grey.

In order to get to that point there were a few steps I needed to take for each of the three hosts.

Appharbor

appharbor-home-1

Getting started

First things first; go and sign up for a free account with AppHarbor.

Then set up a new application in order to be given your git remote endpoint to push to.

I’ve previously had a play with Appharbor, but this is the first time I’m using it for more than just a freebie host.

Configuring

It’s not quite as simple as I would have liked; there are a couple of things that you need to bear in mind. Although Appharbor supports node deployments they are primarily a .Net hosting service and use Windows hosting environments (even though they’re on EC2 as opposed to Azure). Running node within iis means that you need to supply a web.config file and give it some IIS-specific info.

The config file I had to use is:
[xml highlight=”3,9″]<configuration>
<system.web>
<compilation batch="false" />
</system.web>
<system.webServer>
<handlers>
<add name="iisnode" path="app.js" verb="*" modules="iisnode" />
</handlers>
<iisnode loggingEnabled="false" />

<rewrite>
<rules>
<rule name="myapp">
<match url="/*" />
<action type="Rewrite" url="app.js" />
</rule>
</rules>
</rewrite>
</system.webServer>
</configuration>[/xml]

Most of that should be pretty straightforward (redirect all calls to app.js), but notice the lines about compilation and logging; the permissions under which the appharbor deployment process runs for node projects doesn’t have access to the filesystem so can’t create anything in a “temp” dir (precompilation) nor write any log files upon errors. As such, you need to disable these.

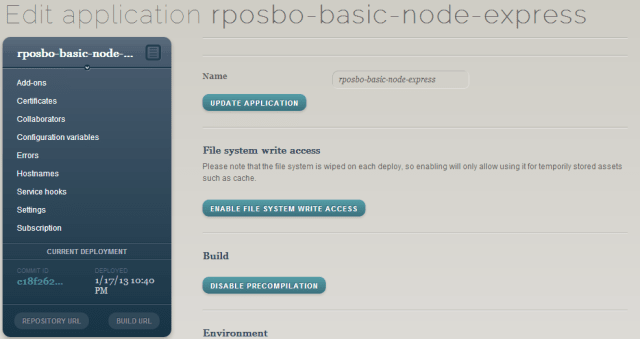
You could also enable file system access and disable precompilation within your application’s settings – as far as I can tell, it does the same thing.

appharbor-settings-1

Deploying

Commit that web.config to your repo, add a remote for appharbor, then push to it – any branch other than master, default, or trunk needs a manual deploy instead of it happening automatically, but you can specify the branch name to track within your appharbor application settings; I put in the branch name “appharbor” that I’ve been developing against and it automatically deploys when I push that branch or master, but not any others.

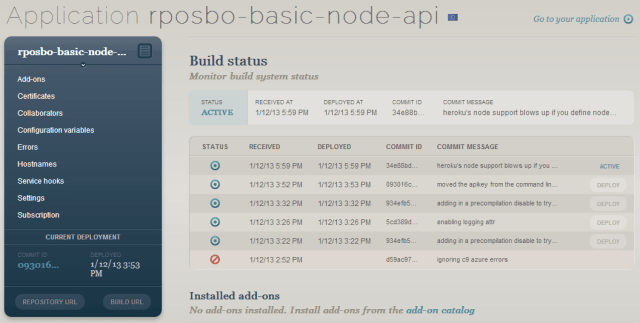
You’ll see your dashboard updates and deploys (automatic deployment if it’s a tracked branch):

appharbor-deploy-dashboard-1

And then you can browse to your app:

appharbor-deploy-result-1

Azure

azure-home-1

Getting started

Again, first step is to go and sign up for Azure – you can get a free trial, and if you only want to host up to 10 small websites then it’s completely free.

You’ll need to set up a new Azure website in order to be given your git remote endpoint to push to.

Configuring

This is pretty similar to the AppHarbor process in that Azure Websites sit on Windows and IIS, so you need to define a web.config to set up IIS for node. The same web.config works as for AppHarbor.

Deploying

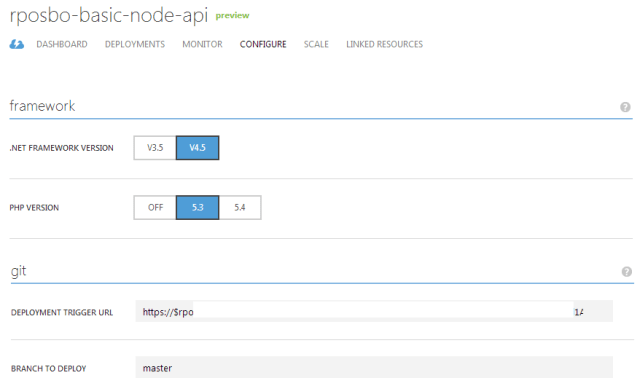
Although you can push to Appharbor from any branch and it will only deploy automatically from the specific tracked branch, you can’t choose to manually deploy from within azure, so you either need to use [code]git push azure {branch}:master[/code] (assuming your remote is called “azure”) or you can define your tracked branch in the configuration section:

azure-settings-1

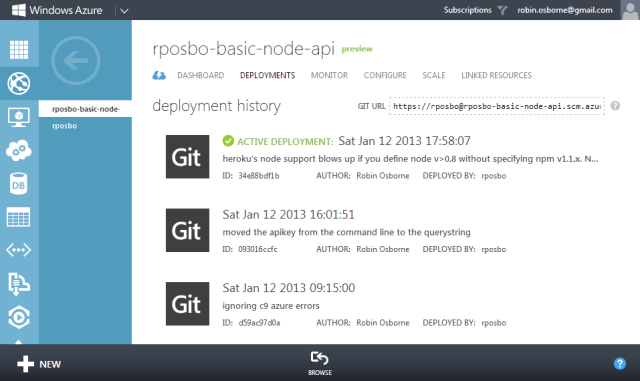
Following a successful push your dashboard updates and deploys:

azure-deploy-dashboard-1

And then your app is browsable:

azure-deploy-result-1

Heroku

heroku-home-1

Getting started

Sign up for a free account.

Configuring

Heroku isn’t Windows based as it’s aimed at hosting Ruby, Node.js, Clojure, Java, Python, and Scala. What this means for our node deployment is that we don’t need a web.config to get the application running on Heroku. It’s still running on Amazon’s EC2 as far as I can tell though.

However, we do need to jump through several other strange hoops:

Procfile

The procfile is a list of the “process types in an application. Each process type is a declaration of a command that is executed when a process of that process type is executed.” These can be arbitrarily named except for the “web” one which handles HTTP traffic.

For node, this Procfile needs to be:

Procfile:
[code]web: node app.js[/code]

Should I want to pass in command line arguments, as in the previous version of my basic node API code, I could do it in this file i.e. [code]web: node app.js mYAp1K3Y[/code]

Deploying

Heroku Toolbelt

There’s a command line tool which you need to install in order to use Heroku, called the Toolbelt; this is the Heroku client which allows you to do a lot of powerful things from the command line including scaling up and down, and start and stopping your application.

Instead of adding heroku as a git remote yourself you need to open a command line in your project’s directory and run [code]heroku login[/code]and then[code]heroku create[/code]
Your application space will now have been created within Heroku automatically (no need to log in and create one first) as well as your git remote; this will have the default name of “heroku”

Deploying code is still the same as before [code]git push heroku master[/code]

In Heroku you do need to commit to master to have your code built and deployed, and I couldn’t find anywhere to specify a different tracking branch.

Before that we need to create the last required file:
package.json:
[js]{
"name": "rposbo-basic-node-hosting-options",
"author": "Robin Osborne",
"description": "the node.js files used in my blog post about a basic node api being hosted in various places (github, azure, heroku)",
"version": "0.0.1",
"engines": {
"node": "0.8.x",
"npm": "1.1.x"
}
}[/js]

This file is used by npm (node package manager) to install the module dependencies for your application; e.g. express, jade, stylus. Even though our basic API project has no specifc dependencies, the file is still required by Heroku in order to define the version of node and npm to use (otherwise your application simply isn’t recognised as a node.js app).

Something to consider is that Heroku doesn’t necessarily have the same version of node installed as you might; I defined 0.8.16 and received an error upon deployment which listed the available versions (the highest at time of writing is 0.8.14). I decided to define my required version as “0.8.x” (any version that is major 0 minor 8).

However, if you define a version of node in the 0.8.x series you must also define the version of npm. A known issue, apparently. Not only that, it needs to be specifically “1.1.x”.

Add these settings into the “engines” section of the package.json file, git add, git commit, and git push to see your dashboard updated:

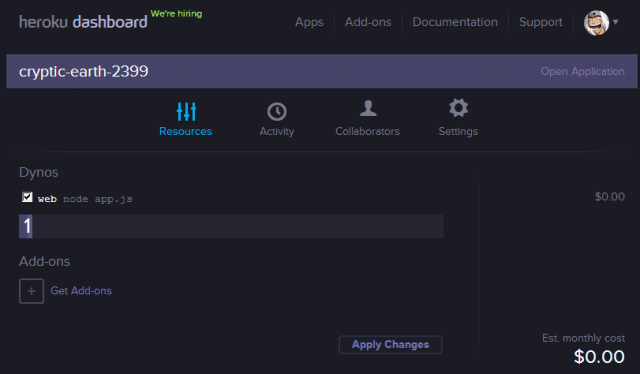
heroku-deploy-dashboard-1

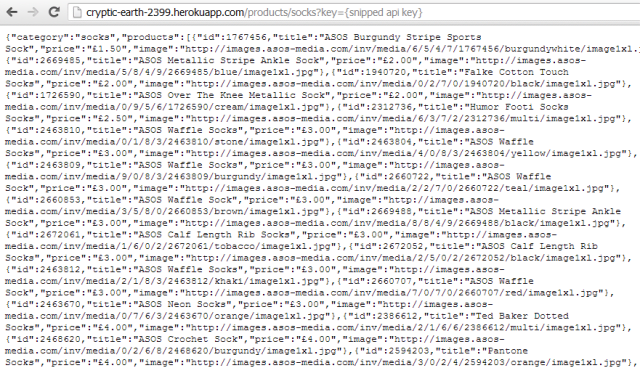
And then your app – with a quite random URL! – is available:

heroku-deploy-result-1

If you have problems pushing due to your existing public keys not existing within heroku, run the following to import them [code]heroku keys:add[/code]

You can also scale up and down your number of instances using the Heroku client: [code]heroku ps:scale web=1[/code]

Debugging

The Heroku Toolbelt is a really useful client to have; you can check your logs with [code]heroku logs[/code] and you can even leave a trace session open using [code]heroku logs –tail[/code], which is amazing for debugging problems.

The error codes you encounter are all listed on the heroku site as is all of the information on using the Heroku Toolbelt logging facility.

A quick one: if you see the error “H14”, then although your deployment may have worked it hasn’t automatically kicked off a web role – you can see this where it says “dyno=” instead of “dyno=web.1”; you just need to run the following command to start one up: [code]heroku ps:scale web=1[/code]

Also – make sure you’ve created a Procfile (with capitalised “P”) and that it contains [code]web: node app.js[/code]

Summary

Ok, so we can now easily deploy and host our API. The files that I’ve been working with throughout this post are on github; everything has been merged into master (both heroku files and web.config) so it can be deployed to any of these hosts.

There are also separate branches for Azure/Appharbor and Heroku should you want to check the different files in isolation.

Next Up

Node packages!

Node.js @ UKWAUG: MS Cloud Day – Windows Azure Spring Release

The fourth session I attended was the highly energetic and speedy introduction to writing node.js and running it on Azure, presented by the author of Simple.Data and Simple.Web, and one of those voices of the developer community with a great JFDI attitude, Mark Rendle (@markrendle).

I’ve just recently got into node.js development myself and have been very much enjoying node, npm, express, stylus, and nib; there is a fantastic community and expanse of modules already and that can be a bit daunting.

During the session Mark’s short code example shows just how simple it can be to get up and running with node, and also how easy it is to deploy to Azure.

A nice comment was that we are on the road to “ecmascript harmony”! And that “Javascript is a great language so long as you ignore the 90% of it which coffeescript doens’t compile to.”

It was a very fast-paced session; hopefully my notes still make sense though..

What the various aspects of Azure do

  • compute – web, worker, vm
  • websites – .net, node, php
  • storage – blob, tables (distributed nosql, like cassandra), queues
  • sql – sql azure, reporting
  • services – servicebus, caching, acs

What are the Cloud Service types used for

  • web roles – iis, for apps
  • worker – no iis, for running anything

How to peruse the contents of blob or table

General tips for developing sites for use in Azure

  • keep static content in blob storage
  • websites commit and deploy much faster than cloud serviecs commit and deploy process
  • azure/iis needs server.js, not app.js

How to run RavenDB in Azure

  • Spin up a vm and install it!! (this used to be a much trickier process, but the recent Azure update meant that the VM support is mature enough to allow the simpler solution)

Developing node.js

Use jetbrains webstorm for debugging/ or the wonderful online editor, Cloud9IDE. Sublime Text 2 is a great editor for simple code requirements, and has great plugins for Javascript support. I also used this for taking all of the seminar notes as it has a simple “zen” zero-distractions interface

Next up – Hadoop and High Performance Computing

MongoDB @ UKWAUG: MS Cloud Day – Windows Azure Spring Release

My third session was about MongoDB and how you might implement it in Azure, presented by MongoDB’s own Gregor Macadam (@gregormacadam).

I only had limited knowledge of what MongoDB was before this session (a document based data store, much like CouchDB and other NoSQL variants), so given that this session appeared to be an intro to MongoDB as opposed to MongoDB on Azure then that suited me just fine!

Here are the basic notes I made during Gregor’s talk (although you may as well just go to MongoDB.org and read the  intro..):

MongoDB uses sharding for write throughput.
The REST interface uses JSON as the data transport format
Data is saved in BSON structure

The db structure (usually?) consists of three nodes; a single primary and two replicated secondary – these are referred to as a Replica Set.
A Replica Set has a single write node with async replicate to other set members, read from all

The write history (known as UpLog) is in the format "move from state A, to state B" so as to avoid overwriting changed data.

If write (to primary) fails, an automatic election determines which remainder is new primary; usually primary is the node with latest data.

It can be configured to write to multiple hosts, but the write won’t return until all writes are completed

An "arbiter" can be the tie breaker in determining the new primary node during election, and we can specify weighting for that process.

"Read" scales with more read nodes, "Write" scales with multiple read/write groups (replica sets) or sharding.

Need config database to define key ranges for sharding etc

MongoS process runs on another node and knows which shard to write your data to.

The updates are released on windows and Linux at same time

Within Azure

Data is persisted in blob storage
MongoDB runs in worker role
page blob is NTFS cloud drive (data drive?)

MongoS router process is required to load balance access to correct node, not the Azure load balancer; the Azure load balancer can end up sending the write request to a non-primary node.

OSdisk has caching enabled by default, data disk doesn’t

Code is Open Source and can be found on github and issues can be raised on the Mongo Jira site

You can sign up for a free Mongo Monitoring Service on 10gen

Main points that I took away from this is that it sounds like you need a large number of Azure VMs to get Mongo running; one for each node, one for each MongoS service, one for an arbiter (maybe more – I didn’t catch all of these details that were raised by a couple of good questions from the audience).

Although I have a big plan to use NoSQL for the front end of an ecommerce website, I don’t think that MongoDB’s Azure offering is mature enough yet. I’ll be looking into CouchDB and Raven initially and keeping an eye on MongoDB. (Interested in how to get Raven running on Azure? Wait for the next post!)

The slide deck from this session is here

Next up – node.js

IaaS @ UKWAUG: MS Cloud Day – Windows Azure Spring Release

Infrastructure as a Service in Azure

Unfortunately, the earlier network disaster at the conference meant that this session seemed to have been cut short. This is a shame as the Azure IaaS offering has really matured and I was looking forward to how I can utilise the improved system.

Since it was a short one, the notes taken on what Microsoft’s own Michael Washam (@MWashamMS) talked about are limited. Here goes:

You can can upload your own VHDs which must be fixed disks, not dynamic

Data disks are a virtual HD which can be attached to your VM; each data disk is up to 1TB!

Instance size/# of data disks

  • xs 1
  • s 2
  • m 4
  • l 8
  • xl 16

So a single XL instance VM can have 16TB of HA storage attached!
Data disks lives in blob storage

Using port forwarding and configuring a Load Balanced Set allows you to set up a cluster/farm.

The load balancer functionality has custom probes; these look for HTTP200 on a health check page. The health check page can be custom and do custom logic (e.g., auth/db conn) determining whether to return a 200 status or not.

Availability Sets ensure not all the VMs in a set would go down for usual updates and patches at the same time; i.e., your load balanced endpoint would always have an active VM on the other end.

The Windows Azure Virtual Network allows, as mentioned in the Keynote, a VPN to be set up which can be patched into your on-premises router to act as if it’s on-prem itself.

The VPN can be configured/defined via an xml file. The creation of the VMs and their attached data disks can be scripted from the mature Azure Powershell cmdlet library. Using these together Michael was able to show how he can run a powershell script to spin up a farm of ten servers from a pre-existing VHD, attach a 1TB data disk to each, and assign them IP addresses within the configured VPN range.

He then downloaded the VPN settings from Azure in a format specific to a possible corporate router to effectively bring that new server farm into the on-premises network.

This automatic setup and configuration was really rushed through and quite tough to follow at times, probably due to the lack of time. There were some tantalising snippets of script on screen momentarily, and then it was all over.

My big take away from this session was the ability to automatically spin up a preconfigured set of servers to create a QA/dev/load test environment, do horrible things to it, get some reports generated, then turn it back off. Wonderful.

:: Michael with the money shot

ukwaug ms cloud day MWasham azure spring release 2012 IaaS

Next up >> Mongo DB