Aside #10 – Send To Kindle WordPress plugin

Whilst uber geeking it up (streaming a HD Wired.com video podcast to my TV via a raspberry pi with the world’s teeniest usb wifi and a USB battery pack – my next RPi post will cover this!) I learned that WordPress has a new plugin for sending posts straight to your Kindle!

Great idea, since I’m always wanting to read some long post but don’t have the time, so would love a “read it later” button to push it to another device.

Installing the plugin

Here’s all it took to install on this blog:

Search for "Send to Kindle” from the plugin page on your wordpress install/site.

Send To Kindle - finding plugin 1

Find the “Send To Kindle” plugin from “Amazon Inc” and click “install”

Send To Kindle - finding plugin 2

Once installed you have a couple of options

Send To Kindle - plugin installed

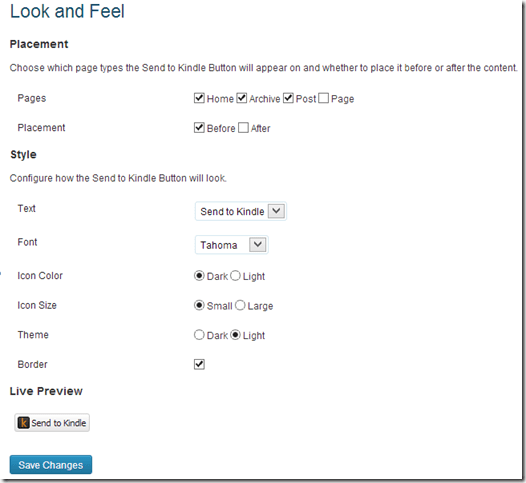
You can configure the basics, such as where to display it, what font to use, what text to display (you’re limited to “Kindle”, “Send to Kindle”, or nothing..), which colour scheme to use, what size icon and of which colour, what colour background, and whether to display a border or not.

Send To Kindle - plugin setup - basic

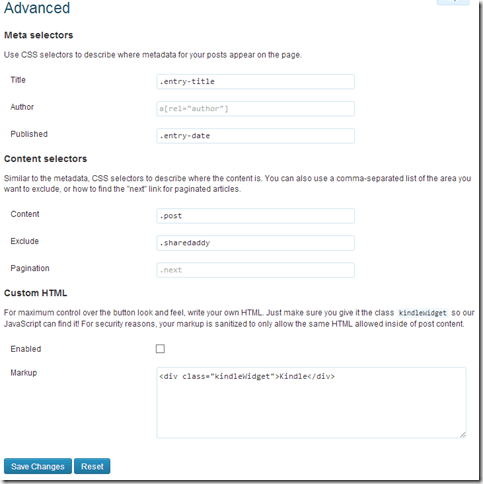
If you want to mess around with the display yourself then the Advanced controls allow this, as well as some default settings of where to pull the post details from.

Send To Kindle - plugin setup - advanced

Then this will appear wherever you’ve chosen.

Button in action

Here it is on a post

Send To Kindle - button appearing

Clicking that  button pops up a window to get you to log in to your Amazon account …

Send To Kindle - Log In

and choose which device you send it to…

Send To Kindle - Configure Settings

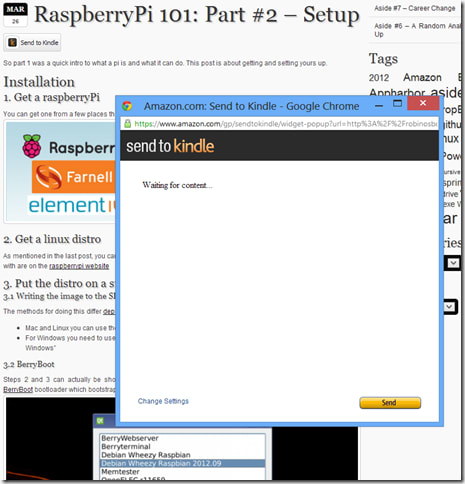
Then content will be loaded and processed for Kindle viewing:

Send To Kindle - Awaiting Content  

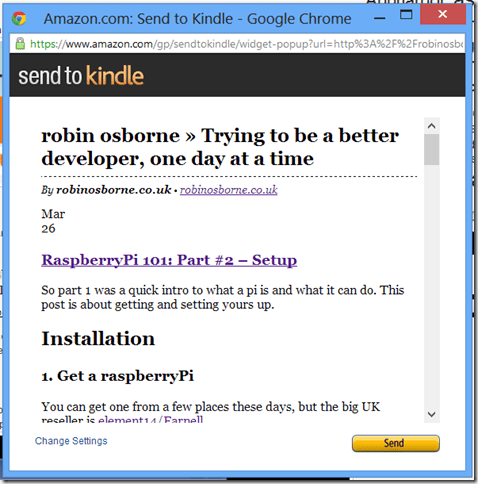
Which means it ends up looking like this:

Send To Kindle - Content Loaded

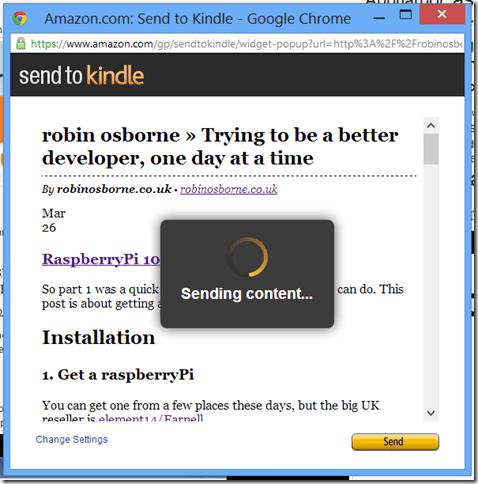
Clicking the “Send” button first gives you a quick thinky thinky image:

Send To Kindle - Uploading

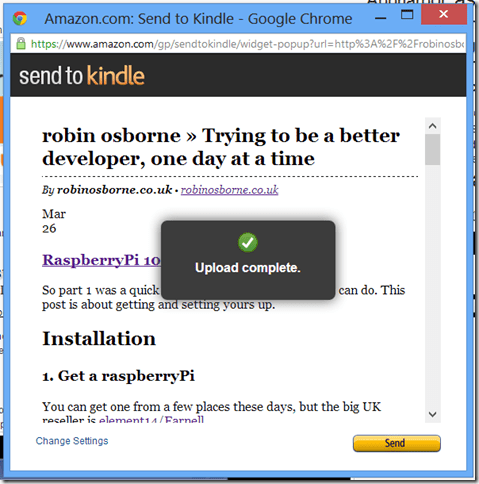
Before shortly letting you know it’s all ok

Send To Kindle - Upload Complete 


Viewing the post on your Kindle

You can then see this post on your Kindle the next time you turn it on in a Wifi (or 3G if your Kindle has Whispernet and you selected that as the delivery mechanism) area:

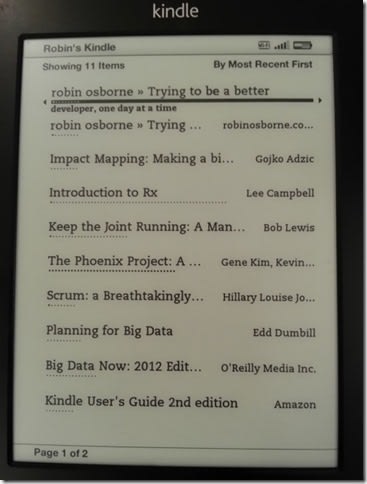
Here I have a couple of posts sent to my Kindle displaying on the home screen:

Send To Kindle - Viewing post content on Kindle - Listing

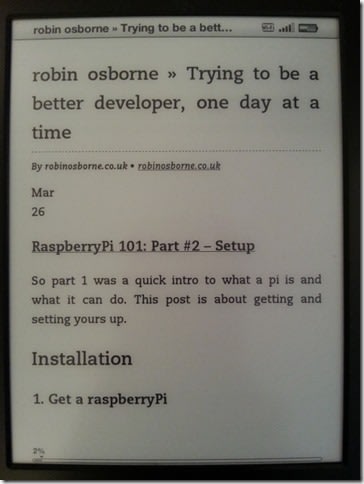
Selecting the RaspberryPi Part #2 post (which you can’t tell from the two on the home screen at the moment – I can probably sort this by changing the selectors in the advanced settings on the plugin page) here we have some basic text content:

Send To Kindle - Viewing post content on Kindle

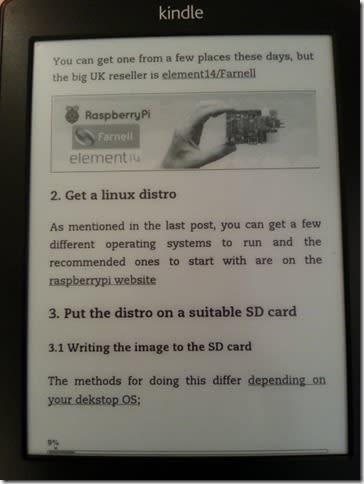
Some image content:

Send To Kindle - Viewing post content on Kindle - Image

And some code example content:

Send To Kindle - Viewing post content on Kindle - Code

The code example is rendered via the wonderful SyntaxHighlighter plugin, hence the weird “view sourceprint?” link at the top of each one.

Summary

Pretty cool concept, huh? No idea if my posts are worth doing this to, but I like the idea of it. And it’s easy too; once installed you can either say “put this everywhere on every post” or just use the [sendToKindle] smart code.

Asides #9 – IRC. WTF?

Whilst I’ve been attempting to learn a new thing each month this year, I’ve been finding it really tricky to keep to the pretty loose schedule. As such, I though I’d try and note down every time a shiny new thing takes my interest, so that I have some idea why I’m incapable of completing a series of blog posts.

JabbR / IRC

IRC

Internet Relay Chat (IRC) – text based shared “room” chat environment, with private messaging etc. I seriously had no idea that people still used these. I would have used them back in university (’98/’99), but haven’t touched them since.

The idea of attempting to convince a company that they should set up a private IRC server internally for team communication just doesn’t seem right to me. I’d much rather suggest that people use any other form of IM or even JabbR; this is probably due to my developer background instead of ops.

JabbR

As such, I’ve been trying to install JabbR in the cloud using AppHarbify as a proof of concept

You can use Janrain to process the authentication, and AppHarbify allow you to just install apps into your appharbor account – including JabbR!

The details for manual installation are in an AppHarbor blog but the killer info is in the comments section..

Instigator
— Discovering people still use IRC, thanks to discussions at DevOpsDays..

RaspberryPi 101: Part #2 – Setup

So part 1 was a quick intro to what a pi is and what it can do. This post is about getting and setting yours up.

Installation

1. Get a raspberryPi

You can get one from a few places these days, but the big UK reseller is element14/Farnell
element14 farnell

2. Get a linux distro

As mentioned in the last post, you can get a few different operating systems to run and the recommended ones to start with are on the raspberrypi website

3. Put the distro on a suitable SD card

3.1 Writing the image to the SD card

The methods for doing this differ depending on your dekstop OS;

  • Mac and Linux you can use the existing “dd” and “df” commands to check and write the image to the SD card
  • For Windows you need to use the Win32DiskImager “used for writing images to USB sticks or SD/CF cards on Windows”

3.2 BerryBoot

Steps 2 and 3 can actually be shortcut by either buying an SD card with a distro already installed, or installing BerryBoot bootloader which bootstraps your installation to give you the easiest possible route to installation:
berryboot

Berryboot is OSS and you can even dig into the source over on github

Random tangent #1: HDMI CEC
BerryBoot supports the fantastic HDMI CEC which “is an HDMI feature designed to allow the user to command and control up-to ten CEC-enabled devices, that are connected through HDMI, by using only one of their remote controls”; this means that you don’t even need to connect a keyboard for most of the berryboot setup process and can just use your tv remote.

There’s more info over on elinux about just how important CEC is for HDMI capable devices and writing software for these devices.

Want to start understanding the CEC messages? Check cec-o-matic

This is the same feature that XBMC uses to allow full and simple navigation of the media centre features just using your remote control – more on XBMC later.

Checkpoint! Base Installation Complete

You’ll now have a version of linux (or RISC OS) running on your pi. If you’ve chosen RISC then I can’t really help you, since the last time I used it was playing games on my uncle’s computer as a young lad (check out those vids – classic 90s gaming at its “best”).

Anyway. From here on in I’ll assume you’ve gone with Raspbian. Wheezy should be pretty much the same I think.

Starting it all up #1: Raspbian

Plug it all in

Put the SD card in, the HDMI cable to your tv/monitor, the network cable in, your USB keyboard which you’ll need for the initial installation (unless you’re berrybooting with it’s CEC awesomeness), and finally the power cable; there is no power switch on the pi so once the cable is plugged in you’re running.

You should see the initial configuration screen where you can setup the locale and turn on SSH (do so).

Then you can choose to get to a terminal or boot into a desktop environment.

SSH

With raspbian this is just a case of enabling ssh from the config menu; after that you can ssh in from another machine on the same network. If you don’t know the IP address of your pi, either plug it in to an HDMI capable display and execute “ifconfig” or just check the devices attached to your router from the router admin screen.

more info on pi ssh

Bluetooth

Setting up a bluetooth keyboard may not be much use if you’ve already got ssh running and want to access the terminal only, however if you’re accessing the pi directly you will either need to plug in a USB HCI device (keyboard/mouse) or set up bluetooth.

1. Get a supported device

There’s a list of confirmed working devices over on elinux.

I went for the dinky little TOPDIGI UA01 Bluetooth USB Dongle from Amazon
TOPDIGI UA01 Bluetooth USB Dongle from Amazon

2. Setup bluetooth on the pi

2.1 install bluetooth software

[code]pi@raspberrypi ~ $ sudo -s
root@raspberrypi:/home/pi# apt-get install bluez[/code]

2.2 scan for nearby devices

[code]root@raspberrypi:/home/pi# hcitool scan[/code]
Your device should appear in those found; use the MAC in the following steps.

2.3 pair your pi to the device

[code]root@raspberrypi:/home/pi# bluez-simple-agent hci0 00:11:22:33:44:55
RequestPinCode: 0000
Enter PIN Code: Release
New device (/org/bluez/3964/hci0/dev_00_11_22_33_44_55)[/code]

Obviously your MAC will be different to the dummy one I’ve used..

2.4 trust the paired device so it’ll auto connect in future

[code]root@raspberrypi:/home/pi# bluez-test-device trusted 00:11:22:33:44:55 yes[/code]

WiFi

Since I’m bored with swapping the ethernet cable from my tv to get this on the network (the switch has no spare ports.. too much living room tech..), I’ve just ordered an Edimax EW-7811UN 150Mbps Wireless Nano USB Adapter
Edimax TEEEENY TINY wifi adapter

Portable Power

Since I’m bored with swapping my phone charger over to power the pi, I’ve just ordered a PowerGen 5200mAh External Battery Pack High Capacity Power Bank Charger
Powergen

I’ll report back on how they work out for me soon. I should find that having a fully portable pi will allow me to mess around with it even more!

Summary

That’s it for this one! You’re now set up with a Linux computer, bluetooth keyboard, and ssh. You can do with this whatever you would do with a normal low power distro (Puppy, DSL, #!.. or is it !#.. hmm..), but you can also interact wiht the outside world via GPIO.

Next Up

I’ll be installing XBMC and having a play. I play, so you don’t have to. See? I care.
Aside #8 – Officeless Working; Amazeballs!

Whilst I’ve been attempting to learn a new thing each month this year, I’ve been finding it really tricky to keep to the pretty loose schedule. As such, I though I’d try and note down every time a shiny new thing takes my interest, so that I have some idea why I’m incapable of completing a series of blog posts.

Mobile working

WorkSnug

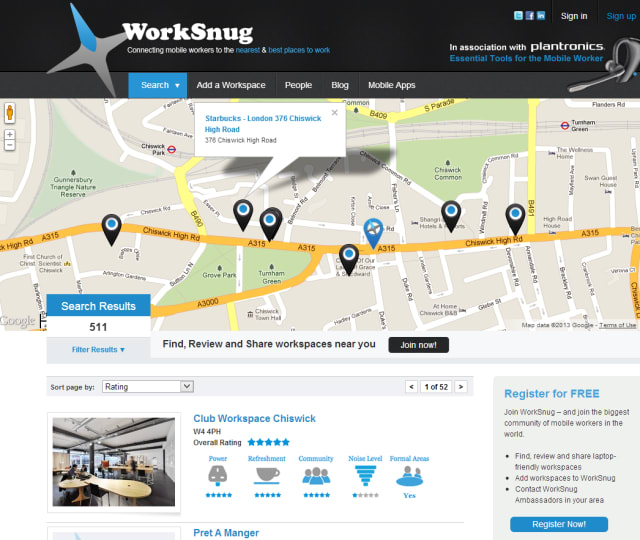
The worksnug website lists places mobile workers have tried and rated; unfortunately it’s mainly coffee shops. The app can apparently filter these out, but the app doesn’t work on the Samsung S3.

worksnug

Southbank

I’ve recently discovered that the SouthBank in London is an amazing place to be an officeless worker:

  • The Royal Festival Hall (RFH) is HUGE, has loads of different areas to sit, free wifi (a bit dodgy sometimes, but fast when it is working), no pressure to buy coffees just to be there, and a members area with panoramic views over London (for only £45 a year – awesome!)

  • The British Film Institute (BFI) venue has a Benugo coffee area, but quite a lot of seating and no pressure to actually buy any coffee

  • National Theatre is a wonderful, huge building, which between shows is exceptionally quiet. Free wifi, limited seating, but would be perfect in nicer weather due to it’s outdoor seating areas.

Instead of following WorkSnug and ending up stuck in coffee shops, I’m going to spend some time with E-Architect’s listing of awesome buildings in London and a few such others and find the ones you can happily work from.

Non-Southbank Mobile Workspaces

Other great places I’ve previously tried and tested, or would like to:

Barbican
Barbican

British Museum
British Museum

British Library
British Library

Any other suggestions?

They don’t need to have free wifi; sometimes I prefer not to join those open networks and will instead fire up a bluetooth PAN with my phone. It’s still fast enough for everything I need to use it for.

Aside #7 – Career Change

Whilst I’ve been attempting to learn a new thing each month this year, I’ve been finding it really tricky to keep to the pretty loose schedule. As such, I though I’d try and note down every time a shiny new thing takes my interest, so that I have some idea why I’m incapable of completing a series of blog posts.

Career

Having decided to leave senior management and get back into something more technical, I thought about what I enjoy doing. I had a short chat with a very smart business friend of mine and thought I’d try to go it alone and focus on devops as a service I would eventually provide.

I was in the enviable position of having the luxury of a little bit of time to work out the direction to take, and made a great move in crowd-sourcing my decision making! I sent out a verbose email explaining all of the options and what I wanted to get out of life (!) to a group of friends (some techies, some not) and asked for their thoughts. The replies covered every possible scenario and reading them helped me work out what I wanted to do myself.

As such, I’m leaving permanent employment behind for the time being, becoming a contractor and working on setting up as a freelancer/consultant for DevOps evangelism.

Initially I needed to set up a company.. which isn’t particularly complicated, but it’s certainly not quick and easy! Coming up with a company name, checking domain availability, registering a company bank account, setting myself up as a consultancy; this is all time consuming stuff.

If you’re thinking of doing the same thing I would recommend reading up on it – there is a VAST amount of info out there on the interwebs and this article from Simon Rigsby is a great one to get your head around things.

What I ended up doing, after loads of email conversations with techie mates who have gone contracting, was to join the Professional Contractors Group and also got insurance, set up a company, and chose an accountant all via the PCG.

In the end it’s all been handled very smoothly by my accountants, and I’m now able to review a contract myself for basic IR35 flags, but I can get one contract reviewed for free each year via PCG.

Instigator
— not liking my job in senior management, deciding to work out what’s important to me instead and focus on that.

Aside #6 – A Random Analogy; DevOps/Washing Up

Whilst I’ve been attempting to learn a new thing each month this year, I’ve been finding it really tricky to keep to the pretty loose schedule. As such, I though I’d try and note down every time a shiny new thing takes my interest, so that I have some idea why I’m incapable of completing a series of blog posts.

Random Analogy – DevOps For Washing Up

Random Washing Up Analogy

Waterfall

Getting all of the dishes ready to wash, clearing all of the space required to let them dry, washing everything in one go and setting it all to dry, then getting a towel and drying everything in one go, then putting everything away in one go.

Agile

Wash one sink full, put it on the drainer, stop washing and grab a towel, dry that load and put it away as you go – one iteration completed!

DevOps

My definition of the devops movement is not about a technology or a single process, but about getting everyone necessary to get something out of the door involved at the start. As such; get two people to help you out: one washes, one dries, one puts away. Continuous deployment 😉

Instigator
— Thinking about DevOps a lot in the run up to devopsdays, and my dishwasher breaking..!

Aside #5 – A trip down memory lane (RISC OS games)

Whilst I’ve been attempting to learn a new thing each month this year, I’ve been finding it really tricky to keep to the pretty loose schedule. As such, I though I’d try and note down every time a shiny new thing takes my interest, so that I have some idea why I’m incapable of completing a series of blog posts.

RISC OS

I’d been derailed by the idea of getting games I used to play on Acorn running on the rPi. Seeing the RISC OS as an option for the rPi OS I went straight off to find ROMS for old Acorn games I loved as a lil hacker.. And ended up watching loads of vids on youtube:

Cataclysm

Galactic Dan

(“Mmm! Thank you!”)

Xenon 2

Twin Worlds

Mad Professor

Gods

(awesome music!)

Instigator
— Seeing Mad Professor youtube clip whilst researching for the “setup” pi post made me yearn for simpler times..

Aside #4 – Accessing EC2 from my phone via SSH

Whilst I’ve been attempting to learn a new thing each month this year, I’ve been finding it really tricky to keep to the pretty loose schedule. As such, I though I’d try and note down every time a shiny new thing takes my interest, so that I have some idea why I’m incapable of completing a series of blog posts.

Accessing EC2 from a phone running ConnectBot

The ppk you use for putty/kitty/ssh doesn’t work on connectbot so you need to generate a new one from within the phone (connectbot app) and copy it over to your EC2 instance, appending it to your authorised keys file.

Generating the key

Go and install the app from the android store.

Find the app on your phone:
connectbot_icon

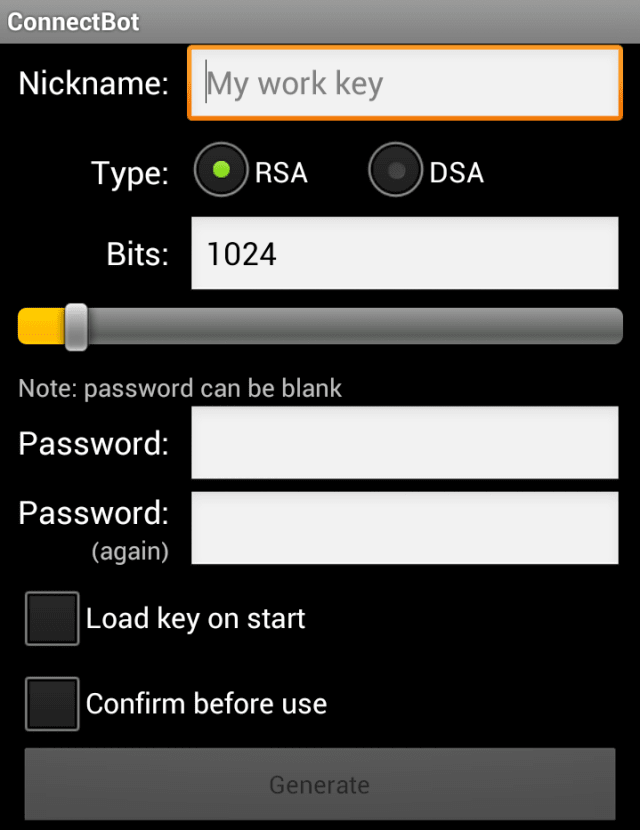
Generate a new key from the Manage Keys page:
connectbot_generate_public_key

Getting your file to your EC2 instance

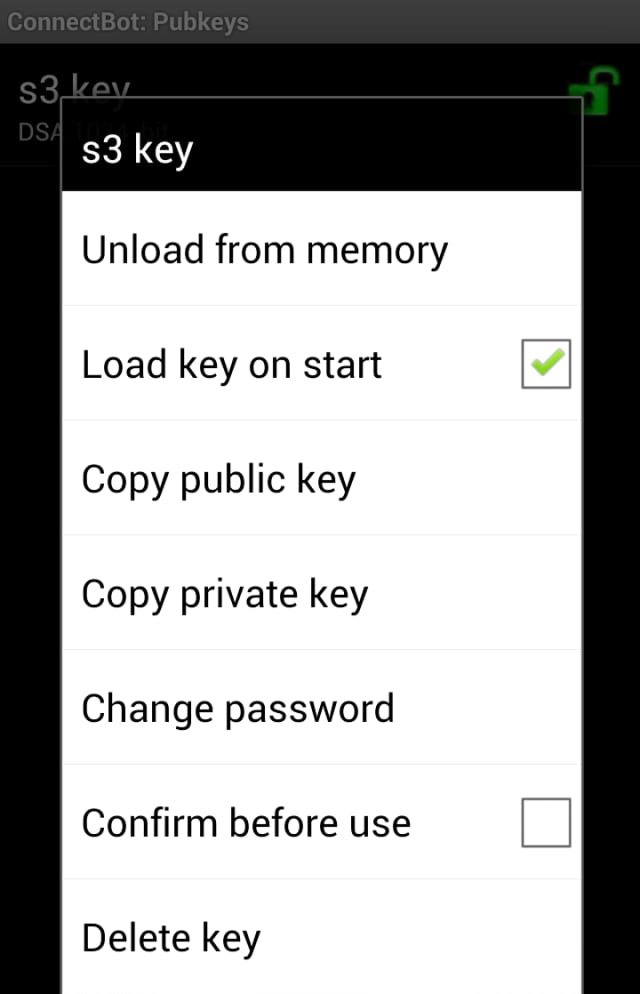
Firstly, copy the public key to clipboard:
connectbot_copy_public_key

Then get it to your phone. There are a few ways of doing this; I pasted it into a new text file via my phone’s dropbox app and then curl-ed/wget-ed that file on to my EC2 instance (obviously logging in from a PC).

Adding it to your authorised keys

First I backed the existing authorized_keys file up:

cp ~/.ssh/authorized_keys backup_auth

Then I appended the one generated from my phone:

cat s3_id_dsa.pub >> ~/.ssh/authorized_keys

You can now log in directly from your phone without using a login:
connectbot_logged_in_to_EC2

Instigator
— needing to restart Apache whilst AFK

Aside #3 – HDMI-CEC Awesomeness

Whilst I’ve been attempting to learn a new thing each month this year, I’ve been finding it really tricky to keep to the pretty loose schedule. As such, I though I’d try and note down every time a shiny new thing takes my interest, so that I have some idea why I’m incapable of completing a series of blog posts.

HDMI CEC

I’m investigating writing apps that implement HDMI CEC protocol and can therefore be manipulated via a TV remote control only. Or an API to handle basic stuff.

HDMI pins
It looks like HDMI CEC is on pins 13 and 17 (?) of an HDMI male connector

The idea that you can plug an HDMI cable into your HDMI-CEC capable TV and not have to use a keyboard to interact with the device is fantastic for usability!

Instigator
— HDMI CEC on XBMC and BerryBoot

Aside #2 – RPi + VirtualBox = :(

Whilst I’ve been attempting to learn a new thing each month this year, I’ve been finding it really tricky to keep to the pretty loose schedule. As such, I though I’d try and note down every time a shiny new thing takes my interest, so that I have some idea why I’m incapable of completing a series of blog posts.

Running Pi distros in VirtualBox

Apparently you can run raspberryPi distros in virtualbox (totally doesn’t work though..)

Converting a .img to a .vdi:

"C:\Program Files\Oracle\VirtualBox\VBoxManage.exe" convertfromraw -format VDI path:\to\input.img path:\to\output.vdi

Instigator
— trying to get decent screenshots of the various pi OS without having to take pics of the tv