I’m going to try to explain a proof of concept I’ve recently completed which is intended to automate the process of resizing, hosting, and serving images, taking the responsibility away from your own systems and data centre/ web host.
We’ll be using Windows Azure for all of the things;
- Web API Azure Web role to proxy the incoming requests, checking blob storage and proxying if not there
- Web API Azure Web role to resize and return the image, and to add it to a Azure Service Bus
- Azure Service Bus to hold the event and data for the resized image
- Worker role to subscribe to the service bus and upload any images on there into blob storage for the next request
Overall Process
The overall process looks a bit like this:
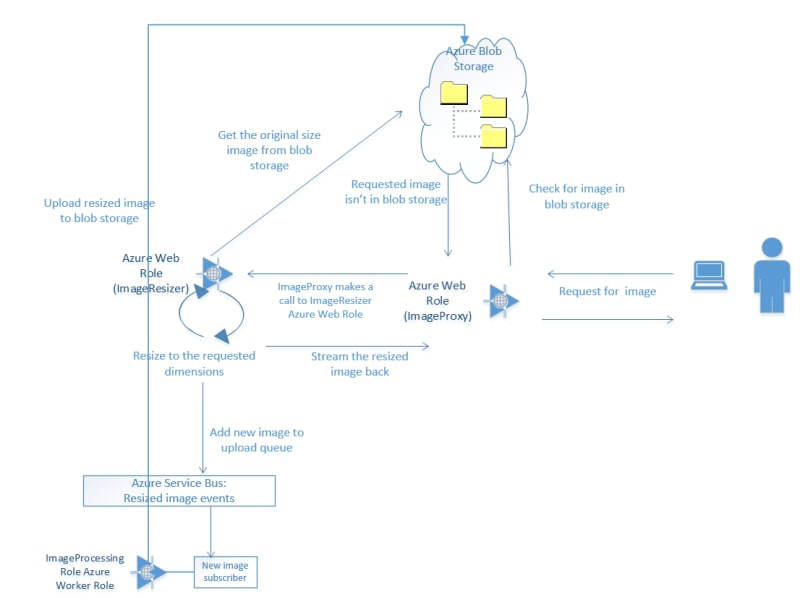
- The user makes a request for an image including the required dimensions, e.g. images.my-site.blah/400/200/image26.jpg, to the image proxy web role
- The image proxy web role tries to retrieve the image at the requested size from blob storage; if it finds it, it returns it; if not, it makes a request through to the image resizing web role
- The image resizing web role retrieves the original size image from blob storage (e.g. image26.jpg), and resizes it to the requested dimensions (e.g., 400×200)
- The resized image is returned to the user via the proxy and also added to an Azure Service Bus
- The image processing worker role subscribes to the Azure Service Bus, picks up the new image and uploads it to blob storage
First Things First: Prerequisites
To start with you’ll need to:
- Set up a Windows Azure account
- Have VS2010 or VS2012 and the appropriate Azure Cloud SDK
Fun Things Second: Image Resizing Azure Web Role
We’re going to focus on the resizing web role next.

For this you need to set up blob storage by logging into your Azure portal and following these simple steps:
Click “Storage”

Click “New”

Fill in the form
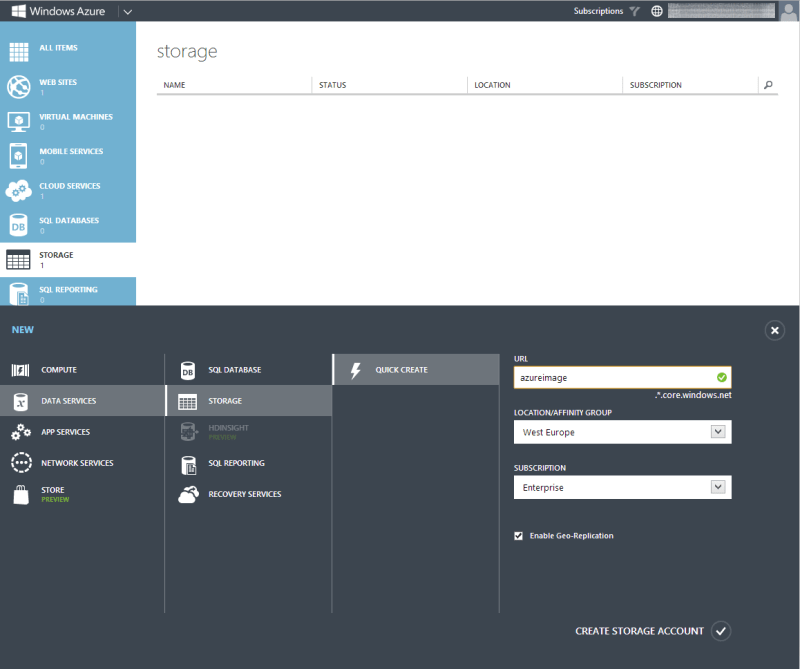
Click “Create”

Note your keys
Click

and note your storage account name and one of the values in the popup:
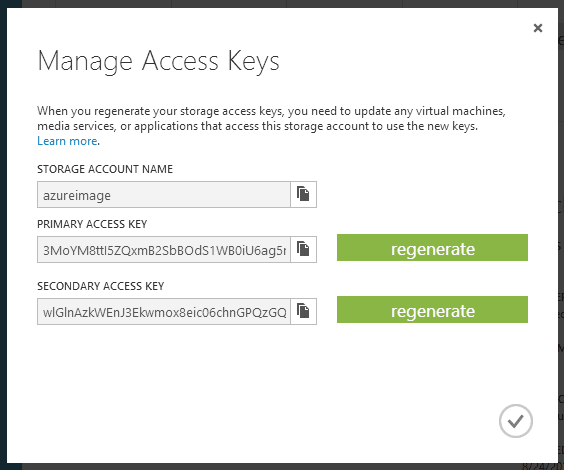
It doesn’t matter which one you use, but it means you can regenerate one key without killing a process that uses the other one. And yes, I’ve regenerated mine since I took the screenshot..
Upload some initial images
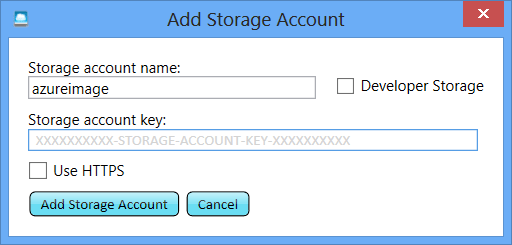
We can easily achieve this using the worker role we’re going to write and the service bus to which it subscribes to automate the process, but I’m just going to show off the nice little Azure Storage Explorer available over on CodePlex.
Go download and install it, then add a new account using the details you’ve just retrieved from your storage account
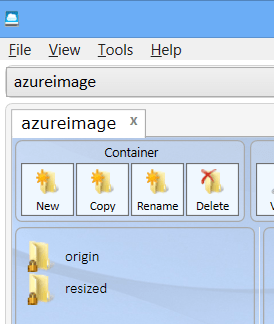
And initialise it with a couple of directories; origin and resized
Then upload one or two base images of a reasonable size (dimension wise).
CODE TIME
Setting up
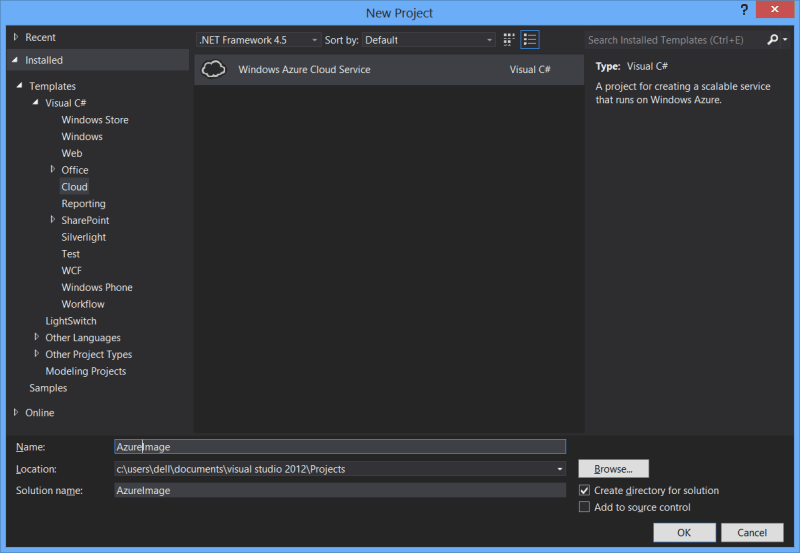
Bust open VS and start a new Cloud Services project
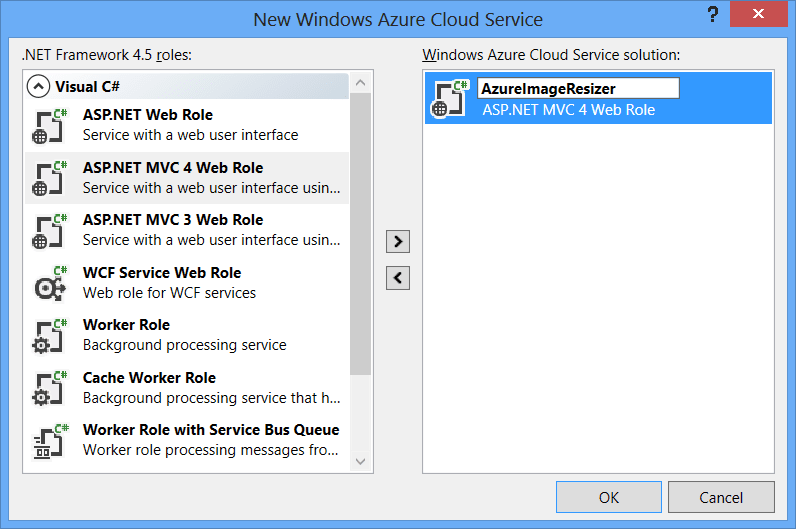
Select an MVC4 role
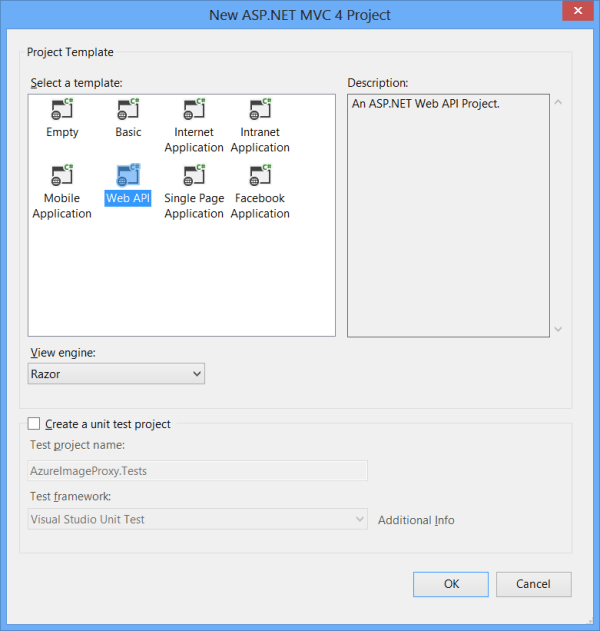
And Web API as the project type
At this point you could carry on but I prefer to take out the files and directories I don’t think I need (I may be wrong, but this is mild OCD talking..); I delete everything highlighted below:
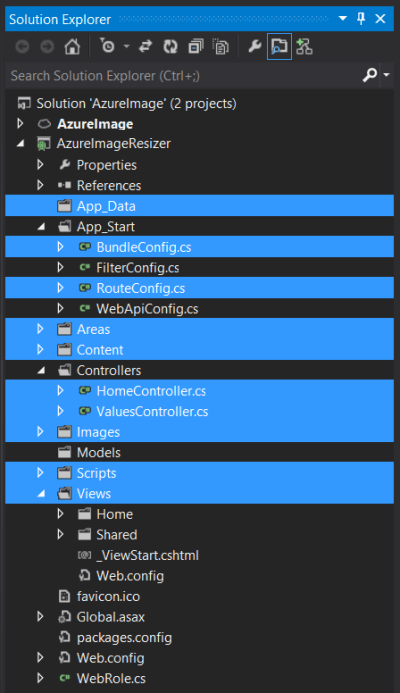
If you do this too, don’t forget to remove the references to the configs from global.asax.cs.
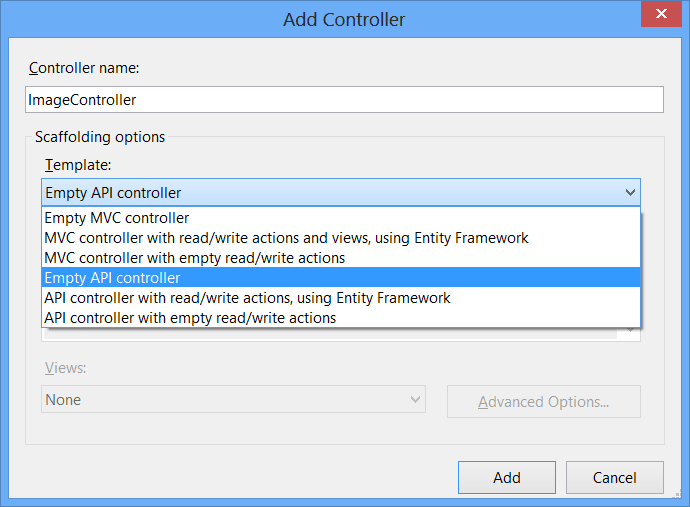
Building the Resizer
Create a new file called ImageController in your Controllers directory and use the Empty API controller template:
This is the main action that we’re going to be building up:
[HttpGet]
public HttpResponseMessage Resize(int width, int height, string source)
{
var imageBytes = GetFromCdn("origin", source);
var newImageStream = ResizeImage(imageBytes, width, height);
QueueNewImage(newImageStream, height, width, source);
return BuildImageResponse(newImageStream);
}
Paste that in and then we’ll crack on with the methods it calls in the order they appear. To get rid of the red highlighting you can let VS create some stubs.
First up:
GetFromCdn
This method makes a connection to your blob storage, connects to a container (in this case “origin”), and pulls down the referenced blob (image), before returning it as a byte array. There is no error handling here, as it’s just a proof of concept!
Feel free to grab the code from github and add in these everso slightly important bits!
private static byte[] GetFromCdn(string path, string filename)
{
var connectionString = CloudConfigurationManager.GetSetting("Microsoft.Storage.ConnectionString");
var account = CloudStorageAccount.Parse(connectionString);
var cloudBlobClient = account.CreateCloudBlobClient();
var cloudBlobContainer = cloudBlobClient.GetContainerReference(path);
var blob = cloudBlobContainer.GetBlockBlobReference(filename);

var m = new MemoryStream();
blob.DownloadToStream(m);

return m.ToArray();
}
This will give you even more red highlighting and you’ll need to bring in a few new assemblies;
- System.IO.MemoryStream
- Microsoft.WindowsAzure.Storage.CloudStorageAccount
- Microsoft.WindowsAzure.CloudConfigurationManager
You’ll need to add in the setting value mentioned:
CloudConfigurationManager.GetSetting("""Microsoft.Storage.ConnectionString")These config settings aren’t held in a web.config or app.config; you need to right click the web role within your cloud project and click properties, then settings, and Add Setting. Enter the values below, referring back to the details you previously got for your Storage Account
- Name: Microsoft.Storage.ConnectionString
- Value: DefaultEndpointsProtocol=http; AccountName=<your account name here>; AccountKey=<account key here>
ResizeImage
This method does the hard work; takes a byte array and image dimensions, then does the resizing using the awesome ImageResizer and spews the result back as a memorystream:
private static MemoryStream ResizeImage(byte[] downloaded, int width, int height)
{
var inputStream = new MemoryStream(downloaded);
var memoryStream = new MemoryStream();

var settings = string.Format("width={0}&height={1}", width, height);
var i = new ImageJob(inputStream, memoryStream, new ResizeSettings(settings));
i.Build();

return memoryStream;
}
In order to get rid of the red highlighting here you’ll need to nuget ImageResizer; open the VS Package Manager window and whack in:
Install-Package ImageResizerAnd then bring in the missing assembly reference;
- ImageResizer.ImageJob
QueueNewImage
This method takes the generated image byte array and puts it on an Azure Service Bus instance. As such, we need to go and create a new Azure Service Bus within the Azure portal.
Click “Service Bus”

Click “New”
Fill in the form
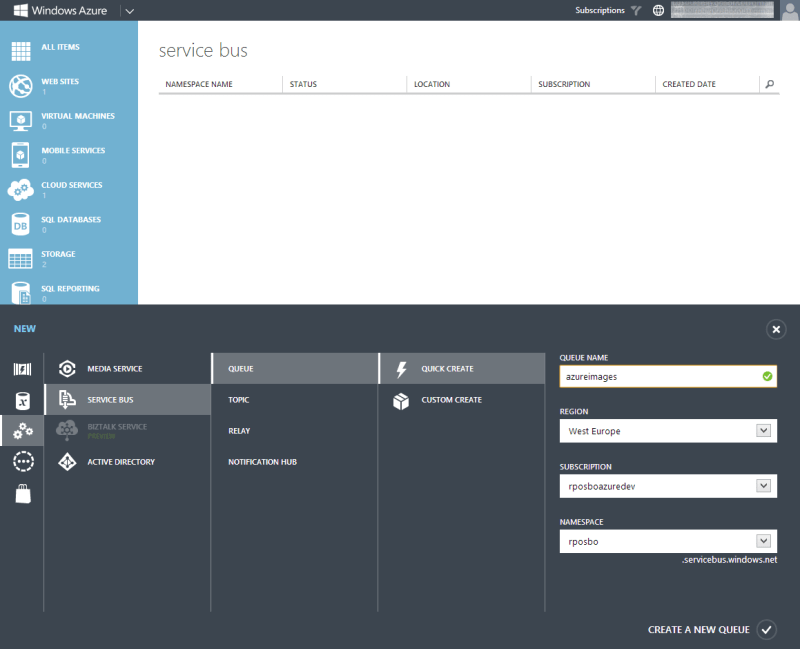
Click “Create”

What you’ve done here is set up a namespace to which you have assigned a new queue. When using this service bus you’ll connect to the namespace within the connection string and then create a queue client connecting to a named queue in code.
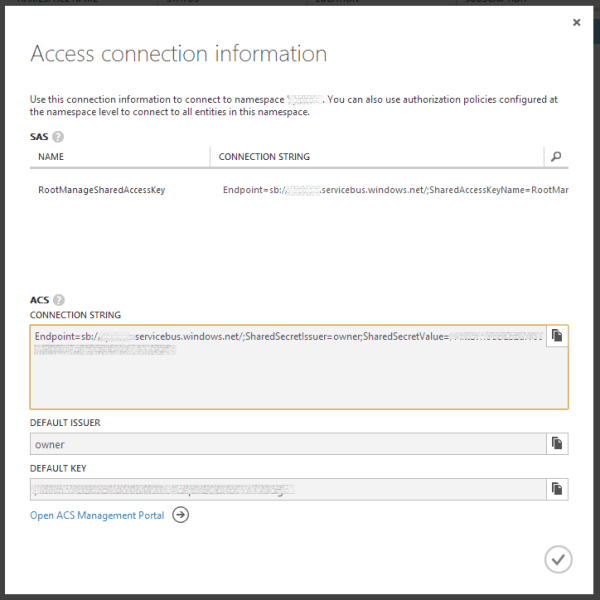
Note your connection details
At the service bus namespaces page click

and note your ACS connection string in the popup:
Set it up
You’ll need to nuget the azure service bus package, so in your VS package manager run
Install-Package WindowsAzure.ServiceBusAnd bring in the missing reference
- Microsoft.ServiceBus.Messaging
Paste in the following methods:
private static void QueueNewImage(MemoryStream memoryStream, int height, int width, string source)
{
var img = new ImageData
{
Name = source,
Data = memoryStream.ToArray(),
Height = height,
Width = width,
Timestamp = DateTime.UtcNow
};
var message = new BrokeredMessage(img);
QueueConnector.ImageQueueClient.BeginSend(message, SendComplete, img.Name);
}

private static void SendComplete(IAsyncResult ar)
{
// Log the send thing
}
Now we need to define the ImageData and QueueConnector classes. Create these as new class files:
ImageData.cs
public class ImageData
{
public string Name;
public byte[] Data;
public int Height;
public int Width;
public DateTime Timestamp;

public string FormattedName
{
get { return string.Format("{0}_{1}-{2}", Height, Width, Name.Replace("/", string.Empty)); }
}
}
QueueConnector.cs
This class creates a connection to your service bus namespace using a connection string, creates a messaging client for the specified queue, and creates the queue if it doesn’t exist.
public static class QueueConnector
{
public static QueueClient ImageQueueClient;
public const string QueueName = "azureimages";

public static void Initialize()
{
ServiceBusEnvironment.SystemConnectivity.Mode = ConnectivityMode.Http;
var connectionString = CloudConfigurationManager.GetSetting("Microsoft.ServiceBus.ConnectionString");
var namespaceManager = NamespaceManager.CreateFromConnectionString(connectionString);

if (!namespaceManager.QueueExists(QueueName))
{
namespaceManager.CreateQueue(QueueName);
}

var messagingFactory = MessagingFactory.Create(namespaceManager.Address, namespaceManager.Settings.TokenProvider);
ImageQueueClient = messagingFactory.CreateQueueClient(QueueName);
}
}
To get rid of the red you’ll need to reference
- Microsoft.ServiceBus.Messaging.MessagingFactory
- Microsoft.ServiceBus.NamespaceManager
- Microsoft.WindowsAzure.CloudConfigurationManager
As before, there now needs to be a cloud project setting for the following:
CloudConfigurationManager.GetSetting("Microsoft.ServiceBus.ConnectionString");Right click your web role within the cloud project, and click properties, then settings, and Add Setting. Enter the values below, referring back to the details you previously got for your Service bus
- Name: Microsoft.ServiceBus.ConnectionString
- Value: Endpoint=sb://<your namespace>.servicebus.windows.net/; SharedSecretIssuer=owner; SharedSecretValue=<your default key>
In order for this initialisation to occur, you need to add a call to it in the global.asax.cs Application_Start method. Add the following line after the various route and filter registrations:
QueueConnector.Initialize();Lastly BuildImageResponse
This method takes the image stream result, creates an Http response containing the data and the basic headers, and returns it:
private static HttpResponseMessage BuildImageResponse(MemoryStream memoryStream)
{
var httpResponseMessage = new HttpResponseMessage {Content = new ByteArrayContent(memoryStream.ToArray())};
httpResponseMessage.Content.Headers.ContentType = new MediaTypeHeaderValue("image/jpeg");
httpResponseMessage.StatusCode = HttpStatusCode.OK;

return httpResponseMessage;
}
This one requires a reference to
- System.Net.Http.Headers.MediaTypeHeaderValue
Running it all
Hopefully you should have something you can now hit F5 in and spin up a locally hosted web role which accesses remotely (Azure) hosted storage and an Azure Service Bus.
To get the action to fire, send off a request to – for example:
http://127.0.0.1/api/Image/Resize?height=200&width=200&source=image1.jpg
You should see something like:

Change those height and width parameters and you’ll get a shiny new image back each time:


Passing in the value of 0 for either dimension parameter means it’s ignored and the aspect ratio is preserved/no padding added.
You’ll also notice that your queue is building up with messages of these lovely new images:

Next Up
In the next post on this theme we’ll create a worker role to subscribe to the queue and upload the new images into blob storage.
I hope you’ve enjoyed this post; I certainly am loving working with Azure at the moment. It’s matured so much since I first tackled it several years ago.
The code for this post is available on GitHub; you’ll need to add in your own cloud settings though!
Troubleshooting
If you get the following error when hitting F5 –
Not running in a hosted service or the Development FabricBe sure to set the Cloud Project as the startup project in VS.