Node.js 101: Wrap up

Year of 101s, Part 1 – Node January

Summary – What was it all about?

I set out to spend January learning some node development fundementals.

Part #1 – Intro

I started with a basic intro to using node – a Hello World – which covered what node.js is, how to create the most basic of all programs, and mentioned some of the development environments.

Part #2 – Serving web content

Second was creating a very simple node web server, which covered using nodemon to develop your node app, the concept of exports, basic request routing, and serving various content types.

Part #3 – A basic API

Next was a simple API implementation, where I proxy calls to the Asos API, return a remapped subset of the data returned, reworked the routing creating basic search functionality and a detail page, and touched on being able to pass in command line arguements.

Part #4 – Basic deployment and hosting with Appharbor, Azure, and Heroku

Possibly the most interesting and fun post for me to work on involved deploying the node code on to three cloud hosting solutions where I discovered the oddities each provider has, various solutions to the problems this raises, as well as some debugging cleverness (nice work, Heroku!). The simplicity of a git-remote-push-deploy process is incredible, and really makes quick application development and hosting even more enjoyable!

Part #5 – Packages

Another interesting one was getting to play with node packages, the node package manager (npm), the express web framework, jade templating engine, and stylus css pre-processor, and deploying node apps with packages to cloud hosting.

Part #6 – Web-based development

The final part covered the fantastic Cloud9IDE, including a (very) basic intro to github, and how Cloud9 can still be used in developing and deploying directly to Azure, Appharbor, or Heroku.

What did I get out of it?

I really got into githubbing and OSSing, and really had to try hard to not over stretch myself as I had starting forking repos to try and make a few tweaks to things whilst working on the node month.

It has been extremely inspiring and has opened up so many other random tangents for me to explore in other projects at some other time. Very motivating stuff.

I’ve now got a month of half decent blog posts – I had only intended to do a total of 4 posts but including this one I’ve done 7, since I kept adding more information as it turned up and needed to split a few posts into two.

Also I’ve learned a bit about blogging; trying to do posts well in advance allowed me to build up the details once I’d discovered more whilst working on subsequent posts. For example, how Appharbor and Azure initially track master – but can be configured to track different branches. Also, debugging with Heroku only came up whilst working with packages in Heroku.

Link list

Node tutorials and references

Setting up a node development environment on Windows
Node Beginner – a great article, and I’ve also bought the associated eBooks.
nodejs.org – the official node site, the only place to go for reference

Understanding Javascript better

Execution in The Kingdom of Nouns
Object Orientation and Inheritance in Javascript

Appharbor

Appharbor and git

Heroku

Heroku toolbelt download and reference
node on Heroku

Azure

Checkout what Azure can do!

February – coming up, Samsung Smart TV App Development!

Yeah, seriously. How random is that?.. 🙂

Node.js 101 : Part #4 – Basic Deployment and Hosting with Azure, Heroku, and AppHarbor

Following on from my recent post about doing something this year, I’m committing to doing 12 months of “101”s; posts and projects themed at beginning something new (or reasonably new) to me.

January is all about node, and I started with a basic intro, then cracked open a basic web server with content-type manipulation and basic routing, and the last one was a basic API implementation

Appharbor, Azure, and Heroku

Being a bit of a cocky git I said on twitter at the weekend:

It’s not quite that easy, but it’s actually not far off!

Deployment & Hosting Options

These are not the only options, but just three that I’m aware of and have previously had a play with. A prerequisite for each of these – for the purposes of this post – is using git for version control since AppHarbor, Azure, and Heroku support git hooks and remotes; this means essentially you can submit your changes directly to your host, which will automatically deploy them (if pre-checks pass).

I’ll be using the set of files from my previous API post for this one, except I need to change the facility to pass in command line args for the api key to instead take it from a querystring parameter.

The initial files are the same as the last post and can be grabbed from github

Those changes are:

app.js (removed lines about getting value from command line):

var server = require("./server"),
    router = require("./router"),
    requestHandlers = require("./requestHandlers");

// only handling GETs at the moment
var handle = {}
handle["favicon.ico"] = requestHandlers.favicon;
handle["product"] = requestHandlers.product;
handle["products"]  = requestHandlers.products;

var port = process.env.PORT || 3000;
server.start(router.route, handle, port);

server.js (added in querystring param usage):

var http = require("http"),
    url = require("url");

function start(route, handle, port) {
  function onRequest(request, response) {
    var pathname = url.parse(request.url).pathname;
    var apiKey = url.parse(request.url, true).query.key;
    route(handle, pathname, response, apiKey);
  }

http.createServer(onRequest).listen(port);
  console.log("Server has started listening on port " + port);
}

exports.start = start;

The “.query” returns a querystring object, which means I can get the parameter “key” by using “.key” instead of something like [“key”].

Ideal scenario

In the perfect world all I’d need to do is something like:

git add .
git commit -m "initial node stuff"
git push {azure/appharbor/heroku/whatever} master
.....
done
.....
new site deployed to blahblah.websitey.net
.....
have a lovely day

and I could pop off for a cup of earl grey.

In order to get to that point there were a few steps I needed to take for each of the three hosts.

Appharbor

appharbor-home-1

Getting started

First things first; go and sign up for a free account with AppHarbor.

Then set up a new application in order to be given your git remote endpoint to push to.

I’ve previously had a play with Appharbor, but this is the first time I’m using it for more than just a freebie host.

Configuring

It’s not quite as simple as I would have liked; there are a couple of things that you need to bear in mind. Although Appharbor supports node deployments they are primarily a .Net hosting service and use Windows hosting environments (even though they’re on EC2 as opposed to Azure). Running node within iis means that you need to supply a web.config file and give it some IIS-specific info.

The config file I had to use is:

<configuration>
    <system.web>
        <compilation batch="false" />
    </system.web>
    <system.webServer>
        <handlers>
            <add name="iisnode" path="app.js" verb="*" modules="iisnode" />
        </handlers>
        <iisnode loggingEnabled="false" />

    <rewrite>
        <rules>
            <rule name="myapp">
                <match url="/*" />
                <action type="Rewrite" url="app.js" />
            </rule>
        </rules>
    </rewrite>
  </system.webServer>
</configuration>

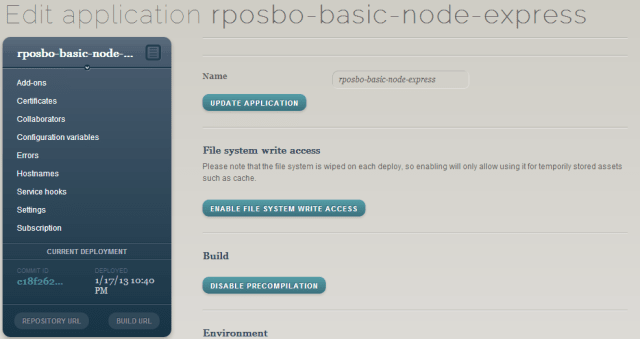
Most of that should be pretty straightforward (redirect all calls to app.js), but notice the lines about compilation and logging; the permissions under which the appharbor deployment process runs for node projects doesn’t have access to the filesystem so can’t create anything in a “temp” dir (precompilation) nor write any log files upon errors. As such, you need to disable these.

You could also enable file system access and disable precompilation within your application’s settings – as far as I can tell, it does the same thing.

appharbor-settings-1

Deploying

Commit that web.config to your repo, add a remote for appharbor, then push to it – any branch other than master, default, or trunk needs a manual deploy instead of it happening automatically, but you can specify the branch name to track within your appharbor application settings; I put in the branch name “appharbor” that I’ve been developing against and it automatically deploys when I push that branch or master, but not any others.

You’ll see your dashboard updates and deploys (automatic deployment if it’s a tracked branch):

appharbor-deploy-dashboard-1

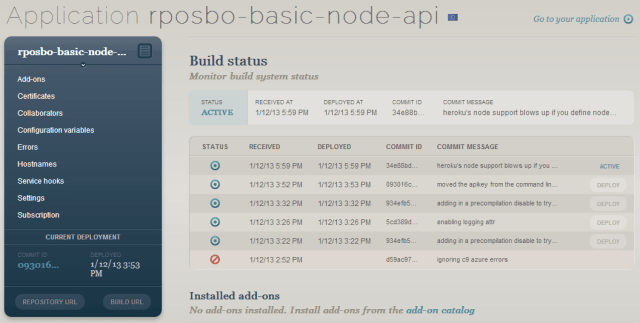
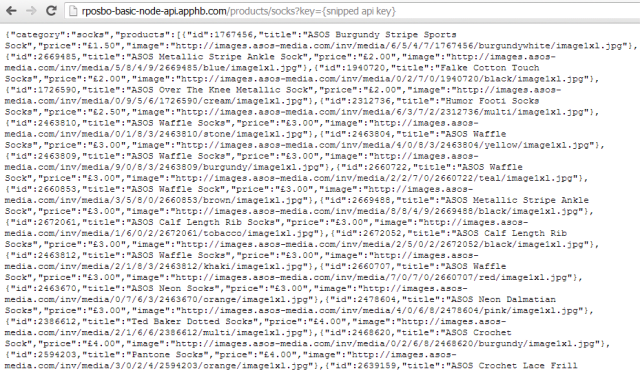
And then you can browse to your app:

appharbor-deploy-result-1

Azure

azure-home-1

Getting started

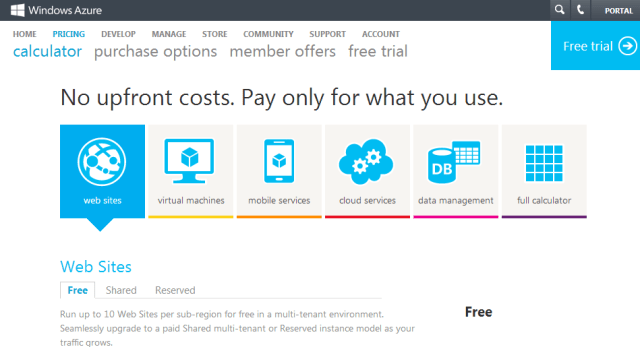
Again, first step is to go and sign up for Azure – you can get a free trial, and if you only want to host up to 10 small websites then it’s completely free.

You’ll need to set up a new Azure website in order to be given your git remote endpoint to push to.
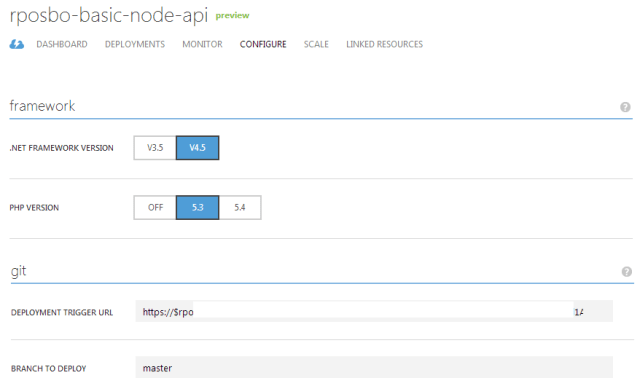
Configuring

This is pretty similar to the AppHarbor process in that Azure Websites sit on Windows and IIS, so you need to define a web.config to set up IIS for node. The same web.config works as for AppHarbor.

Deploying

Although you can push to Appharbor from any branch and it will only deploy automatically from the specific tracked branch, you can’t choose to manually deploy from within azure, so you either need to use

git push azure {branch}:master

(assuming your remote is called “azure”) or you can define your tracked branch in the configuration section:

azure-settings-1

Following a successful push your dashboard updates and deploys:

azure-deploy-dashboard-1

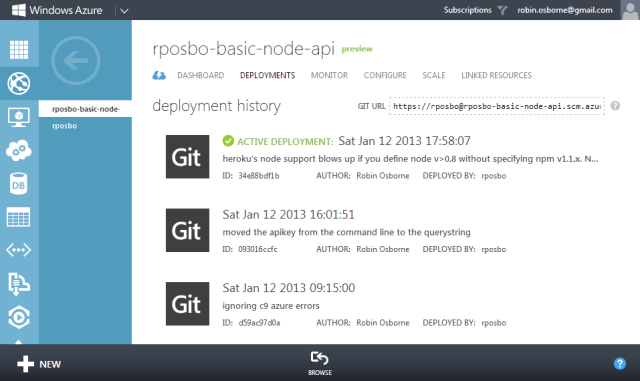
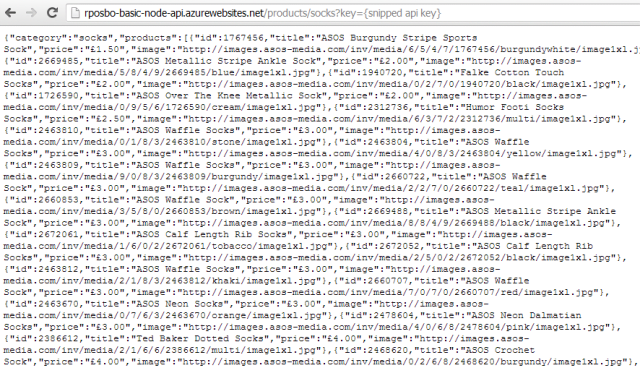
And then your app is browsable:

azure-deploy-result-1

Heroku

heroku-home-1

Getting started

Sign up for a free account.

Configuring

Heroku isn’t Windows based as it’s aimed at hosting Ruby, Node.js, Clojure, Java, Python, and Scala. What this means for our node deployment is that we don’t need a web.config to get the application running on Heroku. It’s still running on Amazon’s EC2 as far as I can tell though.

However, we do need to jump through several other strange hoops:

Procfile

The procfile is a list of the “process types in an application. Each process type is a declaration of a command that is executed when a process of that process type is executed.” These can be arbitrarily named except for the “web” one which handles HTTP traffic.

For node, this Procfile needs to be:

Procfile:

web: node app.js

Should I want to pass in command line arguments, as in the previous version of my basic node API code, I could do it in this file i.e.

web: node app.js mYAp1K3Y

Deploying

Heroku Toolbelt

There’s a command line tool which you need to install in order to use Heroku, called the Toolbelt; this is the Heroku client which allows you to do a lot of powerful things from the command line including scaling up and down, and start and stopping your application.

Instead of adding heroku as a git remote yourself you need to open a command line in your project’s directory and run

heroku login

and then

heroku create

Your application space will now have been created within Heroku automatically (no need to log in and create one first) as well as your git remote; this will have the default name of “heroku”

Deploying code is still the same as before

git push heroku master

In Heroku you do need to commit to master to have your code built and deployed, and I couldn’t find anywhere to specify a different tracking branch.

Before that we need to create the last required file:
package.json:

{
  "name": "rposbo-basic-node-hosting-options",
  "author": "Robin Osborne",
  "description": "the node.js files used in my blog post about a basic node api being hosted in various places (github, azure, heroku)",
  "version": "0.0.1",
  "engines": {
    "node": "0.8.x",
    "npm": "1.1.x"
  }
}

This file is used by npm (node package manager) to install the module dependencies for your application; e.g. express, jade, stylus. Even though our basic API project has no specifc dependencies, the file is still required by Heroku in order to define the version of node and npm to use (otherwise your application simply isn’t recognised as a node.js app).

Something to consider is that Heroku doesn’t necessarily have the same version of node installed as you might; I defined 0.8.16 and received an error upon deployment which listed the available versions (the highest at time of writing is 0.8.14). I decided to define my required version as “0.8.x” (any version that is major 0 minor 8).

However, if you define a version of node in the 0.8.x series you must also define the version of npm. A known issue, apparently. Not only that, it needs to be specifically “1.1.x”.

Add these settings into the “engines” section of the package.json file, git add, git commit, and git push to see your dashboard updated:

heroku-deploy-dashboard-1

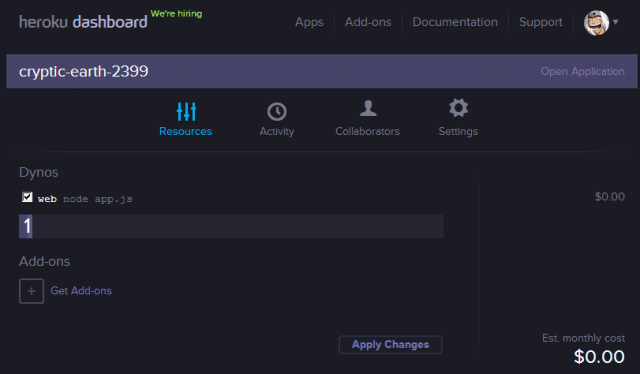
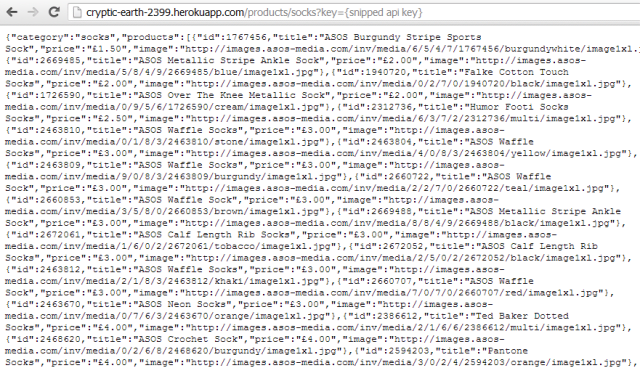
And then your app – with a quite random URL! – is available:

heroku-deploy-result-1

If you have problems pushing due to your existing public keys not existing within heroku, run the following to import them

heroku keys:add

You can also scale up and down your number of instances using the Heroku client:

heroku ps:scale web=1

Debugging

The Heroku Toolbelt is a really useful client to have; you can check your logs with

heroku logs

and you can even leave a trace session open using

heroku logs --tail

, which is amazing for debugging problems.

The error codes you encounter are all listed on the heroku site as is all of the information on using the Heroku Toolbelt logging facility.

A quick one: if you see the error “H14”, then although your deployment may have worked it hasn’t automatically kicked off a web role – you can see this where it says “dyno=” instead of “dyno=web.1”; you just need to run the following command to start one up:

heroku ps:scale web=1

Also – make sure you’ve created a Procfile (with capitalised “P”) and that it contains

web: node app.js

Summary

Ok, so we can now easily deploy and host our API. The files that I’ve been working with throughout this post are on github; everything has been merged into master (both heroku files and web.config) so it can be deployed to any of these hosts.

There are also separate branches for Azure/Appharbor and Heroku should you want to check the different files in isolation.

Next Up

Node packages!

WebForms ScriptManager Vs MVC – FIGHT!

If you’ve tried to squeeze MVC into a WebForms project which uses ScriptManager elements for AJAX functionality, be sure to add some hardcore IgnoreRoute entries in your route registration section.

If you don’t then you’ll find the calls to your asmx webservice that ScriptManager creates will receive 404 errors looking for asmx/js or asmx/jsdebug that contain an HTTPException which looks like:

The controller for path blah.asmx/js was not found or does not implement IController

or if you’re in debug mode

The controller for path blah.asmx/jsdebug was not found or does not implement IController

This basically means that the pattern {folder}/{file}.asmx/{something} isn’t matching a route. Since it shouldn’t match one then you need to make sure you add in an exception.

Ignore a specific file type

This one didn’t actually work for me as expected, but is worth listing here:

routes.IgnoreRoute("{resource}.asmx/{*pathInfo}");

Ignore an entire folder

This brute force attack worked for me:

routes.IgnoreRoute("{folder}/{*pathInfo}", new { folder = "WebServices" });

Strangeness

I didn’t need to add in the IgnoreRoute on one IIS7 instance but did on another IIS7 server. Not sure why, probably due to HTTPHandler configuration within IIS itself?

Scripting the setup of a developer PC, Part 3 of 4 – Installing.. uh.. everything.. with Chocolatey.

This is part three of a four part series on attempting to automate installation and setup of a development PC with a few scripts and some funky tools. If you haven’t already, why not read the introductory post about ninite or even the second part about the command line version of WebPI? Disclaimer: this series was inspired by a blog from Maarten Balliauw.

Installing.. uh.. everything..: Chocolatey

Chocolatey is sort of “apt-get for windows” using powershell; it doesn’t quite achieve that yet, but the idea is the same; imagine nuget + apt-get. It works exactly like nuget but is meant to install applications instead of development components. The next release will support webpi from within chocolatey, but more on that in a moment.

There’s not much to look at yet, but that’s the point; you just type what you want and it’ll find and install it and any dependencies. I want to install virtualclonedrive, some sysinternals goodies, msysgit, fiddler, and tortoisesvn.

Before you start, make sure you’ve relaxed Powershell’s execution policy to allow remote scripts:

Set-ExecutionPolicy Unrestricted

Ok, now we can get on with it. I can now execute a new powershell script to install choc and those apps:

# Chocolatey
iex ((new-object net.webclient).DownloadString('http://bit.ly/psChocInstall'))

# install applications
cinst virtualclonedrive
cinst sysinternals
cinst msysgit
cinst fiddler
cinst tortoisesvn

This script will download (DownloadString) and execute (iex) the chocolatey install script from the bit.ly URL, which is just a powershell script living in github:
https://raw.github.com/chocolatey/chocolatey/master/chocolateyInstall/InstallChocolatey.ps1

This powershell script currently resolves the location of the chocolatey nuget package:
http://chocolatey.org/packages/chocolatey/DownloadPackage

Then, since a nupkg is basically a zip file, the chocolatey script unzips it to your temp dir and fires off chocolateyInstall.ps1; this registers all of the powershell modules that make up chocolatey. The chocolatey client is essentially a collection of clever powershell scripts that wrap nuget!

Once chocolatey is installed, the above script will fire off “cinst” – an alias for “chocolatey install” – to install each listed application.

What’s even more awesome is that the latest – not yet on the “master” branch – version of Chocolatey can install using webpi. To get this beta version, use the extremely terse and useful command from Mr Chocolatey himself, Rob Reynolds (@ferventcoder):

Adding in the install of this beta version allows me to use choc for a few more webpi components:

# Chocolatey
iex ((new-object net.webclient).DownloadString('http://bit.ly/psChocInstall'))

# install applications
cinst virtualclonedrive
cinst sysinternals
cinst msysgit
cinst fiddler
cinst tortoisesvn

# getting the latest build for webpi support: git clone git://github.com/chocolatey/chocolatey.git | cd chocolatey | build | cd _{tab}| cinst chocolatey -source %cd%
# I’ve already done this and the resulting nugetpkg is also saved in the same network directory: 
cinst chocolatey –source "Z:\Installation\SetupDevPC\"

# Now I’ve got choc I may as well use it to install a bunch of other stuff from WebPI;
# things that didn’t always work when I put them in the looong list of comma delimited installs
# IIS
cinst IIS7 -source webpi
cinst ASPNET -source webpi
cinst BasicAuthentication -source webpi
cinst DefaultDocument -source webpi
cinst DigestAuthentication -source webpi
cinst DirectoryBrowse -source webpi
cinst HTTPErrors -source webpi
cinst HTTPLogging -source webpi
cinst HTTPRedirection -source webpi
cinst IIS7_ExtensionLessURLs -source webpi
cinst IISManagementConsole -source webpi
cinst IPSecurity -source webpi
cinst ISAPIExtensions -source webpi
cinst ISAPIFilters -source webpi
cinst LoggingTools -source webpi
cinst MetabaseAndIIS6Compatibility -source webpi
cinst NETExtensibility -source webpi
cinst RequestFiltering -source webpi
cinst RequestMonitor -source webpi
cinst StaticContent -source webpi
cinst StaticContentCompression -source webpi
cinst Tracing -source webpi
cinst WindowsAuthentication -source webpi

Best bit about this? When you run the first command you’ll download and install the latest version of the specified executable. When this succeeds you’ll get:

 <thing> has finished successfully! The chocolatey gods have answered your request!

Nice.

You’ll hopefully see your Powershell window update like this a few times:
choc_install (click to embiggen)

But depending on your OS version (I’m using Windows Server 2008 R2) you might see a few alerts about the unsigned drivers you’re installing:
choc_alert

That doesn’t seem to be avoidable, so just click to install and continue.

You might also find that your own attempts to install the beta version of chocolatey fail with errors like these:
choc_install_choc_fail1
or
choc_install_choc_fail2 (click to embiggen)

This is due to how you reference the directory in which your beta choc nuget package lives. If you reference it from a root dir (e.g. “Z:\”) then it’ll fail. Put it in a subdirectory and you’re golden:
choc_install_choc_success2
or using “%cd%” as the source dir (assuming you’re already in that dir):
choc_install_choc_success1

So, with my new powershell script and the beta chocolatey nupkg, along with the existing script for ninite, webpi and their components, my PC Setup directory now looks like this:

281211_autoinstall_choc_dir_contents

The last part of this series focuses on installing other things that either can’t be done or just didn’t work using one of the previous options, a list of “interesting things encountered”, and a conclusion to the whole project; see you back in:

Scripting the setup of a developer PC, Part 4 of 4 – Installing Custom Stuff, Interesting Things Encountered, and Conclusion.

Update: The chocolatey “beta” I mentioned is actually now in the mainline.