Running detailed website performance tests is often necessary to understand how a website is experienced by an end user in order to identify opportunities for improvements.
WebPageTest.org gives us the ability to run these tests from all over the world – the public instance even gives us access to real devices, so we can check how a site works across different browsers on different versions of different operating systems on different real devices!
In my previous articles I explained how to easily set up your very own private, autoscaling, WebPageTest server. This private instance creates test agents in AWS, dotted around AWS regions, which can emulate a mobile browser; this uses the device emulation in Chrome to throttle network, CPU, memory, etc and change the available screen size.
While this mobile emulation is simple to set up and use, sometimes an emulator isn’t enough; device-specific edge cases, operating system limitations, and performance on a real device may need to be validated to get confidence that everything works as expected in the real world.
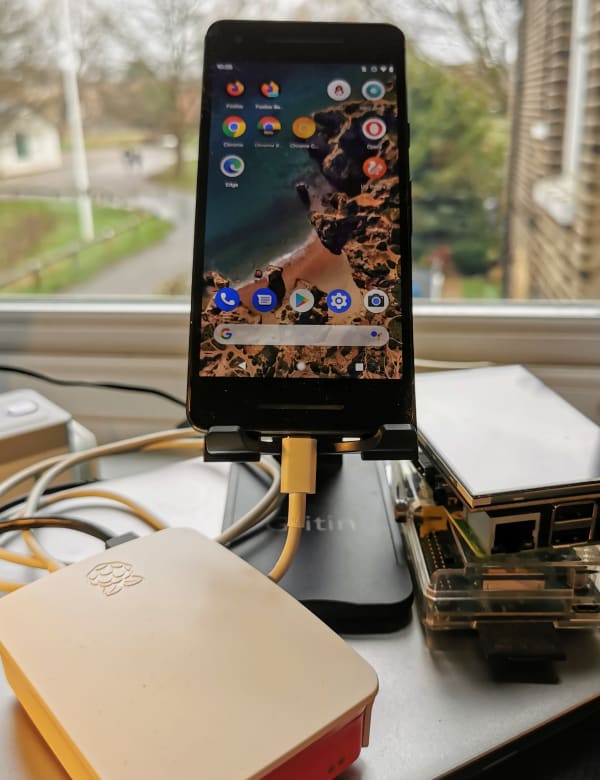
In this article I’ll show you how to set up an Android phone as your own WebPageTest agent to connect to your private WebPageTest server, controlled by a Raspberry Pi!
To get this all working we’re going to need three things:
- A spare Android phone,
- Raspberry Pi 3 – I’d suggest at least rPi 3 or above,
- Private WebPageTest server to connect it to – if you don’t already have one, head over to my earlier articles to set yours up then come back here!
That’s the game plan; I hope you’re looking forward to it – it’s going to be great!
Raspberry Pi
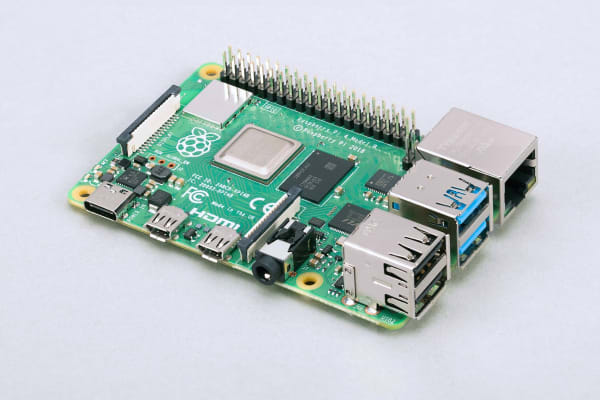
Before we dive into the main sections, let’s briefly review the Raspberry Pi. A Raspberry Pi is a very small, cheap, computer that’s "useful for lots of things". It can do many of the things that laptops, PCs, or even servers do, but at a fraction of the price.
In this project we will use the raspberry Pi as the WebPageTest agent which communicates with the WebPageTest server and executes tests on the attached Android device.
Want to connect more devices to your WebPageTest server? Just get a raspberry Pi for each device! You can save time by setting up one then creating an image and reusing that, changing the variables as necessary.
Preparing the Phone
The Android phone needs to be unlocked and rooted before it can be used as a test agent; here’s how we’re going to do that.
The steps below can potentially brick your device, making it completely useless. Proceed at your own risk; only try this with a spare old phone that you’re willing to sacrifice.
Prerequisite
To allow us to connect to the phone from a computer we need to install Android Debug Bridge (adb), which is part of the Android platform tools
Head over to the android website and download platform tools for your operating system: Platform Tools Download
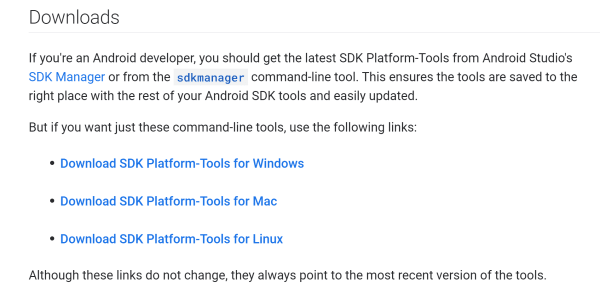
Download and extract the platform tools, then either add the "platform tools" directory to your PATH, or open a terminal/prompt in that directory for using adb.
Now we’re ready to unlock the phone (this step doesn’t harm your device; it’s the rooting part that’s potentially risky).
Developer Mode & Unlocking
In this part we will configure the Android phone to allow us to upload a "patched" version of the usual firmware, which gives us root access. This is necessary to control it from the raspberry pi as a webpagetest agent.
The stages are:
- Enable Developer Mode and configure necessary developer settings
- "Unlock" the device using
adbandfastboot– this will wipe the device
Ready? Let’s get cracking!
Enable Developer Mode and configure necessary developer settings
The location of the settings below might be slightly different for each version of Android OS (e.g. Samsung, Huawei, etc); you might need to search a bit to find the equivalent settings.
Go to Settings -> About -> and tap build number 7 times – you should see the "you are now a developer!" message appear. Yay! Go you! This will have unlocked Developer Options.
Navigate to Developer Options (sometimes under "Advanced Settings")
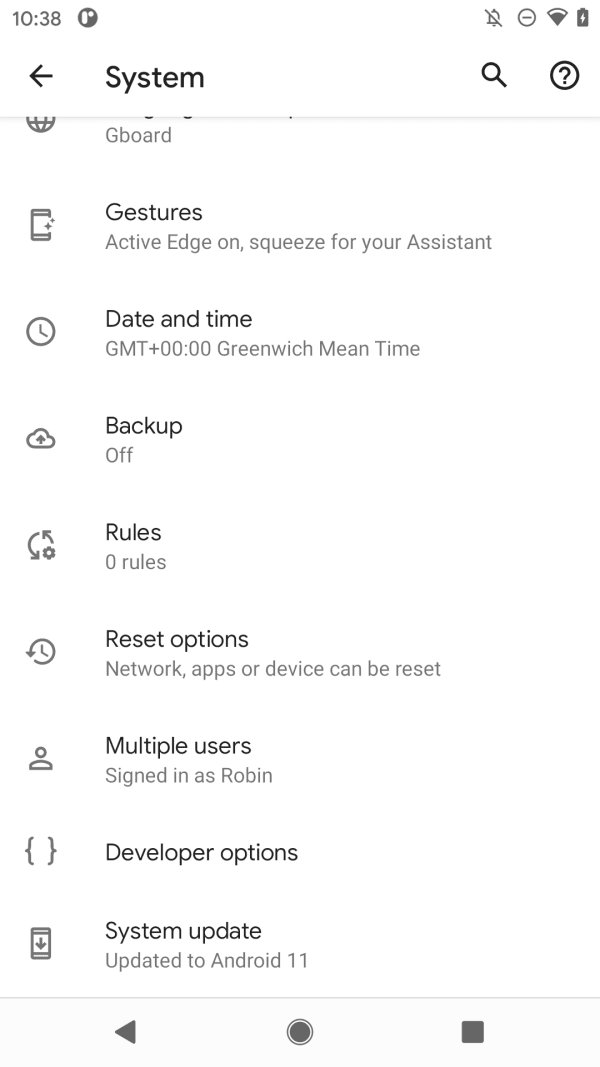
Enable OEM unlock and USB debugging.

"Unlock" the device using adb and fastboot
Now that you’ve enabled USB debugging, you can connect your phone to the computer that has adb installed; this will display a prompt on the phone itself to allow USB debugging for the attached computer – allow this and we can continue.
Restart your phone into the bootloader; you can usually use a combo of holding the power and volume up keys while it restarts, or run
adb reboot bootloaderon your connected pc.
Restarting into the bootloader might have a different key combo for you; search for your make’s combo, or just use
adb reboot bootloaderfrom your attached computer.
The device will restart into the bootloader, which is a mostly black screen, the green "android" robot laying down, and a simple menu which can be navigated using volume and power buttons.
We’re going to access it directly from adb. Let’s unlock the device by connecting to the computer that has adb installed and running
fastboot flashing unlock from the same directory as adb. This will display a warning on your phone that all data will be wiped from the device. If you’re happy to continue, use the volume keys to highlight "Unlock" and use the power button to accept it and continue.
I’m Rooting For You
If you’ve come this far, then you may as well keep going, right? MEGA DISCLAIMER: I cannot help you if you get stuck in this next part, nor can I help if you brick your device! I have only done this on one device (the Pixel 2), so can’t advise for other devices – please don’t ask!
In this part we will upload a "patched" version of the usual firmware, which gives us root access. This is necessary to control it from the raspberry pi as a webpagetest agent.
The stages are:
- Download the correct stock firmware for your device
- Install something to patch this firmware (Magisk) on the device
- Upload the stock firmware to the device
- Patch it on the device
- Download the patched firmware from the device to your computer
- Put the device into bootloader state and upload the patched firmware
Sound good? It’s a bit tricky, but we’re almost there! Stick with it!
Download the correct stock firmware for your device
Firstly we need to get the correct stock firmware for the device; this is usually available from the manufacturer’s websites. For example, I can get my Pixel 2’s stock firmware from the android website: Pixel 2 stock firmware – “Walleye”
It’s important to use the correct version of the firmware; for example, I can look at the build number for my Pixel 2 to see that I need the version matching build "RP1A.200720.009", which appears in the list as "Sep 2020"
You may need to search around for this, but it should be available from your device manufacturer’s website somewhere. Once you’ve downloaded and unzipped this on your computer, find "boot.img" in there and move on to the next step.
Install something to patch this firmware (Magisk) on the device
I used Magisk Manager for this process; the instructions are over on the website: https://magiskmanager.com/
Essentially you’re downloading the Magisk Manager apk which handles installing Magisk itself. You might get warnings that "your current settings do not allow installations from this location" or similar; just hit the "settings" prompt and "allow", then try to "install" again.
Once Magisk Manager is installed, open it, update if prompted, and tap to "install" Magisk; you might need to "allow" this to install as you did above. Once Magisk is installed we can move on.
Upload the stock firmware to the device
The easiest method is via adb, which can transfer files between your computer and your android device:
adb push <path to the boot.img you extracted> /sdcard/DownloadPatch it on the device
In Magisk, press Install > Patch Boot Image File, and select the stock boot.img file you just uploaded.
Magisk Manager will now patch your boot image, and store it in
[Internal Storage]/MagiskManager/patched_boot.imge.g.
/sdcard/MagiskManager/patched_boot.imgDownload the patched firmware from the device to your computer
Again, adb is your friend, which will transfer the patched boot.img file to the current working directory on your computer:
adb pull /sdcard/MagiskManager/patched_boot.imgPut the device into bootloader state and upload the patched firmware
Last step for this section! Nearly there!
It’s all about adb and fastboot again; first, put the device to the bootloader, then flash the patched firmware:
- First:
adb reboot bootloader - Then:
fastboot flash boot <path to patched boot>.img
Checkpoint
Once you’ve completed the above steps you will have a fully prepared Android device. Head over to Play store and install the browsers you want to test on; bear in mind the supported browsers for WPT on Android are, at time of writing:
- Chrome (Stable, Beta, Dev and Canary)
- Samsung Internet
Several browsers run as "black box" tests (single page load, visual metrics only):
- Chrome (Stable, Beta, Dev and Canary)
- Samsung Browser
- Opera
- Opera Mini
- UC Browser
- UC Mini
- Firefox (Stable and Beta)
I’ll admit I’m a bit over optimistic with browser support…
Next up, let’s get your WPT server ready so we can connect a raspberry Pi as the WPT agent to control the phone.
WebPageTest Server Configuration
Before we get to the final stage of this mission, let’s get your WPT server ready. SSH in (ssh root@[your WPT instance URL]), change directory to
/var/www/webpagetest/www/settings/ and open or create locations.ini; we need to add a new location group, and a new location.
The name you use for the location must match the location used later in the agent configuration (e.g. WPT_LOCATION=london) else it won’t connect. You can refer to the example in the WPT github repo: locations.ini.sample
The structure of this file is:
[locations]
1=name-of-location-group-1
default=name-of-default-location

[name-of-location-group-1]
1=name-of-location-1
label="description of location group"

[name-of-location-1]
key=hardcoded-value-for-location_key
browser=list,of,installed,browsers
label=what-to-show-in-WPT-UI
Example:
[locations]
1=london-group
default=london

[london-group]
1=london
label="My house"

[london]
key=abcd1234
browser=Chrome,Firefox
label="Pixel 2"
The value used in WPT_LOCATION later is the name of the location, not the location group, i.e. "london" in my example above, not "london-group" or "Pixel 2".
The value used in WPT_KEY later is the value you set for key, i.e. abcd1234 in my example above.
Last section coming up; we’re nearly there!
Setting up the Raspberry Pi
The raspberry Pi is the actual webpagetest agent that connects to your WebPageTest server, polls for tests to run, executes the tests on the attached Android device, and pushes the results back to your WPT server.
Prerequisites
- Micro SD card, at least 32 GB; get a decent SD card else you’ll get corrupt files everywhere, breaking installation. Ask me how I know…
- Raspberry Pi 3B or above
- USB keyboard and HDMI monitor
- All the necessary cables for power
WPT recommends raspberry Pi 3B or above. I’ve tried with my old rPi1 and it didn’t really work; the architecture is different on the pi 1, so you need to install custom nodejs builds etc. Save yourself some trouble and invest in at least a rPi3B.
In this section we’ll install the base Operating System for the raspberry Pi, set some environment variables, then let the WPT agent install script do its thing while we drink coffee.
The stages are:
- Download the Raspberry Pi OS and Flash to a SD Card
- Boot up the Raspberry Pi and Set environment variables
- Execute the WPT installation
Download the Raspberry Pi OS and Flash to a SD Card
If you have your own SD flashing software, then you can manually download and flash the "lite" OS to your SD card: head over to the raspberry Pi site to download the "lite" OS (no desktop needed): raspberry pi OS downloads
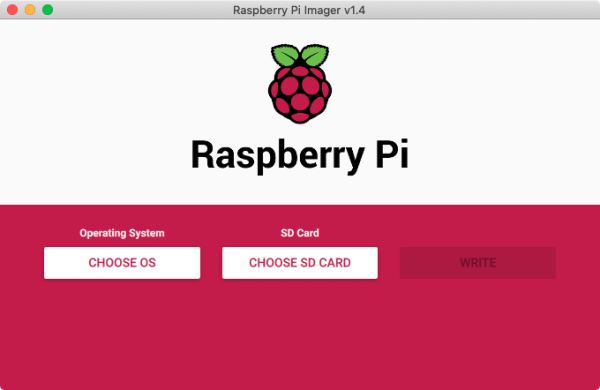
If you don’t already have SD flashing software, then just download the rpi-imager which does it all in one: raspberry pi imager
Boot up the Raspberry Pi and Set Environment Variables
Pop that flashed SD card in your raspberry Pi, connect up the keyboard and monitor and power it up.
- Log on as
piwith default passwordraspberry - Run
sudo raspi-configto: - Change your password
- Set up SSH (to remotely access the pi)
- Configure wifi (if you’re not using ethernet)
- Expand the filesystem to fill the entire SD card
Once that’s all done, it’s useful to set some WPT environment variables to save you editing config files later:
export WPT_LOCATION=<the location from locations.ini>
export WPT_SERVER=<your private WPT server URL>
export WPT_KEY=<your private WPT server *location* key>
export WPT_DEVICE_NAME=<the name of this rPi as you want it to appear, e.g. "Pixel2">
export AGENT_MODE=android
Important: WPT_LOCATION must match an entry in your WPT server’s locations.ini file, else it just won’t appear to connect. Scroll back up a bit to see where this is set.
Also important: WPT_KEY is not your API key; it is the location key. The value is either manually set in your locations.ini config file (as we did earlier), or is the auto-generated default that’s created during your WPT server installation and appears at the bottom of your WPT server’s settings.ini file at
/var/www/webpagetest/www/settings/settings.ini The value in locations.ini overrides the value in settings.ini for a given location.
Just as important: setting these environment variables just sets values that would otherwise be asked for during installation; changing them after installation does nothing, as the files have already been created with the specified values hard coded in them.
If you need to change them after installation, just log on to your raspberry pi and edit agent.sh in the home directory; look for the line that starts:
python wptagent.py -vvvv --name=... --location=... --key=...Edit the values for location, key, and server as necessary; notice that server needs to end with /work/ not just a bare /.
Be aware that there are two, almost identical, lines: the commented out one has a
vpntetherparameter set, which needs more configuration to get working; save that for extra credit homework (then tell me how you got it working please) and just use the uncommented line without thevpntetherparam.
Execute the WPT installation
Using screen is optional, but since the install process is so slow it’s well worth doing if you’re SSH-ed in, since losing that SSH connection will fail the installation otherwise. Screen is installed as part of the WPT agent install, but is handy to have during the install also.
Screen allows you to run things as background processes. If you’re a fan of tmux feel free to do that instead.
Install screen:
sudo apt install -y screenStart a new screen:
screenNow kick off the install:
bash <(curl -s https://raw.githubusercontent.com/WPO-Foundation/wptagent-install/master/raspbian.sh)Fill in any missing variables that you’re prompted for, then go for a long walk; this will take a while.
Eventually you’ll see "Install is complete. Please reboot the system to start testing (sudo reboot)" – that’s your cue to reboot
Finishing Up
We now have a prepped Android phone and a configured raspberry pi WPT agent. Time to wire it all up!
Connect the Android phone to the Raspberry Pi via USB and power the rPi up. At some point you will see a prompt on your Android device to allow USB debugging for the attached computer (now the rPi) – allow it. You’ll also be prompted to "Grant super user access for process" – it might not appear until the first test is started though.
Head over to your WPT server private instance; you should see your phone’s configuration in the available test locations (since this was defined in your WPT server’s locations.ini file, which I mentioned earlier).
Validate it’s connecting to your WPT server before moving on: head to
<your WPT server>/getLocations.php?f=htmlor
<your WPT server/getTesters.php?f=htmlThere can be more of a delay before it appears on
<your WPT server>/install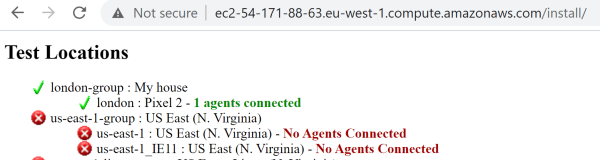
If you can’t see it in your attached agents then start troubleshooting before moving on. Things to check include:
- Did you set environment variables before installation?
- Check the values in
agent.shand change them if they’re not right. - Does your
locationvalue match that in your WPT server’slocations.inifile? - Did you use the WPT API key instead of the value of the
keyfrom yourlocations.ini? - Can you ssh into your WPT server and run
tail -f /var/log/nginx/access.logto see your agent pinging for work? If so, check the
locationandkeyvalues in the requests to make sure they’re correct; if not, check theservervalue is correct in youragent.shfile - Does the line in
agent.shhave thevpntetherparam set? If so, comment this line out and uncomment and edit the other line without this param. - Can your raspberry pi connect to your device? ssh in to the pi and run
screen -rto attach to the wptagent process – loads of useful information is here, including attempts to connect to the device, and requests made to WPT server. Don’t forget to detach (ctrl a+d) instead ofexit, else you’ll need to restart the raspberry pi.
If all is good then you can enter a URL, select your new agent, and hit "GO" – if everything was done correctly you should eventually see your Android device open up a browser and load a webpage while your WPT server shows the usual test progress.
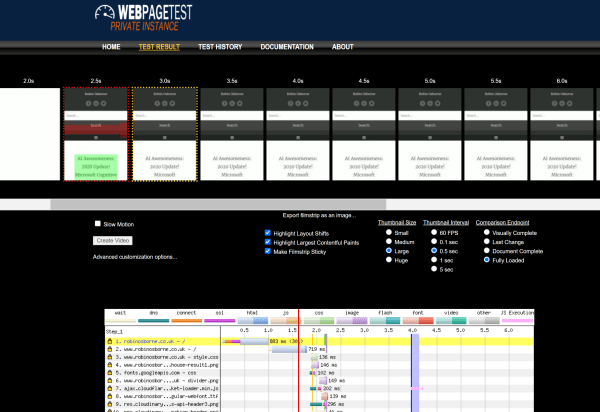
Once completed you’ll have all the usual data, videos, filmstrips, etc, but all for web performance tests executed on a real device!

Hmm, looks like this site has some improvement opportunities:
Summary
Now it’s over to you: stock up on raspberry pi and old phones, add in some networking hardware, phone stands, and heatsinks for the raspberries, and you’ve got a device lab! (I’ll show mine in a follow up)
Advanced step to try for extra credit: configure reverse tethering so the device actually uses the raspberry pi connection, meaning you can apply traffic shaping. Right now you will be using the device’s wifi or mobile connection and can’t reliably shape the connection.
Let me know how you get on!
Thanks for sharing Robin!