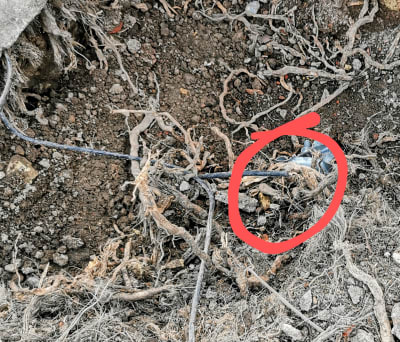
A few days ago these workmen were using cutting machinery dangerously close to my broadband cables:

Shortly after this picture was taken – bang! No internet! They cut the cables while doing their work!
Two adults working from home on back to back video calls, one high-schooler also on video classes, and one primary-schooler with streaming classes – all suddenly disconnected from the world!
That afternoon we huddled around the kitchen table, mobile phones on with hotspots enabled to get through the rest of the day – but this wouldn’t work for regular use.
The broadband company said it wouldn’t be fixed for weeks due to how badly everything was damaged; the pavement would have to come up! I had to think of a pragmatic solution.
In this article I’ll go through the steps I took to completely swap my home broadband for a Raspberry Pi and a spare mobile phone – and show the results!
Intro: Kit
Here’s a list of the kit I used (in addition to my regular home networking kit) to create the solution:
- Raspberry Pi 3B
- Phone Stand (optional, but useful)
- Micro SD card (I have several 16GB spares, but I expect 4GB or even 2GB would suffice)
- USB cable for the Pi and a supported USB mains plug (the Pi needs reliable, stable, power)
- USB cable to connect the phone to the pi (which also charges the phone)
My current home network
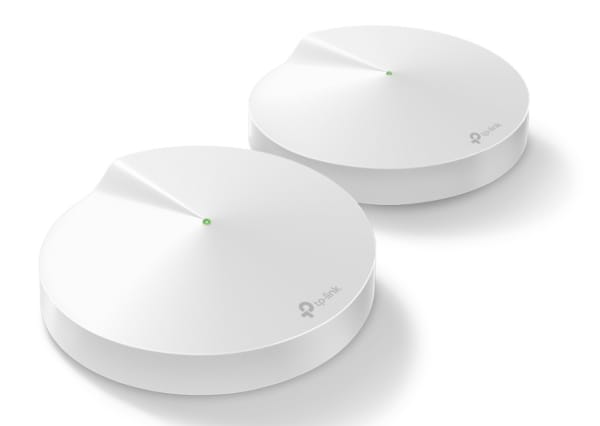
Luckily, my home network is broadband-provider-agnostic; I have a combination of a mesh network for spreading the wifi everywhere for things that move or only have wifi (phones, tablet, laptops, consoles, security cameras, etc) – I have a couple of the TP-Link Deco M9
And I use powerline for things that don’t move (office setup, tv, etc).

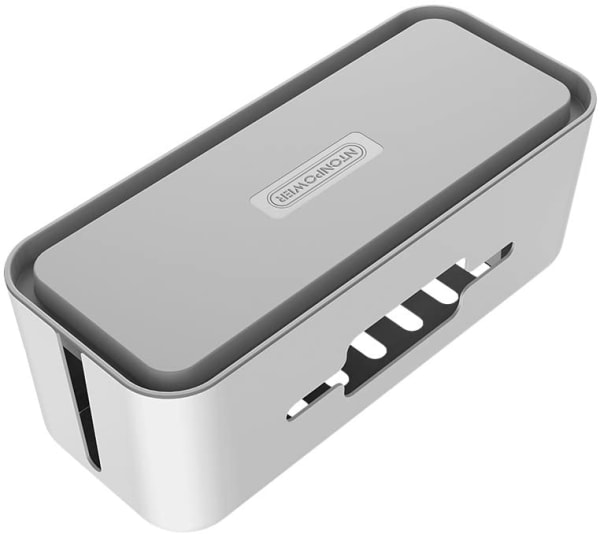
This is a surprisingly decent setup – I didn’t expect powerline to work as well as it does; even through extension cables I’m getting good enough connection and speeds to do day to day work, video calls, streaming music and movies, etc. My TV has ethernet but no wifi, so there’s a powerline behind the TV, and a mini switch to break that connection out for various things that live behind the TV. To keep this tidy I use one of these great cable storage boxes:
We only use the broadband router to provide the internet connectivity; the wifi is disabled, the DHCP disabled – it is just a dumb router, connected to the phone line and then into the home network via an ethernet cable. As such, if I can swap the broadband router for something else with internet connectivity, then the whole house should be back up and running… hmmm…
Phone & Raspberry Pi Networking
When working remotely I would regularly tether my laptop to my phone over USB, using my phone’s data to connect to the internet as needed; how can I apply this to the house?
Software
From previous hacking around, I know that routers just run linux and can have their firmware flashed to something else (I used to love doing this with cheap, ancient, home NAS routers, turning them into web servers and the like).
The most popular router distributions (AKA “distros”) which support USB tethering, that I know of, are “OpenWRT” and “DD-WRT”, so I’ll go with one of those. OpenWRT seemed to be more user friendly, and I wanted to get something up and running quickly so chose that.
Hardware
I would rather not mess with the broadband provider’s router, so – after checking it doesn’t support USB tethering out of the box – I started to think what else I could put OpenWRT on. I have a spare Archer C7 but that still felt like overkill… enter the Raspberry Pi! (as usual)
It turns out there is a Raspberry Pi build of OpenWRT – I downloaded that (via my laptop tethered to my phone over USB) and flashed it to a spare microSD card (luckily I have a few for just such an emergency). You need to get the right build for your version of Raspberry Pi, and support for various capabilities can vary.
The Build!
I put the card in the pi, plugged the pi into my laptop’s ethernet port and disconnected my phone; remember that I have no internet, and no wifi, so I need to connect to the Raspberry Pi directly via ethernet.
Connecting over ssh to the default IP for OpenWRT (192.168.1.1) I was greeted by the busybox OpenWRT welcome screen:
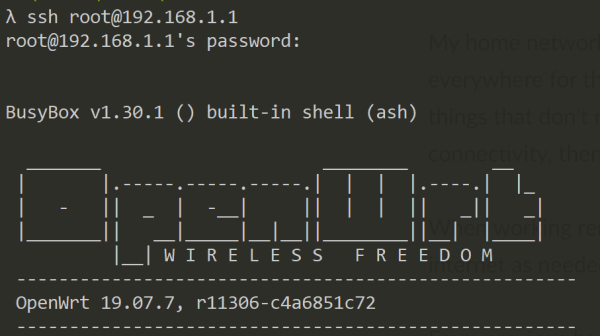
First things first: change the default (empty) root password with passwd!
Now I needed to install USB tethering support. However, I needed the Raspberry Pi to be online to do this. The phone comes back out, wifi hotspot mode, and I open a browser on my still ethernet-connected laptop to the Pi IP address.
From the web interface I can log in with root and the password I just set, browse to Network > Wireless, hit “Scan” and connect to my phone’s hotspot, saving this connection.
Back over to SSH – the Pi should now have internet access as it’s connected over wifi to my phone. However, this isn’t ideal; I’d prefer to use a USB connection to tether instead of using to the phone’s wifi hotspot.
As such, time to install USB tethering support on the Pi:
opkg update && opkg install kmod-usb-net-rndis
Once that completed I turned off the phone’s hotspot and connected it to the pi via USB; upon seeing the USB connection notification, I changed from the “charging via USB” default to “USB Tethering” (also called “RNDIS” on my other phone; both do the same thing). That way, it will always choose “USB Tethering” if I have to unplug and plug it back in.
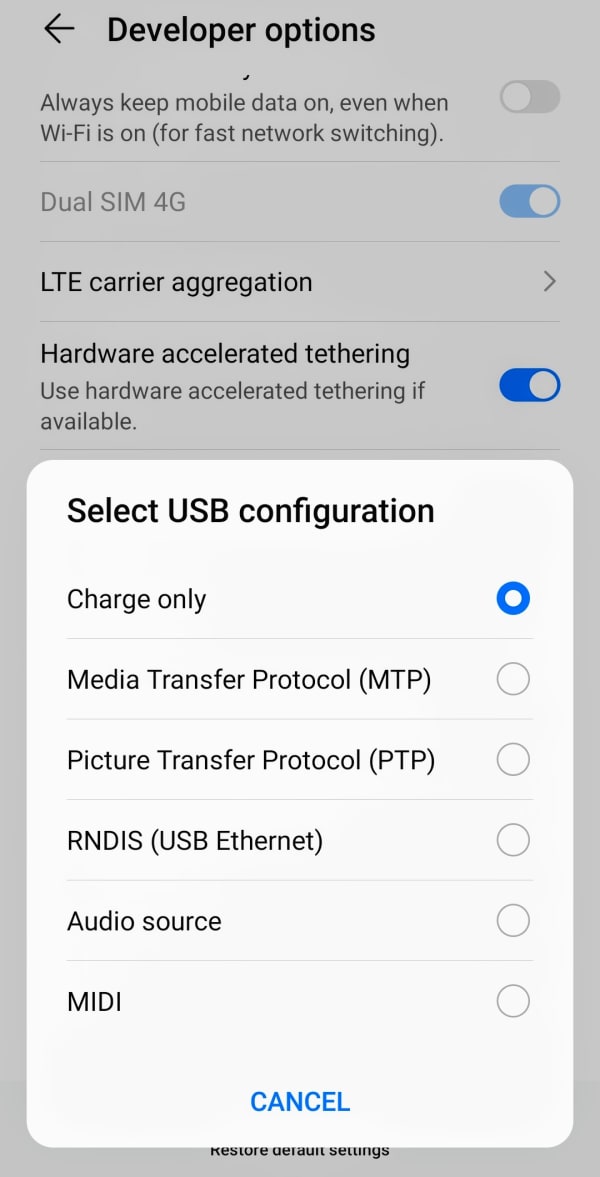
Back to the OpenWRT web UI: Network > Interfaces > Add New Interface and selected the new “usb0” option when selecting which interface to cover.
Since I’m still logged on to SSH I kick off a ping to test… and… it works! The laptop is connected to the Pi over ethernet, which is connected to the phone over USB, which is connected to the internet over 4G!
Putting it all together
Almost there; only one last step. Since I just want to swap this out for the existing router to get the whole house back online, I need to set the IP address of the Pi to that of the router and disable any DHCP. Over to OpenWRT web UI, visit Network > Interfaces and hit “Edit” on the “lan” connection. From here you can set a static address to whatever IP you want – I entered my old router’s IP address – and disable DHCP (my mesh network does that).
Once this was all done, I took the ethernet plug out of the broadband router, plugged in into the pi, and powered it up… a few seconds later, the status light on my Deco mesh network went from red to green, indicating the home network had internet access! Success!
I wander to the kitchen and ask Alexa to play music – and it works. I’m so smug, but the rest of the house is asleep so I can’t gloat until the next day! This was all completed in less than an hour – I was amazed.
I kick off a speed test and get surprisingly good results; faster than I was expecting. During the following day I move the phone around until it gets as many 4G signal bars as possible, which bumps up a few more Mbps bandwidth. Latency still isn’t great, but that’s what you get with 4G.
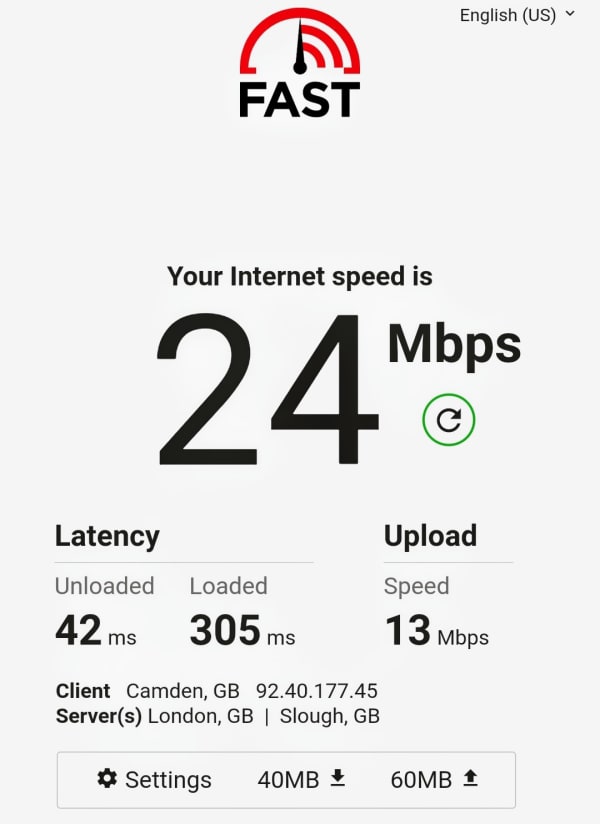
The next day everyone is cautiously limiting video use on calls, but it all goes well. The day after that we go back to normal and realise video calls work as before, even with 3 of us on at once and one of us streaming her class (or cartoons – I can’t tell, I’m busy working…), then all watching Netflix/ Disney+/ iPlayer/ Amazon Prime in the evening; the initial start of a stream is a bit slow, but once it starts there are no noticeable issues with buffering or video quality.
It’s so successful that I’ve bought a new unlimited data sim for £15 less per month than I was paying for broadband, and cancelled our broadband contract.
I even bought a “proper” 4G router to replace my MacGyvering, but it actually got slower speeds than my setup so returned it and stuck with mine.
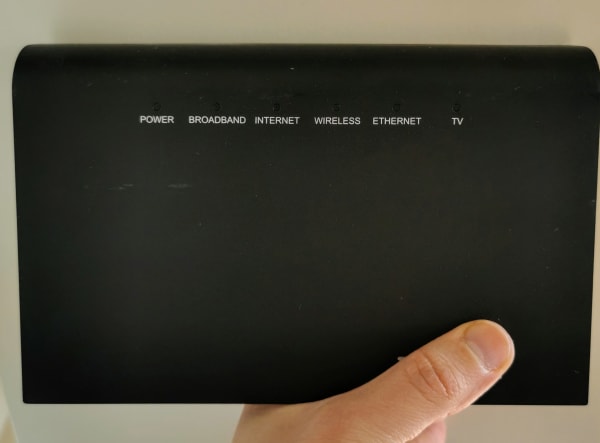
My home broadband went from this:
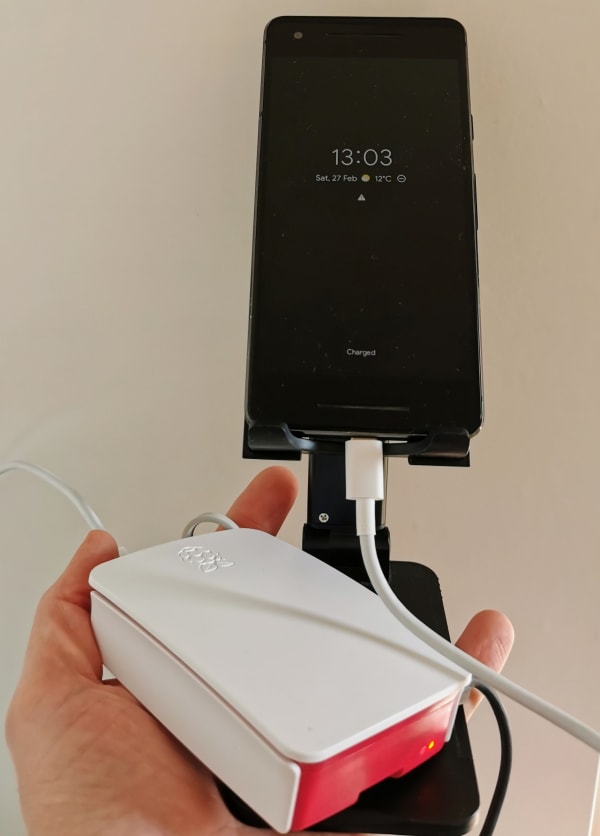
To this:
It still surprises me that it’s working so well, to be honest. This will hopefully tide us over until the cable is fixed, at which point I can decide if I want to go back to boring old cables instead of MAGICAL AIR INTERNET.
If you have the kit, why not have a go yourself? This probably only really works if you’re in a city, where the 4G is strong.
You are just a genius! I love it.
Thanks Robin for this. I’ve been thinking of doing this a while now. I’ll have a go later. I’m thinking of phone to rp4 (usb) then rp4 to Asus router. Hoping this’ll act as a switch. Like you most is wired, Asus will handle wireless needs I hope haha
Thanks for the recipe! I’m currently living away from “civilization” in a camper (caravan) for the next year. I have very good 4G coverage, an extra phone and an extra Pi. I’ll have to make sure I give the Pi a good battery backup so my service doesn’t drop during power changeover when moving locations.
Hi Robin, did you download Open WRT and flash it onto a micro sd card on a Windows or Linux computer. If a Windows computer can you provide a link to the OpenWRT image please.
You can use the raspberry pi page on OpenWrt.org to find the appropriate firmware version: https://openwrt.org/toh/raspberry_pi_foundation/raspberry_pi
Or just head over to the firmware selector page: https://firmware-selector.openwrt.org/ and start typing “raspberry pi” to see all available firmwares, for example here is the raspberry Pi 3 firmware: https://firmware-selector.openwrt.org/?version=23.05.3&target=bcm27xx%2Fbcm2710&id=rpi-3
That will give you a `img.gz` file that, once downloaded, you can select using your imaging tool (e.g. the raspberry pi imager tool – https://www.raspberrypi.com/software/ ).
Hi Robin, I use Ethernet Tether instead of USB Tether.
Ethernet Tether is now available on Android 11 (uses Ethernet port on Pi, no Linux USB driver hassle, you just need the USB-C to Ethernet adapter cable $14.00). Not available on iPhone.
Great writeup! In my previous house, where we had copper then FTTP provided Internet, I’d done the same thing as you, i.e. abstract that provision away by using as little as possible that was from the Internet provider themselves, and using my own hardware to do DNS, DHCP and WiFi (in my case I just ran an ethernet cable from the FTTP termination box to a Google Nest Hub router). Worked really well too. I’m pondering going through this setup (with a Pi and Open WRT, plus my work phone) as a backup for my narrowboat (https://qmacro.org/blog/posts/2023/01/09/working-from-a-narrowboat-internet-connectivity/).
Hi! Thanks for this tutorial.
How much heat does this produce? Do you think this could work with a battery, in a backpack? If it occasionally turns off by overheat protection that’s fine. Most of the time it wouldn’t be in a backpack.
I think this should work ok from a battery; bear in mind that the battery has to both power the rPi which in turn is charging the phone. Let me know how you get on!
Hey Robin,
I don’t know if you’ll read this but I needed to thank you for your help. I don’t have internet in my new apartment so I was searching a way to connect all my stuffs with my iPhone in tethering mode and it’s done thanks to you.
For those who wonder how to make this work on iPhone you can find the answer here : https://openwrt.org/docs/guide-user/network/wan/smartphone.usb.tethering
———
opkg update
opkg install kmod-usb-net-ipheth usbmuxd libimobiledevice usbutils
# Call usbmuxd
usbmuxd -v
# Add usbmuxd to autostart
sed -i -e “\$i usbmuxd” /etc/rc.local
———
If it doesn’t work, reboot your iphone and it will 😉
I’ve just been hit by the need to resurrect this solution, and the only spare phone I had was an ancient iPhone – your comment was exactly what I needed to get it working again, thanks!
Hi Robin, thanks for this write up, really helped me out since my FTTP connection has been offline for the past 5 days.
Back online and I can get some work done, much appreciated.