Update: November 2021
This article is out of date; there are no longer WebPageTest Server AMIs, so you need to install WPT on a base OS. There is an updated article here Automate Your WebPageTest Private Instance With Terraform: 2021 Edition

In a previous article I went through the steps needed to create your own private, autoscaling, WebPageTest setup in Amazon AWS. It wasn’t particularly complicated, but it was quite manual; I don’t like pointing and clicking in a GUI since I can’t easily put it in version control and run it again and again on demand.
Fortunately, whatever you create within AWS can be described using a language called CloudFormation which allows you to define your infrastructure as code.
Unfortunately it’s not easy to understand (in my opinion!) and I could never quite get my head around it, which annoyed me no end.
In this article I’ll show you how to use Terraform to define your private autoscaling WebPageTest setup in easily understandable infrastructure as code, enabling an effortless and reproducable web performance testing setup, which you can then fearlessly edit and improve!
Terraform
Terraform is a domain specific language (DSL) which MASSIVELY simplifies AWS’s CloudFormation language.
I’ll build up the infrastructure code section by section below, and then review the script in its entirety at the end.
Your first prerequisite is to go and download terraform and ensure it’s in your PATH; it’s a standalone executable, which makes this super simple!
Done that? Ok, cool – let’s move on:
Autoscaling Private WebPageTest
The three required sections for this setup are:
- A user with permissions to create new EC2 instances which the WebPageTest server uses to spin up test agents and S3 permissions to archive the tests (
IAM). - A place to archive test results, freeing up space on the WebPageTest server itself (
S3). - A VM instance on which to host your WebPageTest server which orchestrates the whole process (
EC2).
Previously we created and linked these up manually, and this time we’ll get the same result using Terraform to code it all up!
Codified Autoscaling Private WebPageTest setup
A big difference with this approach is that in order to use Terraform we will need to create an AWS user for Terraform since it will be creating AWS resources on our behalf, and as such it will need the appropriate admin permissions.
This is a one-off task: log in to your AWS console, hop over to IAM, and create a new user with programattic access and admin privilages.
This is seriously overkill, so you might want to read up on Terraform Best Practices to grant just the level of access you actually need for your setup.
Grab the access key and secret for your Terraform user and save them in any one of the following:
- Environment variables
- AWS Profile entry in the local profile file
- Inline (see below)
- Plain text file
If you choose the AWS profile file or a plain text file, then it should use this format:
[terraform]
aws_access_key_id=BLAHBLAHBLAHBLAHBLAH
aws_secret_access_key=bLAHBLAhbLAHBLAhb
Set up the AWS provider
Terraform needs to know which infrastructure provider you plan to use; it currently officially supports over 100 providers and has unofficial support for over 100 more via the community.
Basically if you deal with infrastructure, there’s probably a Terraform provider for it. We’re using AWS so ours will look like this, depending on where you saved your Terraform IAM details:
# Use locally defined "terraform" profile
# This could  via environment variables (1)
provider "aws" {
  region        = "eu-west-1"
}

# OR
# in your ~/.aws file, for example (2)
provider "aws" {
  region        = "eu-west-1"
  profile       = "terraform"
}

# OR
# Inline (3)
provider "aws" {
  region     = "eu-west-1"
  access_key = "<access_key>"
  secret_key = "<secret_key>"
}

# OR
# Specific credentials file (4)
# (same format as a profile file)
provider "aws" {
  region        = "eu-west-1"
  shared_credentials_file = "aws_credentials.txt"
}
Just choose one of these approaches and save it as "webpagetest.tf"
IAM
Now that the admin is completed, we can get back to the list of three things the WebPageTest setup needs:
- IAM
- S3
- EC2
We need to create a user for the webpagetest server to use in order to create and destroy the EC2 test agents, and archive test results to S3.
1) Create the IAM user
The general structure for Terraform resources is:
# resource structure
resource "resource type" "resource name" {
  property_name = "property value"
}
For creating our IAM user, it looks like this:
# IAM resource
resource "aws_iam_user" "wpt-user" {
  name = "wpt-user"
}- The "resource type" is "aws_iam_user"
- The "resource name" for this one is "wpt-user"
- The "property_name" "name" has the "property_value" of "wpt-user"
Save this as "iam-wpt.tf" in the same directory as your "webpagetest.tf" file from above (with the configuration details).
Easy, right? That’s our first resource! Want to try it out? Sure you do! Hop over to your command line, get into the same directory as your tf files, and run:
$ terraform init

Initializing provider plugins...
- Checking for available provider plugins on https://releases.hashicorp.com...
- Downloading plugin for provider "aws" (2.12.0)...
This will initialise the directory with the AWS Terraform provider, which can take a while to download. Once that’s finished you can run:
terraform planThis will show what Terraform will do, without actually doing it yet:
Terraform will perform the following actions:

  + aws_iam_user.wpt-user
      id:                                    <computed>
      arn:                                   <computed>
      force_destroy:                         "false"
      name:                                  "wpt-user"
      path:                                  "/"
      unique_id:                             <computed>

  + aws_iam_user_policy_attachment.ec2-policy-attach
      id:                                    <computed>
      policy_arn:                            "arn:aws:iam::aws:policy/AmazonEC2FullAccess"
      user:                                  "wpt-user"

  + aws_iam_user_policy_attachment.s3-policy-attach
      id:                                    <computed>
      policy_arn:                            "arn:aws:iam::aws:policy/AmazonS3FullAccess"
      user:                                  "wpt-user"

  + aws_instance.webpagetest
      id:                                    <computed>
      ami:                                   "ami-9978f6ee"
      arn:                                   <computed>
      associate_public_ip_address:           <computed>
    ...
If you actually want to try this out, then run:
terraform applyYou’ll be asked to approve this step by typing "yes"; if you’re feeling confident and foolhardy you can bypass this each time with an extra parameter:
terraform apply -auto-approveThe IAM user will be created, visible in your AWS console:
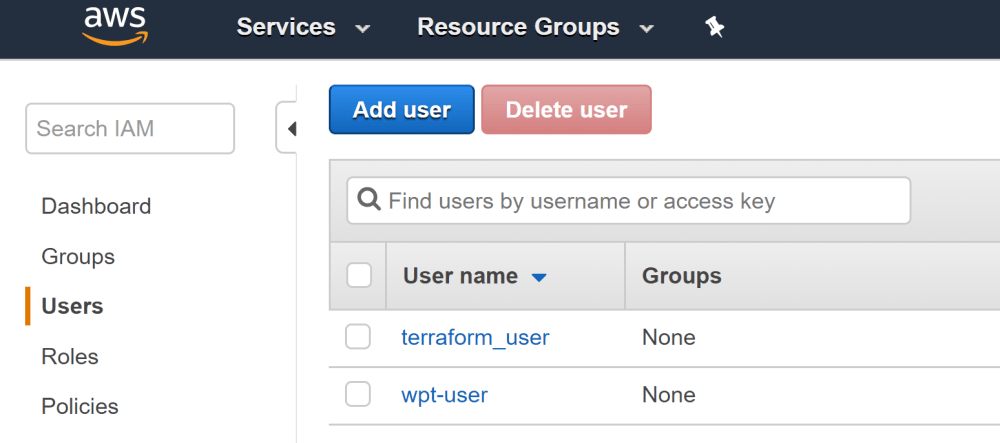
Since we’re not done yet, we could just leave it there since Terraform keeps track of the current state of your setup, and will apply subsequent updates as incremental changes where possible or just teardown and recreate the entire thing.
If you don’t want to leave it laying around, you can run:
terraform destroyThis will tear down whatever was created by the .tf files in the current directory.
Give EC2 permissions
We need to find the EC2 policy for AmazonEC2FullAccess and attach it to the user; for this you can use the appropriate arn (Amazon Resource Name) inline:
# AmazonEC2FullAccess
# Attaching the policy to the user
resource "aws_iam_user_policy_attachment" "ec2-policy-attach" {
  user = "${aws_iam_user.wpt-user.name}"
  policy_arn = "arn:aws:iam::aws:policy/AmazonEC2FullAccess"
}
There are a few other ways to do this; I’ll pick this up later in the Improvements section.
Notice the use of references: instead of typing:
user = "webpagetest"we can refer to the properties of other resources, so this code instead becomes:
user = "${aws_iam_user.wpt-user.name}"In some cases (such as using resources we’ve already created), this dynamic referencing makes for a wonderfully flexible infrastructure-as-code setup; we’ll use this lots more later on.
Give S3 Permissions
Same as above, but this time for AmazonS3FullAccess:
# S3 policy
# attach the S3 policy to the user
resource "aws_iam_user_policy_attachment" "s3-policy-attach" {
  user = "${aws_iam_user.wpt-user.name}"
  policy_arn = "arn:aws:iam::aws:policy/AmazonS3FullAccess"
}
Checkpoint
We’ve now defined a Terraform user with admin powers, created a WebPageTest IAM user, and granted that user full EC2 and S3 permissions.
Ideally you’d only grant powers to create the resources that you actually need – there’s a lot of valuable info over on the Terraform site around best practices
You can check this out with a terraform plan and/or terraform apply if you like, or just move on to the next section.
2) S3 Bucket for test archiving
Creating an S3 bucket is pretty simple, and since we’ve given the IAM user full S3 access then it can push tests into whatever bucket we create. There’s one snag though…
resource "aws_s3_bucket" "wpt-archive" {
  bucket = "HowDoIMakeSureThisIsUniqueIsh?!" # great question..
  acl    = "private"
}
S3 buckets need to have unique names within a given region – how can we code that? Luckily, Terraform has the concept of a random number generator, which will give us a pretty good chance of coming up with something unique:
# the "random_string" resource with some S3-friendly settings:
# no special chars and no uppercase
resource "random_string" "bucket" {
  length = 10
  special = false
  upper = false
}

# Now get the actual value using ".result"
resource "aws_s3_bucket" "wpt-archive" {
  bucket = "my-wpt-test-archive-${random_string.bucket.result}"
  acl    = "private"
}
Important point:
random_stringcounts as a new "provider", so you’ll need to runterraform initagain to pull down that provider, before you’ll be allowed to runterraform planorterraform apply.
3) EC2 WebPageTest Instance
To create the WebPageTest server EC2 instance we need to specify the AMI to use; luckily for us, these are all listed in the WebPageTest github repo:
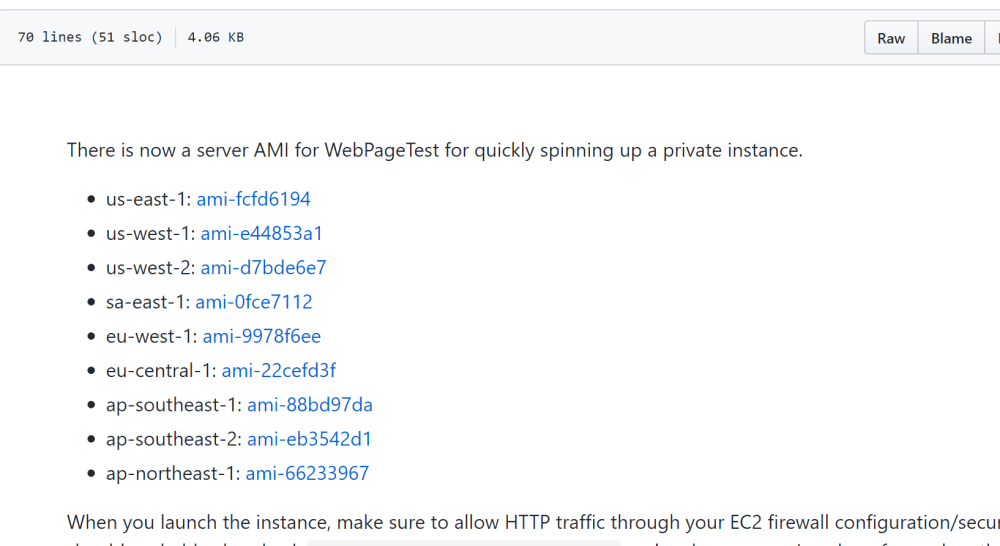
Pick the one for your chosen AWS region; in my case this will be eu-west-1, so I use the ami value of "ami-9978f6ee" for the first step:
# WebPageTest EC2 instance
resource "aws_instance" "webpagetest" {
  ami           = "ami-9978f6ee"
  instance_type = "t2.micro"
}
Security
We also need to specify the security config to open up port 80, and/or 443 (for HTTPS). This is a separate resource which we then refer back to in the EC2 one:
# Security group for the WebPageTest EC2 instance
resource "aws_security_group" "wpt-sg" {
  name = "wpt-sg"

  # http
  ingress {
    # What range of ports are we opening up?
    from_port = 80 # From port 80...
    to_port = 80 # to port 80!
    protocol = "tcp"
    description = "HTTP"
    cidr_blocks = ["0.0.0.0/0"] # who can access it? The world!
  }

  # SSH
  ingress {
    from_port = 22
    to_port = 22
    protocol = "tcp"
    description = "SSH"
    cidr_blocks = ["0.0.0.0/0"]
  }

  # Outgoing traffic
  egress {
    from_port       = 0
    to_port         = 0
    protocol        = "-1"
    cidr_blocks     = ["0.0.0.0/0"]
  }
}
I’m not a security specialist, I just like connecting dots to see what happens! Please feel free to suggest improvements to the repo over on github; I appreciate any help I can get.
Now we can link that security group resource to the EC2 instance resource like so:
# WebPageTest EC2 instance
resource "aws_instance" "webpagetest" {
  ami           = "ami-9978f6ee"
  instance_type = "t2.micro"

  # we can refer back to the security group using a reference
  # made up of  "resource-type.resource-name" to  get the
  # id property
  vpc_security_group_ids  = ["${aws_security_group.wpt-sg.id}"]
}
A couple more things and we’re done with the EC2 instance.
Key Pair
Any EC2 instance needs an associated public key, so that you can remotely connect if necessary. We could make this dynamic, using something like this:
# create a keypair
resource "aws_key_pair" "wpt-admin-key" {
  key_name   = "wpt-admin-key"
  public_key = "ssh-rsa blahblahblah... [email protected]"
}

resource "aws_instance" "webpagetest" {
  ami           = "ami-9978f6ee"
  instance_type = "t2.micro"
  vpc_security_group_ids  = ["${aws_security_group.wpt-sg.id}"]
  # reference the new key pair's name
  key_name      = "${aws_key_pair.wpt-admin-key.name}"
}
Or we could just use one that already exists in the AWS account.
resource "aws_instance" "webpagetest" {
  ami           = "ami-9978f6ee"
  instance_type = "t2.micro"
  vpc_security_group_ids  = ["${aws_security_group.wpt-sg.id}"]
  # paste in your existing key pair's name
  key_name      = "robins-key"
}
User data
Last thing needed to the WebPageTest server EC2 instance working is to set the user data, defining the settings for the WebPageTest server. The tricky part here seems to be passing in line-delimited data within user data.
If you remember from last time, we want to pass in the following information (and if you don’t remember from last time, why not have a quick read to get context?):
ec2_key: the IAM user access key IDec2_secret: the IAM user secret access keyapi_key: a super secret api key that you providewaterfall_show_user_timing: makes for pretty waterfall charts if you have user timings in your pagesiq: image quality – defaults to 30%, but 75% is nicer, especially if you’re using S3 for storage!pngss: full resolution images for screenshotsarchive_s3_key: the IAM user keyarchive_s3_secret: the IAM user secretarchive_s3_bucket: the WPT archive bucketarchive_days: number of days before tests are pushed to S3cron_archive: run archive script hourly automatically as agents poll for work
First up, let’s get a reference to the wpt-user‘s IAM credentials, so they can be passed in as user data:
# IAM Access Key for WebPageTest user
resource "aws_iam_access_key" "wpt-user" {
  user = "${aws_iam_user.wpt-user.name}"
}
The WebPageTest IAM user’s access key details can now be accessed via this new aws_iam_access_key resource:
key = "${aws_iam_access_key.wpt-user.id}"
secret = "${aws_iam_access_key.wpt-user.secret}"
We could just create a really long string with "\n" separating, or we could reference an external file. I’ll show an inline string here with references to both the aws_iam_access_key and our previously created aws_s3_bucket resource called "wpt_archive", and will show the external file version in the Improvements section towards the end.
Unfortunately you can’t have multiline variable values, so this inline version just becomes one very very long line of text. Not easy to maintain or debug!
# specifying the user data inline
user_data     = "ec2_key=${aws_iam_access_key.wpt-user.id} \n ec2_secret=${aws_iam_access_key.wpt-user.secret} \n api_key=<my crazy long api key> \n waterfall_show_user_timing=1 \n iq=75 \n pngss=1 \n archive_s3_server=s3.amazonaws.com \n archive_s3_key=${aws_iam_access_key.wpt-user.id} \n archive_s3_secret=${aws_iam_access_key.wpt-user.secret} \n archive_s3_bucket=${aws_s3_bucket.wpt-archive.bucket} \n archive_days=1 \n cron_archive=1"
There are plenty of potential improvements here: pulling the user data into a
template, which allows us to create it dynamically from a template file is a favourite of mine; I’ll demonstrate this later in the Improvements section.
Try it out
The resulting script is below – be sure to replace placeholders with your own values!:
# Setting up the AWS Terraform provider
provider "aws" {
  region     = "eu-west-1"

  # FILL IN THESE PLACEHOLDERS (or use another method):
  access_key = "<access_key>"
  secret_key = "<secret_key>"
}

# IAM config
resource "aws_iam_user" "wpt-user" {
  name = "wpt-user"
}

resource "aws_iam_user_policy_attachment" "ec2-policy-attach" {
  user = "${aws_iam_user.wpt-user.name}"
  policy_arn = "arn:aws:iam::aws:policy/AmazonEC2FullAccess"
}

resource "aws_iam_user_policy_attachment" "s3-policy-attach" {
  user = "${aws_iam_user.wpt-user.name}"
  policy_arn = "arn:aws:iam::aws:policy/AmazonS3FullAccess"
}

resource "aws_iam_access_key" "wpt-user" {
  user = "${aws_iam_user.wpt-user.name}"
}

# S3 Config
resource "random_string" "bucket" {
  length = 10
  special = false
  upper = false
}

resource "aws_s3_bucket" "wpt-archive" {
  bucket = "my-wpt-test-archive-${random_string.bucket.result}"
  acl    = "private"
}

# Main EC2 config
resource "aws_instance" "webpagetest" {
  ami           = "ami-9978f6ee"
  instance_type = "t2.micro"
  vpc_security_group_ids  = ["${aws_security_group.wpt-sg.id}"]

  # FILL IN THIS PLACEHOLDER:
  key_name      = "<key pair name>"

  # FILL IN THE API KEY PLACEHOLDER:
  user_data     = "ec2_key=${aws_iam_access_key.wpt-user.id} \n ec2_secret=${aws_iam_access_key.wpt-user.secret} \n api_key=<my crazy long api key> \n waterfall_show_user_timing=1 \n iq=75 \n pngss=1 \n archive_s3_server=s3.amazonaws.com \n archive_s3_key=${aws_iam_access_key.wpt-user.id} \n archive_s3_secret=${aws_iam_access_key.wpt-user.secret} \n archive_s3_bucket=${aws_s3_bucket.wpt-archive.bucket} \n archive_days=1 \n cron_archive=1"
}

# Security group for the WebPageTest server
resource "aws_security_group" "wpt-sg" {
  name = "wpt-sg"

  # http
  ingress {
    from_port   = 80
    to_port     = 80
    protocol    = "tcp"
    description = "HTTP"
    cidr_blocks = ["0.0.0.0/0"]
  }

  # SSH
  ingress {
    from_port   = 22
    to_port     = 22
    protocol    = "tcp"
    description = "SSH"
    cidr_blocks = ["0.0.0.0/0"]
  }

  egress {
    from_port       = 0
    to_port         = 0
    protocol        = "-1"
    cidr_blocks     = ["0.0.0.0/0"]
  }
}

# This is to make it easier to get the resulting URL
# for your WebPageTest instance
output "webpagetest" {
  value = "${aws_instance.webpagetest.public_dns}"
}
The final section is really handy; the output type will print out the result of the value property – in this case the public URL for the WebPageTest server itself.
We could also create an output for:
- Randomised S3 bucket name,
- WebPageTest IAM user’s key and secret,
- etc
Let’s run terraform apply and watch what happens:
Apply complete! Resources: 9 added, 0 changed, 0 destroyed.

Outputs:

webpagetest = ec2-34-245-85-104.eu-west-1.compute.amazonaws.com
Go ahead and visit that url to find the familiar WebPageTest homepage. Enter a URL to test and submit it; you’ll see an EC2 test agent start to spin up in the appropriate AWS region.
Complete
Hopefully you’ve seen how easy it can be to get started with Terraform, creating your very own autoscaling private WebPageTest instance in AWS from one Terraform file.
You can stop here, have a refreshing beverage of choice and make smug finger-guns at people as they pass by.
Or you could check out the next section which takes your current knowledge and builds on it – go on, you’ll love it, honest!
Improvements
The script above will totally get you a fully autoscaling WebPageTest private instance in AWS and is pretty flexible via the user_data options that can configure WebPageTest in some detail.
Here are a few opportunities to improve on this.
Improvement 1: Variables
There are a few places in the Terraform script that use hard coded values; by introducing variables we can make the script more flexible. For instance, right at the very top the "region" is set to "eu-west-1", so let’s pull that into a variable:
# Define a variable for the region
variable "region" {
  default = "eu-west-1"
}
We can now refer to this anywhere that we would have hard coded the region, for example:
# Setting up the AWS Terraform provider
provider "aws" {
  region = "${var.region}"
}
Let’s define another one that abstracts the EC2 ami for the WebPageTest server; this will be a "map" type instead of the default "value" type:
# WebPageTest EC2 AMIs
variable "wpt_ami" {
    type    = "map"
    default = {
        us-east-1 = "ami-fcfd6194"
        us-west-1= "ami-e44853a1"
        us-west-2= "ami-d7bde6e7"
        sa-east-1= "ami-0fce7112"
        eu-west-1= "ami-9978f6ee"
        eu-central-1= "ami-22cefd3f"
        ap-southeast-1 = "ami-88bd97da"
        ap-southeast-2 = "ami-eb3542d1"
        ap-northeast-1 = "ami-66233967"
    }
}
Since there’s a different one for each region, we can combine these variables using a lookup:
resource "aws_instance" "webpagetest" {
  ami = "${lookup(var.wpt_ami, var.region)}"
  ...
}
Cool, huh? Although the default region is set to "eu-west-1" in this example, it can be overridden when calling from the command line:
terraform apply -var "region=ap-southeast-1"This will set the "region" variable to "ap-southeast-1", affecting the provider resource and also choose the matching "wpt_ami" value. This would result in the equivalent of:
provider "aws" {
  region = "ap-southeast-1"
}

...

resource "aws_instance" "webpagetest" {
  ami  = "ami-88bd97da"
  ...
}
Handy! We’ve now extended the original script to support all AWS regions that WebPageTest AMIs exist for.
The github repo includes this addition
Improvement 2: Template for User Data
Having that user data as a looooonnnggg inline string is quite ugly and unmaintainable. We can improve this by using the template_file data type.
This is a new provider, so you’ll need to run
terraform initbefore it can be used.
By abstracting out our user data into a separate data source, we can update the user data string in the EC2 definition to:
user_data = "${data.template_file.ec2_wpt_userdata.rendered}"There are a few methods – all covered below – to implement this and they all use the template_file data type. This allows us to use a template input with placeholders, and define the values for those placeholders in a vars object, which are merged together later:
#  a) Inline template string
# Separates it out, but still a messy single line
data "template_file" "ec2_wpt_userdata" {
    template = "ec2_key=$${key} \n ec2_secret=$${secret} \n api_key=$${api_key} \n waterfall_show_user_timing=1 \n iq=75 \n pngss=1 \n archive_s3_server=s3.amazonaws.com \n archive_s3_key=$${key} \n archive_s3_secret=$${secret} \n archive_s3_bucket=$${wpt_s3_archive} \n archive_days=1 \n cron_archive=1"

    vars = {
        key = "${aws_iam_access_key.wpt_user.id}"
        secret = "${aws_iam_access_key.wpt_user.secret}"
        api_key = "123412341234123412341234"
        wpt_s3_archive = "${aws_s3_bucket.wpt-archive.bucket}"
    }
}

# b) Inline heredoc syntax - much more readable!
# Now we can have new lines for improved readability
# Note the double $$
data "template_file" "ec2_wpt_userdata" {
    template =<<EOT
      ec2_key=$${key}
      ec2_secret=$${secret}
      api_key=$${api_key}
      waterfall_show_user_timing=1
      iq=75
      pngss=1
      archive_s3_server=s3.amazonaws.com
      archive_s3_key=$${key}
      archive_s3_secret=$${secret}
      archive_s3_bucket=$${wpt_s3_archive}
      archive_days=1
      cron_archive=1
    EOT

    vars = {
        key = "${aws_iam_access_key.wpt_user.id}"
        secret = "${aws_iam_access_key.wpt_user.secret}"
        api_key = "123412341234123412341234"
        wpt_s3_archive = "${aws_s3_bucket.wpt-archive.bucket}"
    }
}

# c) External TPL file
# Keeps it nice and tidy!
data "template_file" "ec2_wpt_userdata" {
    template = "${file("user_data.tpl")}"

    vars = {
        key = "${aws_iam_access_key.wpt_user.id}"
        secret = "${aws_iam_access_key.wpt_user.secret}"
        api_key = "123412341234123412341234"
        wpt_s3_archive = "${aws_s3_bucket.wpt-archive.bucket}"
    }
}
All of the above options can be referenced using .rendered on the template_file:
# refer to this as a "rendered" value
resource "aws_instance" "webpagetest" {
  user_data     = "${data.template_file.ec2_wpt_userdata.rendered}"
  ...
}
The external template file would look like the below – note the single $ this time:
ec2_key=${key}
ec2_secret=${secret}
api_key=${api_key}
waterfall_show_user_timing=1
iq=75
pngss=1
archive_s3_server=s3.amazonaws.com
archive_s3_key=${key}
archive_s3_secret=${secret}
archive_s3_bucket=${wpt_s3_archive}
archive_days=1
cron_archive=1
The github repo includes the heredoc template syntax version
Improvement 3: Dynamic API key
Up until now we’ve used a static API key value:
# e.g.
api_key=<my crazy long api key>

# or
api_key = "123412341234123412341234"
Of course, Terraform has a solution to this; first up, the random_string as we used for the S3 bucket name:
# API key as a random 40 char string
resource "random_string" "api-key" {
  length = 40
  special = false
}

data "template_file" "ec2_wpt_userdata" {
    template = "${file("user_data.tpl")}"

    vars = {
        # reference the api key to get the resulting random string
        api_key = "${random_string.api-key.result}"
        key = "${aws_iam_access_key.wpt_user.id}"
        secret = "${aws_iam_access_key.wpt_user.secret}"
        wpt_s3_archive = "${aws_s3_bucket.wpt-archive.bucket}"
    }
}
All seems good, but we can actually improve on this more. What use is an API key if you don’t know what it is? You can’t easily get the value back out of the rendered user data without rendering the whole string; and doing so will regenerate the random value! it’s like a quantum variable!
One trick to geting the random value out is in Terraform’s locals; a local value assigns a name to an expression, allowing it to be used multiple times within a module without repeating it.. It also means that the value is calculated once and can be referenced many times.
# API key as a random 40 char string
resource "random_string" "api-key" {
  length = 40
  special = false
}

# define a local "api_key" variable
locals {
  "api_key" = "${random_string.api-key.result}"
}

data "template_file" "ec2_wpt_userdata" {
    template = "${file("user_data.tpl")}"

    vars = {
        # reference the new local
        api_key = "${local.api_key}"
        key = "${aws_iam_access_key.wpt_user.id}"
        secret = "${aws_iam_access_key.wpt_user.secret}"
        wpt_s3_archive = "${aws_s3_bucket.wpt-archive.bucket}"
    }
}

# BONUS! Return the API key without
# regenerating the random value
output "api_key" {
  value = "${local.api_key}"
}
Putting it all together
The full script is over on github, and once you fill in the AWS credentials for your Terraform user and the key pair name, then after running a terraform init and terraform apply you’ll be greeted with something like this:
Outputs:
api_key = t2glfd2MlixzkQpr1e0v37xmGkQOBUVWU1pKeQKd
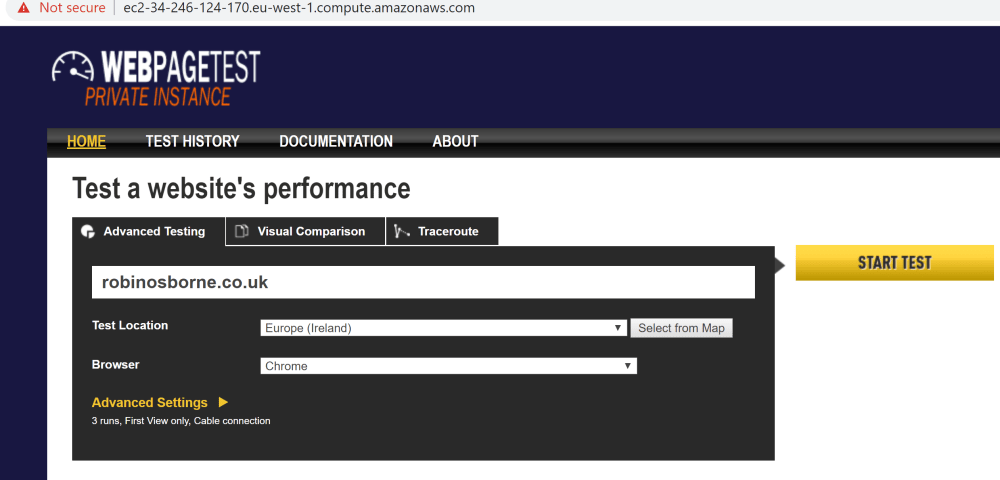
webpagetest = ec2-34-246-124-170.eu-west-1.compute.amazonaws.comThe user data is generated as expected; you can see the api key is the same in user data as the output from above:
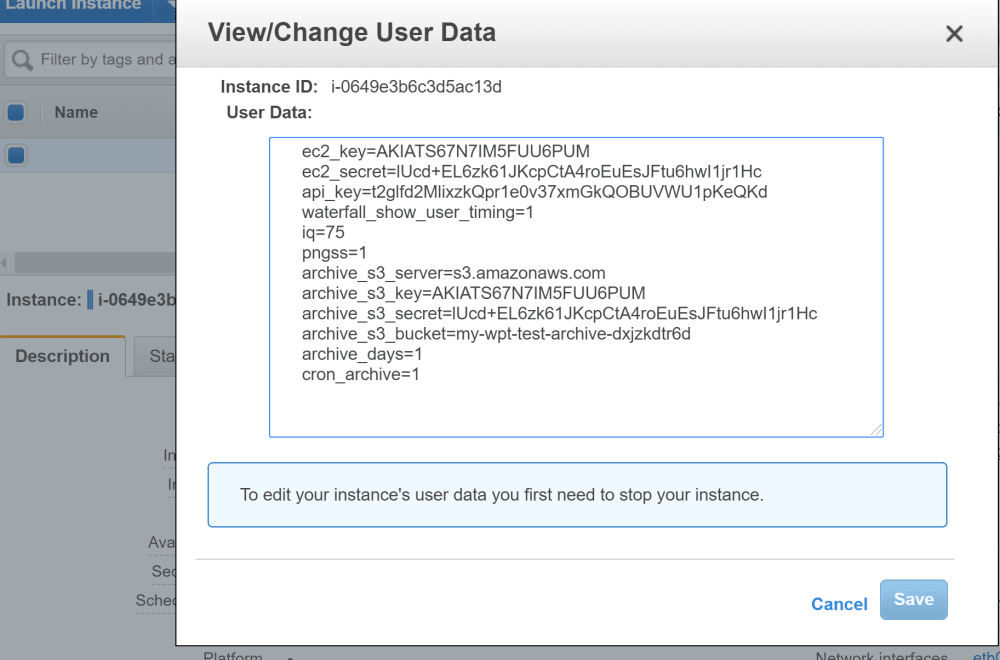
You’ll see the familiar WebPageTest homepage if you pop over to the URL in the output from above:
Different Regions
Let’s try this same script, but in a different region!
Be aware that once you’ve executed one test, then the S3 bucket will not be deleted when you call destroy as it’s not empty. Usually this isn’t a problem, since any subsequent terraform apply checks the local "terraform.tfstate" file, knows this S3 bucket still exists, and won’t create a new one. If you change region then this apply will fail, since the S3 bucket exists in "terraform.tfstate", but doesn’t exist in the new region that you’re now referencing. You can just delete your "terraform.tfstate" file if you want to start from scratch and it’ll work.
ALSO be aware that your key pair doesn’t exist in the new region, so you’ll need to create a new one there first or use Terraform’s inline key pair creation to automated it!
terraform apply -var 'region=ap-southeast-1'After ticking along for a while (assuming you’ve tidied up any S3 and missing key pair), you’ll see something like this:
Outputs:

api_key = 5titWU7aE3R6gkbf851v3tPjwCsosNVZnmreOSuq
webpagetest = ec2-54-169-221-212.ap-southeast-1.compute.amazonaws.com
Oooh – ap-southeast-1! Cool huh?
Given that the WebPageTest server can already spin up test instances in many AWS regions, you choose to can deploy the server into whichever region you need.
EXTRA POST CREDITS NICK FURY BONUS IMPROVEMENT
Here’s one last improvement to thank you for reading to the end! Notice the EC2 instances appearing in the AWS console:
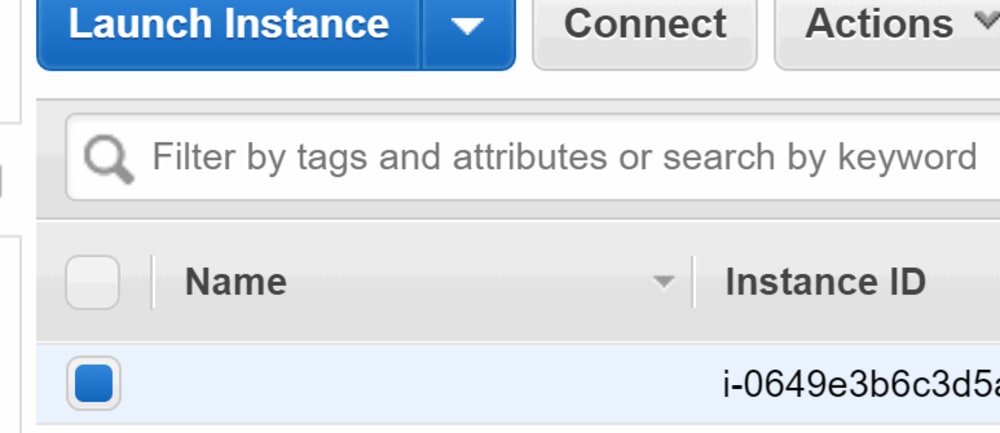
No name! That’s not pretty.
If we add tags, and if we add a tag called "Name", then we’ll get something more useful in that listing.
resource "aws_instance" "webpagetest" {
  ...
  # Add your tags in here
  tags {
   Name      =   "webpagetest"
   Project   =   "webperf"
  }
}
Now check it out:
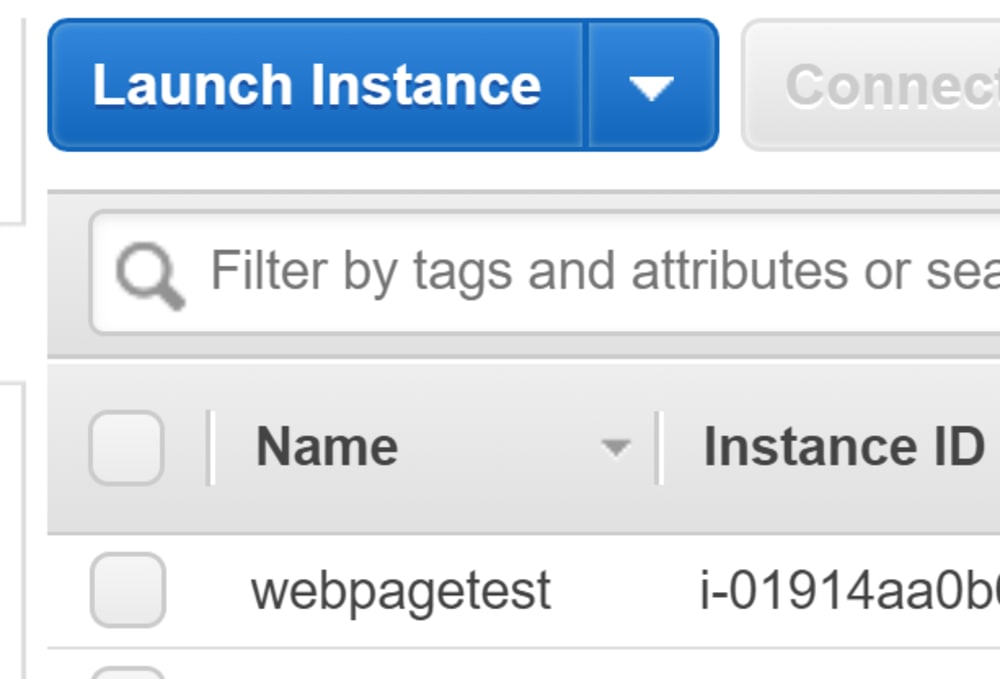
Cool!
Summary
Phew, we’ve covered a whole lot here! With a bit of Terraform we’ve managed to set up WebPageTest’s IAM, S3, EC2, Security Groups, and make it region agnostic and autoscaling, with a dynamically generated API key.
The resulting script is in this github repo. Have a go and let me know how you get on!