Receiving Images to Your Skype Botframework Bot (v2!)

If you’re getting a “403” HTTP error when attempting to receive an image sent to your Skype bot, and the previous use of message.ServiceUrl to create a ConnectorClient didn’t work, try this more verbose version which explicitly sets the authorization header:

byte[] data;

if (image.ContentUrl != null)
{
    using (var connectorClient 
        = new ConnectorClient(new Uri(message.ServiceUrl)))
    {
        var token = 
            await (connectorClient.Credentials as MicrosoftAppCredentials)
                .GetTokenAsync();

        var uri = new Uri(image.ContentUrl);

        using (var httpClient = new HttpClient())
        {
            if (uri.Host.EndsWith("skype.com") 
                && uri.Scheme == Uri.UriSchemeHttps)
            {
                httpClient
                    .DefaultRequestHeaders
                    .Authorization = 
                        new AuthenticationHeaderValue("Bearer", token);

                httpClient
                    .DefaultRequestHeaders
                    .Accept
                    .Add(new MediaTypeWithQualityHeaderValue("application/octet-stream"));
            }

            // Get the image in a byte[] variable
            data = await httpClient.GetByteArrayAsync(uri);
        }
    }
}
Receiving files sent to your botframework chatbot

We’ve already looked at how a botframework bot receives messages, and even how to save those messages.

In this article I’ll show you how to handle files that are sent to your botframework chatbot.

When a user interacts with your bot, unless they’re responding to a prompt, they will cause the Message controller’s Post method to fire with an activity.

This will send a message through to your underlying IDialog or LuisDialog implementation.

MessageReceived

The method that receives the message will have the signature (though the parameter names and method name could be different):

Continue reading

Scripting the setup of a developer PC, Part 1 of 4 – Installing Applications & Utilities with Ninite

Setting up a development PC can be a bit of a pain, unless you’re smart and create an image following the setup of a brand new vanilla install. But who’s organised enough to do that?! I’ll get onto that option in another post, but this one is more an excuse to play with interesting stuff.

I thought I’d have a play with coding up a set of scripts to do as much of this setup as possible instead; there are a few tools out there to do this sort of thing, and I’ve gone with ninite, webpi, and chocolatey.


I’ll start with the intended ideal option for each tool, and then go into how this doesn’t work perfectly and why, and what the other options are. Part 1 of this series of 4 is for the easiest tool of all:


Installing Applications & Utilities: ninite

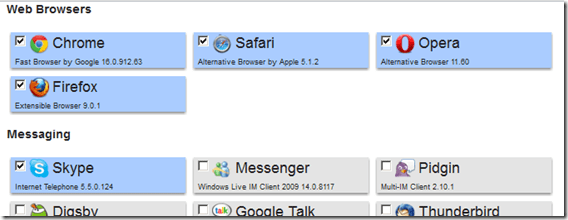
This site allows you to create a single exe installer which contains your own selection of a large number of applications/frameworks/utilities:

232111_autoinstall_ninite_web

For an ASP.Net developer PC I’ve gone with Chrome, Safari, Opera, Firefox, Skype, VLC, Flash, Air, Java, Silverlight, Launchy, 7-Zip, WinSCP, PuTTY, Notepad++, WinMerge, Paint.NET, PDFCreator, Reader, DropBox, and Everything Search for my installer. This installer can be called from the command line but the basic version still opens a graphical interface; however no interaction is required. The Pro version comes with a command line installer, but I’ll not be using that.

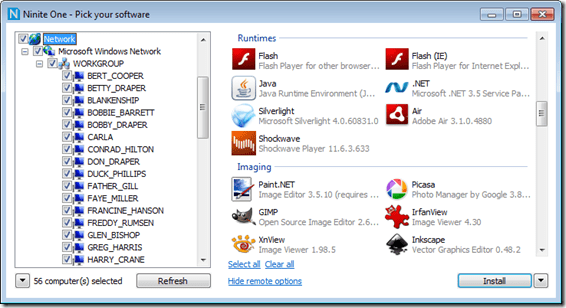
Ninite Pro is absolutely awesome: you can remotely manage installed software and software patches within your network with a silent install process.

232111_autoinstall_ninite_pro


So far my install script set looks like this; pretty bare:

[batch]@echo off
REM Ninite stuff
cmd /C Z:\Installation\SetupDevPC\Ninite_DevPC_Utils.exe[/batch]

And the installation directory is merely one script and one exe:

281211_autoinstall_ninite_dir_contents

That was dead simple! Lovely! Coming up next – something a bit messier:

Scripting the setup of a developer PC, Part 2 of 4 – Installing Frameworks and Components with WebPI.