Update: November 2021
This article is out of date; there are no longer WebPageTest Server AMIs, so you need to install WPT on a base OS. The updated article is here WebPageTest Private Instance: 2021 Edition
If you have any interest in website performance optimisation, then you have undoubtedly heard of WebPageTest. Being able to test your websites from all over the world, on every major browser, on different operating systems, and even on physical mobile devices, is the greatest ever addition to a web performance engineer’s toolbox.

The sheer scale of WebPageTest, with test agents literally global (even in China!), of course means that queues for the popular locations can get quite long – not great when you’re in the middle of a performance debug session and need answers FAST!
Also since these test agents query your website from the public internet they won’t be able to hit internal systems – for example pre-production or QA, or even just a corporate intranet that isn’t accessible outside of a certain network.
In this article I’ll show you how to set up your very own private instance of WebPageTest in Amazon AWS with autoscaling test agents to keep costs down
Once you have this you can optionally extend the setup, for example:
- Always-on test agent(s) – get your test result faster
- Your own test agent within the China firewall – get realistic test results from the perspective of a user behind the Great Firewall
- Automation and scripting – schedule regular tests
- Reporting and visualisation – graph your tests to find trends
We’ll get on to those topics later, but first up let’s focus on building a solid WebPageTest foundation!
Getting familiar with AWS
You don’t need to be an AWS guru to get this all running. AWS can be confusing, however this setup only requires a few clicks throughout the AWS console. Make sure you have your own AWS account ready to go.
There are 2 or 3 main areas we will need to use in AWS for setting up our private WebPageTest instance:
- A user with permissions to create new EC2 instances which the WebPageTest server uses to spin up test agents, and optionally S3 permissions to archive the tests.
- A place to archive test results, freeing up space on the WebPageTest server itself (optional, but highly recommended – and cheap).
- A VM instance on which to host your WebPageTest server which orchestrates the whole process.
Let’s start off with –
1. Create a WebPageTest User
IAM is the AWS Identity and Access Management (aka IAM – "I am"…) area; we need to create a new programmatic user for the WebPageTest server to run under.
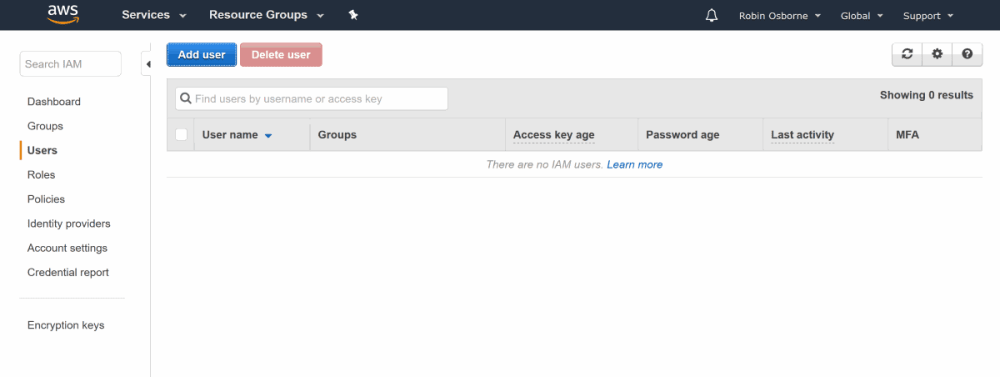
Log in to your AWS console and head over to IAM by finding it in the Services menu:
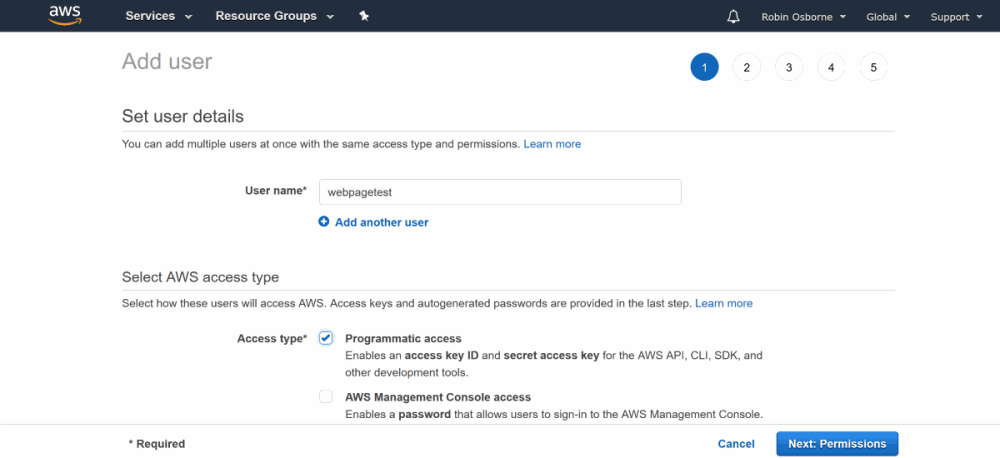
From there, click Add user, enter a name, and select Programmatic Access:
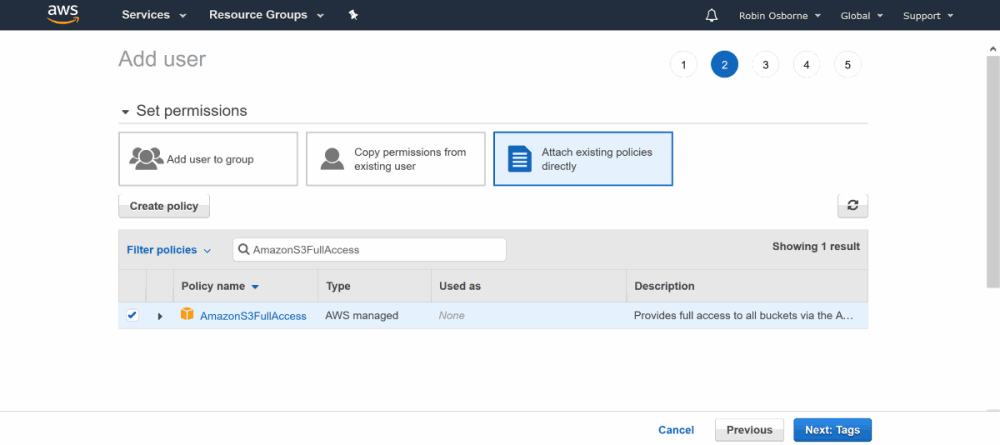
Now we need to Set permissions. Select Attach Existing Policies and search for and select "AmazonEC2FullAccess" (so it can start test agents)…

… and search for and select "AmazonS3FullAccess" (to archive tests into S3).
The tests can easily fill up even a large EC2 volume quickly, so archiving to S3 is strongly recommended – S3 is super cheap, EBS volumes are not.
Archiving tests to S3 won’t change how WebPageTest looks and feels; it will fetch the zipped test from S3 on demand incredibly quickly.
Copy the AWS Access Key ID and Secret Access Key for this new user somewhere as we’ll need them in a moment.

2. Configure Test Storage in S3
EBS volumes (the hard drive on a EC2 instance) will fill up quickly and, although expanding them is possible, it isn’t easy and it can’t be reversed. S3 is the super cheap, almost limitless, alternative.
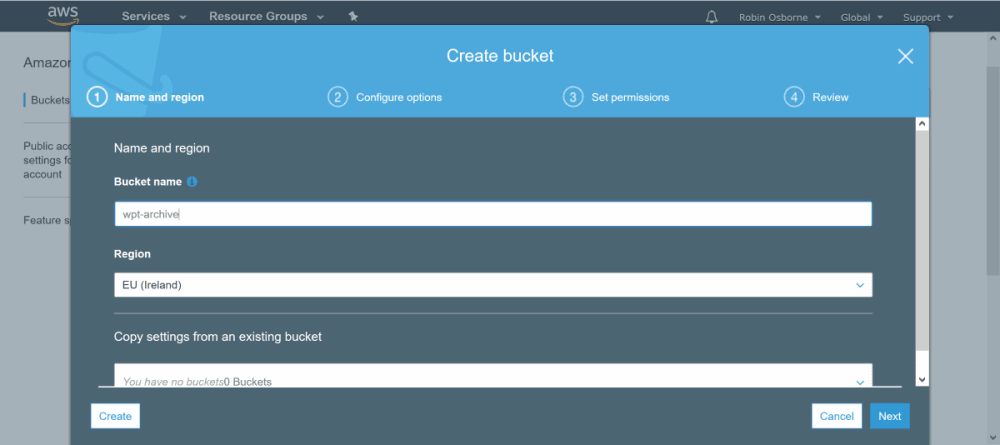
Head over to the S3 area of your AWS console – again, you can find this under the Services menu:
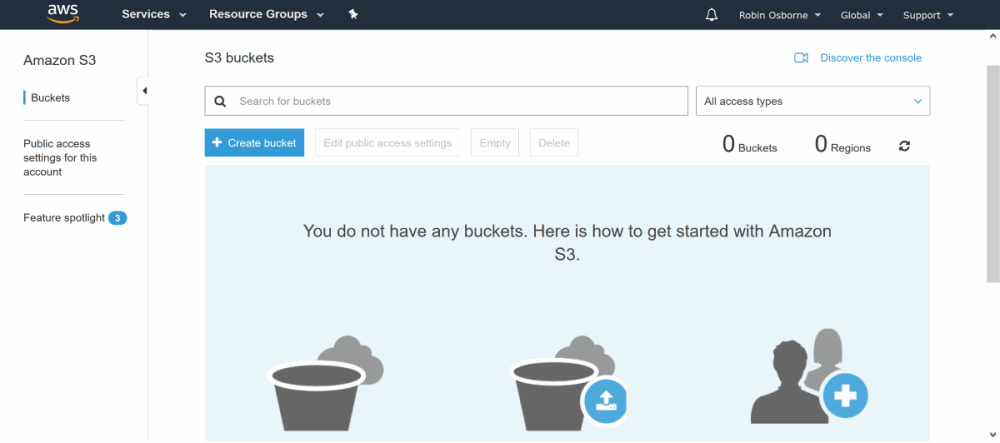
Give your bucket a unique name – your bucket name cannot already exist in the same region, even in another user’s AWS account – and set the region where you’ll be creating your WebPageTest server:
With that done, now you’re ready to create the server!
3. Setting up the WebPageTest server on EC2
Now let’s create the actual WebPageTest server itself; this is quite a long set of steps so get that coffee ready!
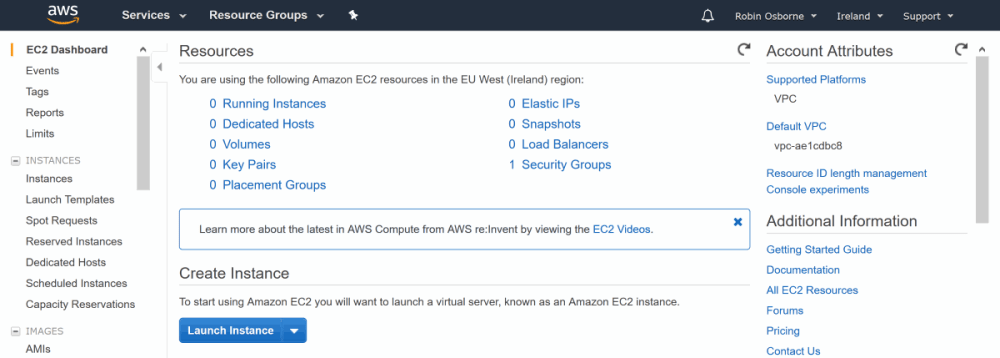
Head over to the EC2 area within the AWS console and select Launch Instance:
Search for "webpagetest" and select Community AMIs:
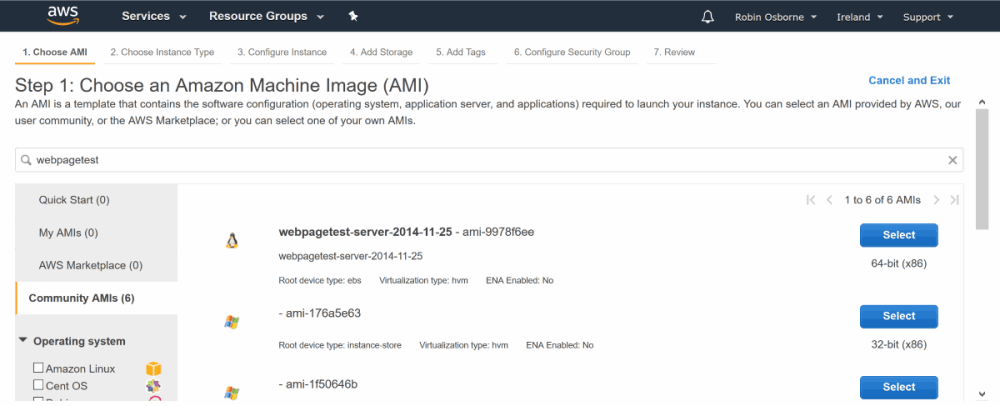
Select the top webpagetest-server result.
Choose instance size: t2.micro is ok to start with as you can always scale up if necessary, and t2.micro is currently free:

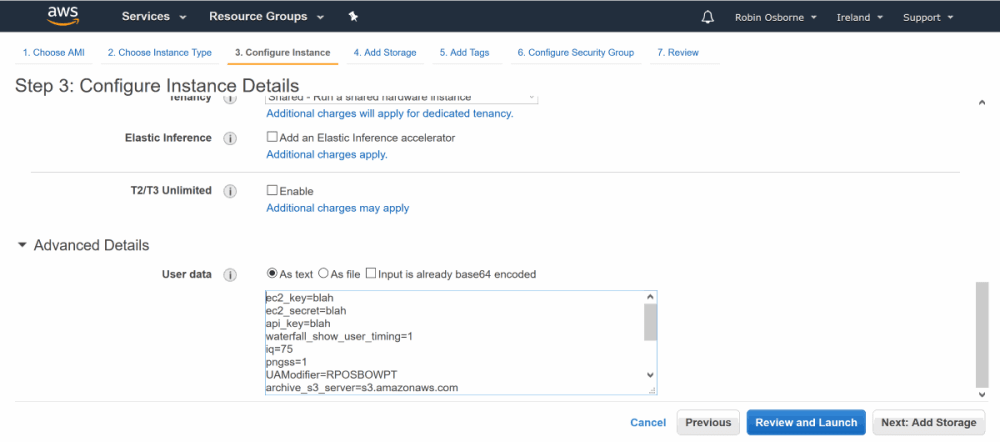
This is an important step: instead of launching the server and logging in to edit settings, we can actually define the settings in "user data" which is passed in to the instance at start-up.
If you prefer, you can connect to your WebPageTest instance after launching and configure these settings directly in the file /var /www /webpagetest /www /settings/ settings.ini; you can copy the sample and edit it.
Tap on Configure instance details, then Advanced, and paste in user data similar to this, filling in the blanks:
# User to start/stop agents and save tests to s3
ec2_key=<the IAM user access key ID>
ec2_secret=<the IAM user secret access key>

# Set the API key to use when programmatically enqueuing tests
# Can't think of one? check out http://new-guid.com/
api_key=<choose a super secret api key>

# show user timing marks in waterfalls - very handy
waterfall_show_user_timing=1

# better images for screenshots - you're using S3, right?
# so you have the storage!
iq=75
pngss=1

# archiving to s3
archive_s3_server=s3.amazonaws.com
archive_s3_key=<the IAM user key>
archive_s3_secret=<the IAM user secret>
archive_s3_bucket=<the WPT archive bucket>

# number of days to keep tests locally before archiving
archive_days=1

# run archive script hourly automatically as agents poll for work
cron_archive=1
The full list of options that can be set are over on the github repo for WebPageTest, as the
settings.ini.samplefile; as mentioned earlier, you could skip the user data step and set these options in ainifile to be created in /var /www /webpagetest /www /settings /settings.ini
Now we need to make sure we can access the server over port 80; for this you need to select Configure security group, then add rule and choose HTTP:
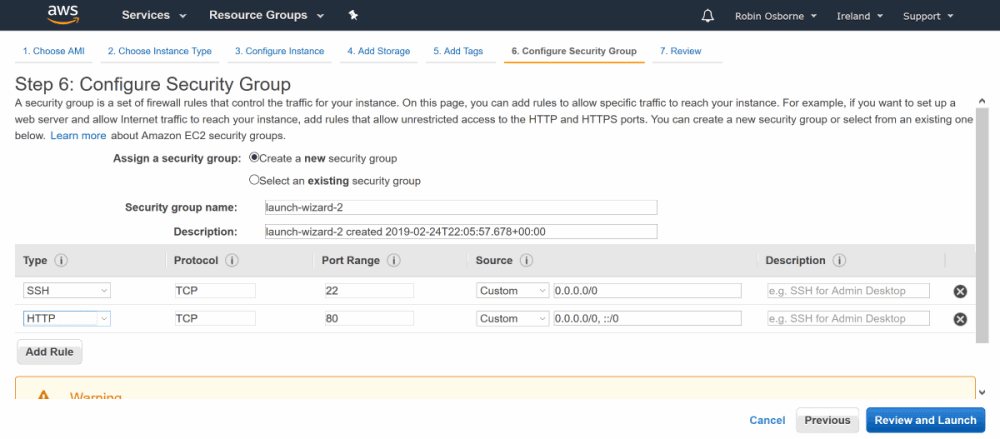
Alright! Ready to rock! Let’s hit Review and Launch and after you’ve selected or created a keypair (used to log in to the instance), and after it’s finished initialising we’ll be given a URL, where it says Public DNS:
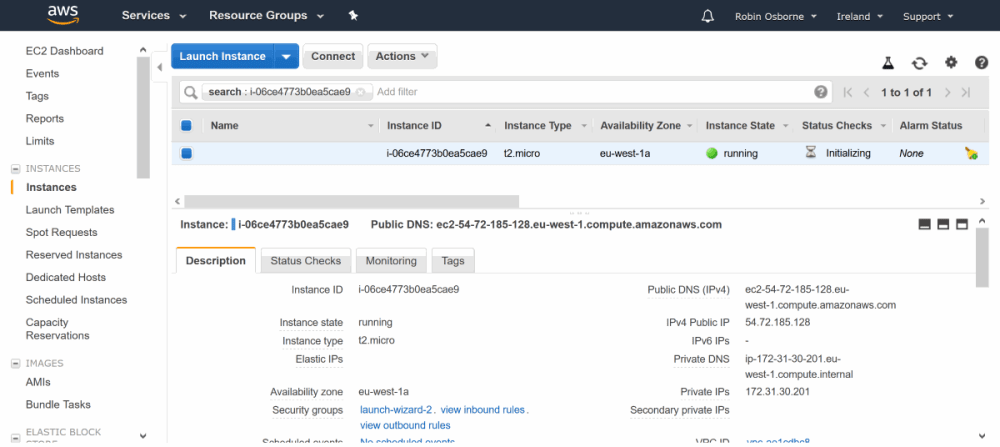
Head over to that URL and you should see the familiar WebPageTest homepage:
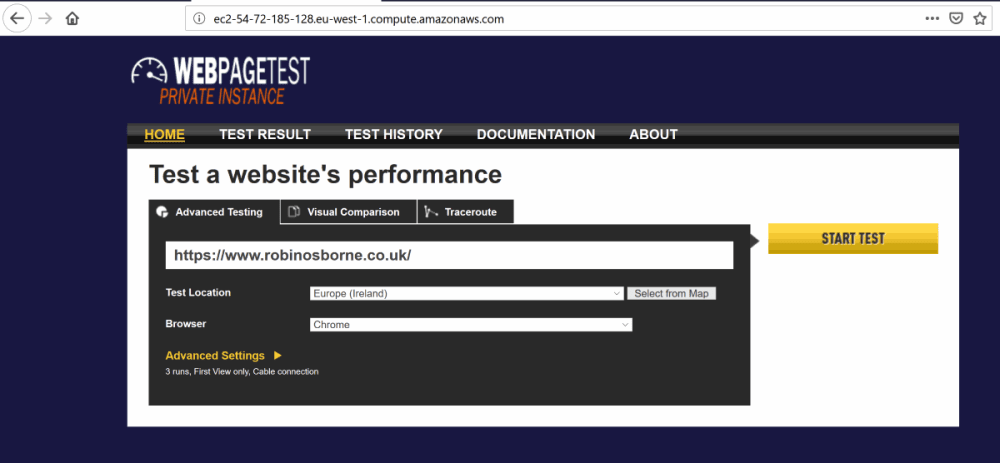
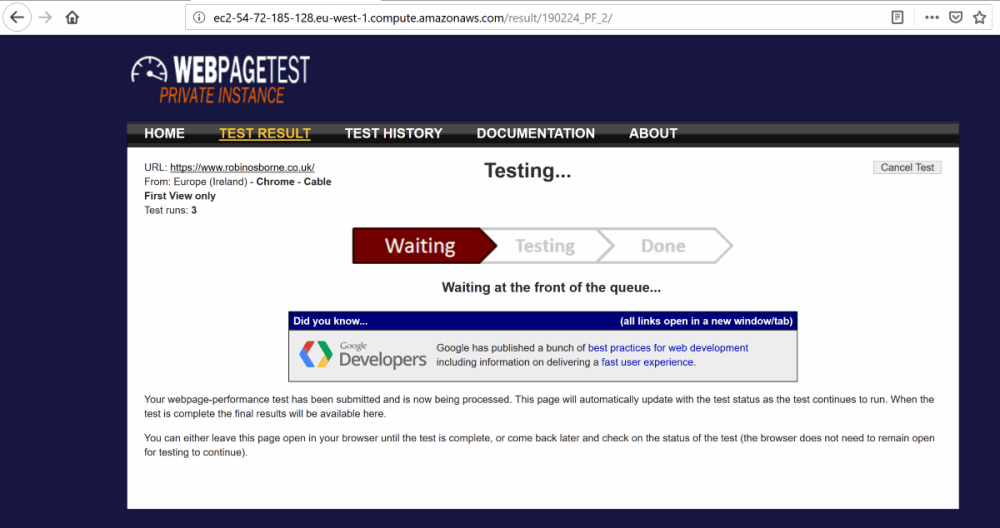
Try it out – pop in a URL, select a location, and submit the test. If you then check the EC2 area of your AWS account, after a moment you’ll notice a new instance starting up called "WebPagetest Agent":
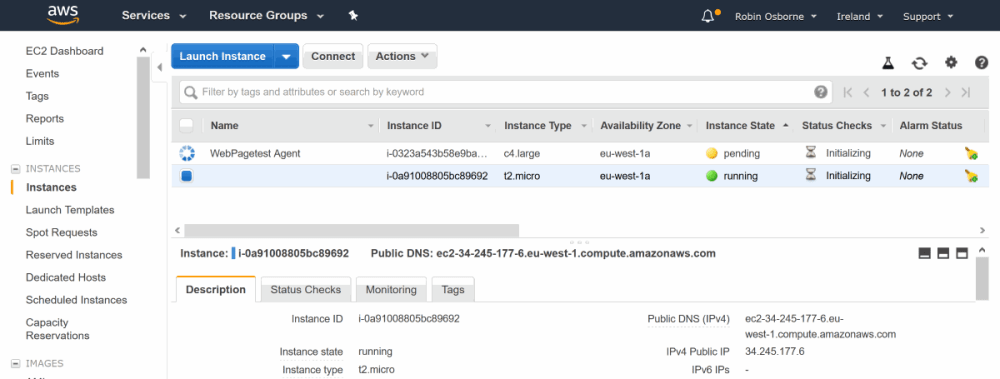
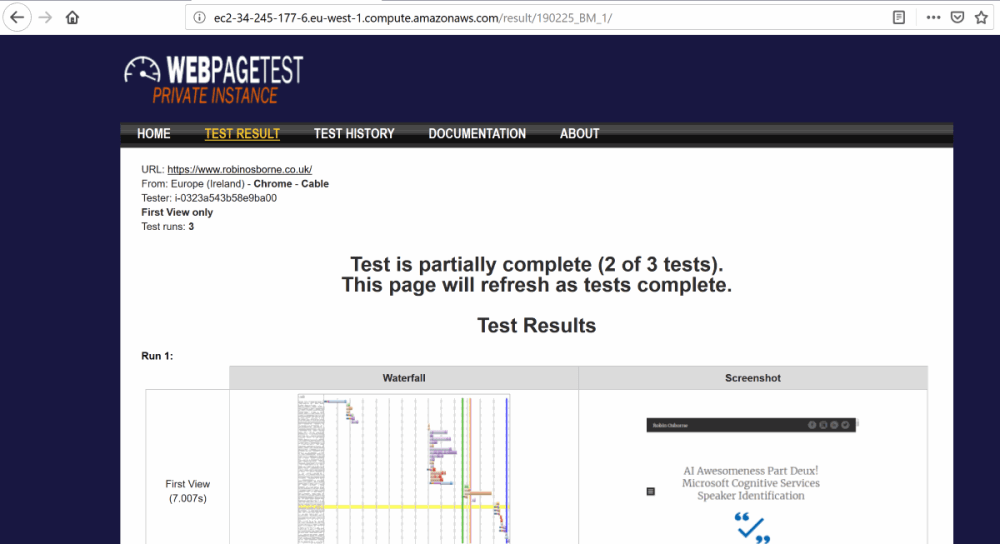
A new test agent can take a few minutes to actually connect and start testing – sometimes up to 10 minutes – but once connected it’ll automatically pick up the enqueued test and run it:
That was easy, right? The server will update itself from the WebPageTest github repo regularly, as will the test agents. Your tests will be automatically archived to, and retrieved from, S3.
Your private WebPageTest foundation has been laid! We will build on this over a few more articles.
BONUS) Scaling Up and Staying There
By default, only one test agent per 100 tests will be created per region. One of the reasons I wanted a private WebPageTest instance was my impatience at queueing up to find out how slow my sites are. If you can throw money at the problem, then change this in your user data:
# This will create one new test agent for every 5 tests queued
# *up to the location max*:
EC2.ScaleFactor=5

# The default max per location is 1, so you need to override it per
# location to enable scale out:
EC2.us-east-1.max=10
EC2.us-west-1.max=20
EC2.eu-west-1.max=15
...
# etc
If there are no more tests queued which that agent can pick up for an hour (or however long you want; an hour is the default) then it will be terminated. This means that you’ll have to wait for the agent to be recreated next time, but it also means you’re not paying for an EC2 instance that you’re not using; these agents should be c4.large, so they’re not free tier eligible.
To avoid this you can alter the user data (you’ll need to stop the WebPageTest server instance before you can edit it) to add in a line for each location you want to keep an agent always available, e.g.:
 EC2.us-east-1.min=1
 EC2.us-west-1.min=1
 EC2.eu-west-1.min=1
It will now scale down to a minimum of one test agent for each of the specified regions.
Debugging
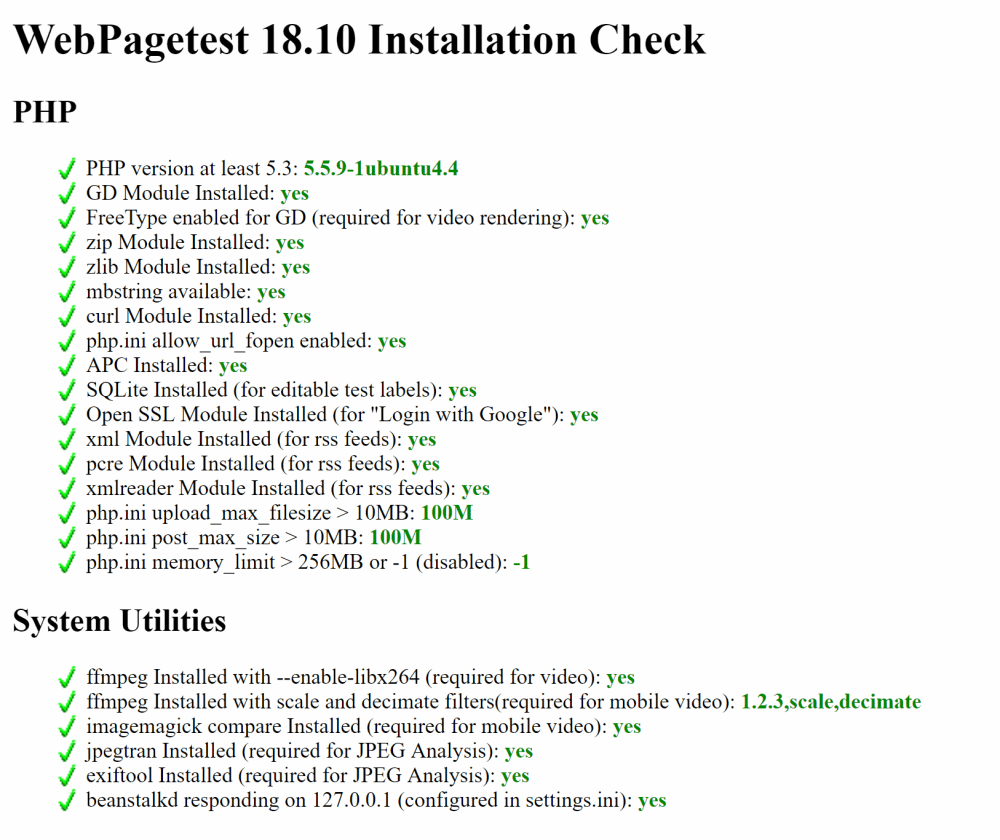
Wondering why your test isn’t starting? Getting impatient? Check /install to make sure you have green everywhere, except at the bottom where no test agents will exist (since they’re spun up on demand):
You can also check /getTesters.php?f=html to see what is connected:

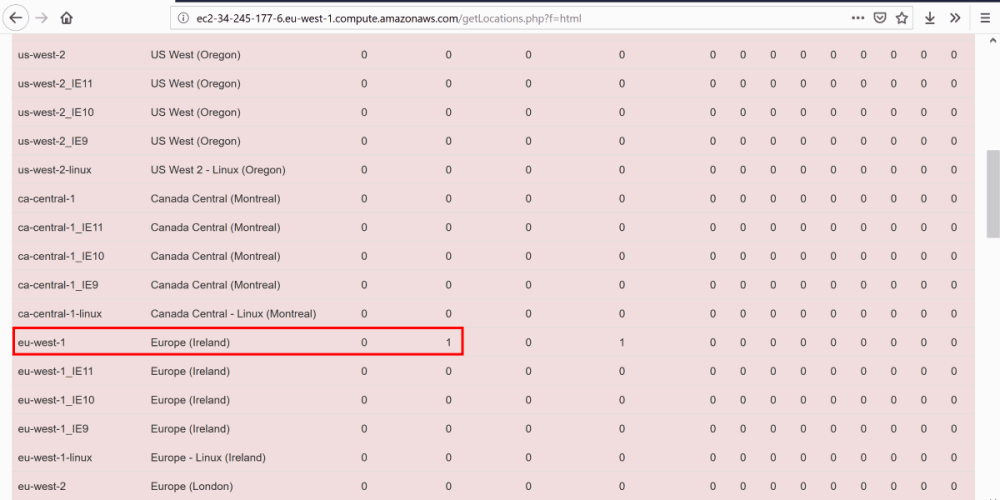
The test agents are only created on demand, so let’s ensure there’s a test actually registered at /getLocations.php?f=html:
You can also log in and check what’s happening on the server:
ssh -i "<your keypair>.pem" ubuntu@<the url of your instance>
e.g.
ssh -i "webpagetest.pem" [email protected]
Now let’s check nginx for requests to getwork.php – this is the URL that test agents poll to pick up the next test in their queue:
tail -f /var/log/nginx/access.log | grep getwork
e.g.
ubuntu@blah:~$ tail -f /var/log/nginx/access.log | grep getwork
127.0.0.1 - - [25/Apr/2019:20:42:01 +0000] "GET /work/getwork.php HTTP/1.1" 200 5 "-" "Wget/1.15 (linux-gnu)"
127.0.0.1 - - [25/Apr/2019:20:43:01 +0000] "GET /work/getwork.php HTTP/1.1" 200 5 "-" "Wget/1.15 (linux-gnu)"
127.0.0.1 - - [25/Apr/2019:20:44:01 +0000] "GET /work/getwork.php HTTP/1.1" 200 5 "-" "Wget/1.15 (linux-gnu)"
127.0.0.1 - - [25/Apr/2019:20:45:02 +0000] "GET /work/getwork.php HTTP/1.1" 200 5 "-" "Wget/1.15 (linux-gnu)"
hmm… not a lot happening there. That’s the server pinging itself for some reason; you can tell this since the requests are from "127.0.0.1". Usually after a few more minutes you’ll see:
172.31.20.24 - - [25/Apr/2019:20:45:37 +0000] "GET /work/getwork.php?f=json&shards=1&reboot=1&location=eu-west-1&pc=EC2AMAZ-CO5OM1I&key=4d446cb0d60d76dced79ffa39cf3c1e953db594b&ec2=i-0323a543b58e9ba00&ec2zone=eu-west-1a&version=190221.200223&screenwidth=1920&screenheight=1200&freedisk=7.464&upminutes=9 HTTP/1.1" 200 282 "-" "python-requests/2.21.0"
127.0.0.1 - - [25/Apr/2019:20:46:01 +0000] "GET /work/getwork.php HTTP/1.1" 200 5 "-" "Wget/1.15 (linux-gnu)"
172.31.20.24 - - [25/Apr/2019:20:46:39 +0000] "GET /work/getwork.php?f=json&shards=1&reboot=1&location=eu-west-1_IE11&pc=EC2AMAZ-CO5OM1I&key=4d446cb0d60d76dced79ffa39cf3c1e953db594b&ec2=i-0323a543b58e9ba00&ec2zone=eu-west-1a&version=190221.200223&screenwidth=1920&screenheight=1200&freedisk=7.404&upminutes=10 HTTP/1.1" 200 31 "-" "python-requests/2.21.0"
172.31.20.24 - - [25/Apr/2019:20:46:39 +0000] "GET /work/getwork.php?f=json&shards=1&reboot=1&location=eu-west-1&pc=EC2AMAZ-CO5OM1I&key=4d446cb0d60d76dced79ffa39cf3c1e953db594b&ec2=i-0323a543b58e9ba00&ec2zone=eu-west-1a&version=190221.200223&screenwidth=1920&screenheight=1200&freedisk=7.404&upminutes=10 HTTP/1.1" 200 284 "-" "python-requests/2.21.0"
Notice the timestamps show there was nothing going on for over 3 minutes after I had started to get impatient; AWS EC2 test agents can take a while to wake up and connect, so bear this in mind.
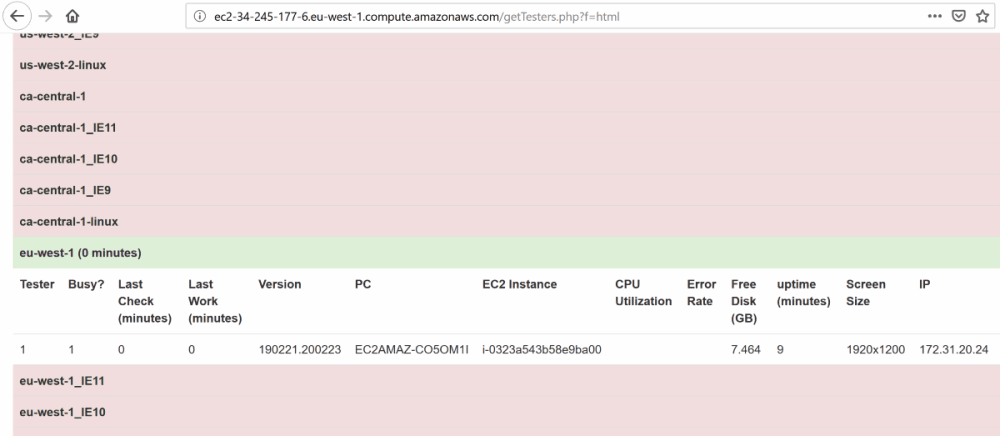
Interesting point: notice the querystring parameters in the request; the test agent informs the server a lot about itself, even including available disc space.
Things to check:
- User Data – did you set the correct IAM details for EC2? If not, then the WebPageTest server will not be able to spin up the agents
- IAM – did you give EC2 permissions to the IAM user you created? If not, same issue as above.
- WPT logs – you can check the logs for issues in the WebPageTest logs, which can be found in
/var/www/webpagetest/www/log/(not/logs/, as this is where the submitted tests are logged, not errors). - nginx logs – you can check if the agents are able to connect to your the WebPageTest server at all.
Summary
Hopefully you followed along and successfully set up your own private WebPageTest instance, and can now queue up all the tests you like!
If you have issues, then hit me up on twitter or head over to the WebPageTest forums – seriously, given how many times the same question must be asked in there, the gang are exceptionally patient and helpful.
Good luck!
Hello, excellent contribution, I am a bit confused about the agents that are configured in the ec2 amis, I would like to use mobile agents (iphone), I do not know if I should configure the ec2 agent or install a new one as indicated in the book “Using WebPageTest
Web Performance Testing for Novices and Power Users ”
Grx
Yes, a limitation of this initial private install is that you only get access to virtual machines by default, not real physical ones like you get on the public instance.
You’ve got a couple of options:
1) If you’re happy to use the built in Chrome emulation in WebPageTest, then just choose the appropriate “mobile” options when submitting a test via the web interface, or
2) set up a relay server in your private instance’s “location.ini”
[WPT_Real_Mobile]

browser=Safari

label="Real iPhone"

relayServer="http://www.webpagetest.org/"

relayKey=(your API key for public wpt goes here)

relayLocation=(public wpt location with a real iphone)
If you want a bit more detail I wrote about it here: https://andydavies.me/blog/2016/09/20/adding-public-locations-to-a-private-webpagetest-instance/
Thanks for the detailed step-by-step guide. It was extremely helpful and made it easy to setup.
I have couple of AWS related questions, if you can help:
1. How do I secure my instance access publicly? The EC2 t2.micro instance that we created using the AMI, is accessible on the web and anybody can start misusing it. How can I ensure that only my application has access to it? What are the ways to secure it basically?
2. How can I use it programmatically/api way? We have an internal application and we would want to use this everytime we make some change or sometime ad-hoc. So basically a simple UI in our application where they enter the URL and that application should connect to/talk to this instance and generate the results for us. Any pointers in this would be helpful.
3. I noticed that it takes around 7-10 minutes for each test. How to faster this? t2.micro should be increased to next level in order to faster this?
Again, thanks a ton. Would wait to hear from you.
Hi Milan, great questions! You’re preempting my next article..
1) You can spin up the WPT instance into an AWS VPC with limited external access; so long as you configure up your WPT agents to have access to the VPC, then this can help to lock it down. I’ll write this up soon. I think you can also add basic authentication to the WPT server, but I’ve not tried this.
2) When you configure your WPT server you can define the API key; once you have this you can use the other articles to help – you’ll need to change the server from webpagetest.org to your own instance’s URL or IP:
– https://www.robinosborne.co.uk/2019/07/01/automating-and-orchestrating-webpagetest/
– https://www.robinosborne.co.uk/2019/07/08/automating-webpagetest-using-the-nodejs-webpagetest-api-package/
3) Yep, I usually have the WPT server as m4.large and the WPT agent instances as c4.large; this costs a lot more, but speeds up the ability to execute hundreds of tests.
Great article, thanks for going in to so much detail.
I’ve followed the instructions and have a working server, but all tests are ‘waiting at the front of the queue’ as it’s not spinning up any servers. The /install page shows ticks for everything, but no agents connected for any of the locations.
Should it just spin up agents on demand?
Hey Adam, did you follow the troubleshooting steps? It can take up to 10-15 minutes to start the ec2 instances. Have you tried logging on to your WPT server and check the logs there?
I have a doubt regarding scaling up, if I’ll use “EC2.us-east-1.max=10” then it’ll create agent as per tests suppose WPT server created 5 Agent so my question is -it’ll terminate agent automatically in case no test is available or Agent(machine) will remain same.
Thanks.
Ankit Jain
Hi Ankit,
If you set max to 10, and the scalefactor to 2 (for example) then it will spin up a new agent instance for every 2 tests in the queue, up to a max of 10 instances. Once the test agent has had no work for 1h (by default, else you can change this in the settings.ini) then it will terminate, down to your defined minimum – or zero instances if you haven’t defined a min
Hi Robin,
Thanks for your reply.
I followed steps which you mentioned here and server is working fine but I am getting a issue to run test.
I have given google.com for us-east-1 location but it’s not launching any agent so I varied log and getting this below error
“Error: Launching EC2 instance. Region: us-east-1, AMI: ami-0137821046846369e, error: The specified instance type can only be used in a VPC. A subnet ID or network interface ID is required to carry out the request.”
Could please help me to resolve this issue.
Thanks,
Ankit Jain
Hi Robin,
I need you help to resolve below issue:
I want to run more than 300 test on private WPT so created a server with using “webpagetest-server-2014-11-25 (ami-fcfd6194)” AMI on AWS but not able to Auto scale Agent. I am sharing my settings.ini file details here
When I started server then it initiated single Agent only but I want to initiate agent for all location which I mentioned in settings.ini file so that will get result within 10 hours currently it’s taking more that 15 hours.
Could anyone help me on this.
settings.ini ::
[settings]
product=WebPagetest
;[email protected]
; **************
; UI Integration
; **************
; Comment out the publishTo if you do not want to be able to upload your
; results to the public instance (this is useful for sharing internal tests
; with external users)
publishTo=www.webpagetest.org
;Uncomment map=1 if you want to enable the map-based picker
map=1
#lighthouse=1
; Integrate with cloudshark
tcpdump_view=”http://cloudshark.org/view?url=”
; *********************
; Test options/defaults
; *********************
enableVideo=1
; Run tests concurrently across test machines
shard_tests=1
; Maximum number of runs allowed per test
maxruns=50
; Allow (1) or disable (0) testing of sites on private IP addresses (http://
192.168.0.1/ for example).
allowPrivate=1
#ec2_use_server_private_ip=1
; image quality (defaults to 30)
;iq=75
;save png full-resolution screen shots
;pngss=1
; *************
; Server Config
; *************
; disable gzip compressing the result text files
;nogzip=1
;Log tests that take longer than X seconds
;slow_test_time=240
; beanstalkd memory queue for tests (only the default 11300 port is supported
right now)
beanstalkd=127.0.0.1
beanstalk_api_only=1
; Automatically update from git hourly.
; (assumes a git clone and just runs “git pull origin master” as the web user).
gitUpdate=1
; Automatically update test agents hourly (pulls the latest test agents from the
provided server)
agentUpdate=http://cdn.webpagetest.org/
; ***********************
; Test result integration
; ***********************
;tsview time-series database
;tsviewdb=http://server:port/src/v1/
; Serialize the test results to a log file in JSON format for
; bulk logs processing (splunk, logster, flume, etc).
; The directories must already exist and have permissions set so the web server
; user can write to it.
;
; logTestResults – file for the page-level data to be logged
; logTestRequests – file for the per-request data (each request for every test
will be logged as a separate record)
; logPrivateTests – Set to 0 to disable logging of tests marked private (defaults
to logging all tests)
;
;logTestResults=/var/log/webpagetest/page_data.log
;logTestRequests=/var/log/webpagetest/requests.log
;logPrivateTests=0
;
; showslow (beacon rate is a percent of results to allow for sampling)
;
;showslow=http://www.showslow.com
;beaconRate=100
;showslow_key=
; **************
; Test Archiving
; **************
; archiving to local storage – directory to archive test files (must include trailing
slash)
;archive_dir=/data/archive/
; archiving to s3 (using the s3 protocol, not necessarily just s3)
;archive_s3_server=s3.amazonaws.com
;archive_s3_key=
;archive_s3_secret=
;archive_s3_bucket=
;archive_s3_url=http://s3.amazonaws.com/
;Number of days to keep tests locally before archiving
archive_days=2
; *************
; EC2 Instances
; *************
; Should we automatically delete any EBS volumes marked as “available”?
; This can be used to prevent orphaned volumes but only if the account
; doesn’t expect to keep offline EBS volumes.
ec2_locations=1
ec2=1
#This will create one new test agent for every 5 tests queued
up to the location max:
EC2.ScaleFactor=5
location to enable scale out:
EC2.us-east-1.max=3
EC2.us-west-1-group.max=3
EC2.eu-west-1-group.max=3
EC2.eu-central-1-group.max=3
EC2.ap-northeast-1-group.max=3
EC2.ap-southeast-1-group.max=3
EC2.sa-east-1-group.max=3
EC2.us-west-1.min=1
EC2.eu-west-1.min=1
EC2.us-east-1.min=1
EC2.us-east-1-group.min=1
EC2.ap-northeast-1-group.min=1
EC2.ap-southeast-1-group.min=1
EC2.sa-east-1-group.min=1
;
;Settings from user data
ec2_key=MyKey
ec2_secret=MyKey
location_key=MyKey
ec2_initialized=1
EC2.east-1.securityGroup=sg-02bfb67a,sg-65382a17,sg-0ff026ee4490bf035
EC2.default=us-east-1
EC2.us-east-1.subnetId=subnet-8c22f1d5
EC2.IdleTerminateMinutes=15
Hi Robin,
I have setup WPT using public AMI which you mentioned but I am getting error “502 Bad Gateway nginx”after upgrading Ubuntu Server 14.0.4 to 16.04 even I tried to start service again.
Could you please give me solution for the same.